Better Payment now lets you build campaigns using AI. Instead of manually picking a template and filling in every field yourself, you can simply describe your campaign and let Better Payment generate a ready-to-customize campaign for you in seconds.
Follow the step-by-step guide below to create a new campaign with AI using the Better Payment Campaign Builder.
Note: Make sure you’ve installed and activated Better Payment in your WordPress dashboard.
Step-By-Step Guide to Create a New Campaign with AI in Better Payment #
All you have to do is describe your campaign goal, and Better Payment’s AI will generate the content, structure, and design foundation for you — ready for final customization. Let’s follow the steps below:
Step 1: Adding New Campaign with AI #
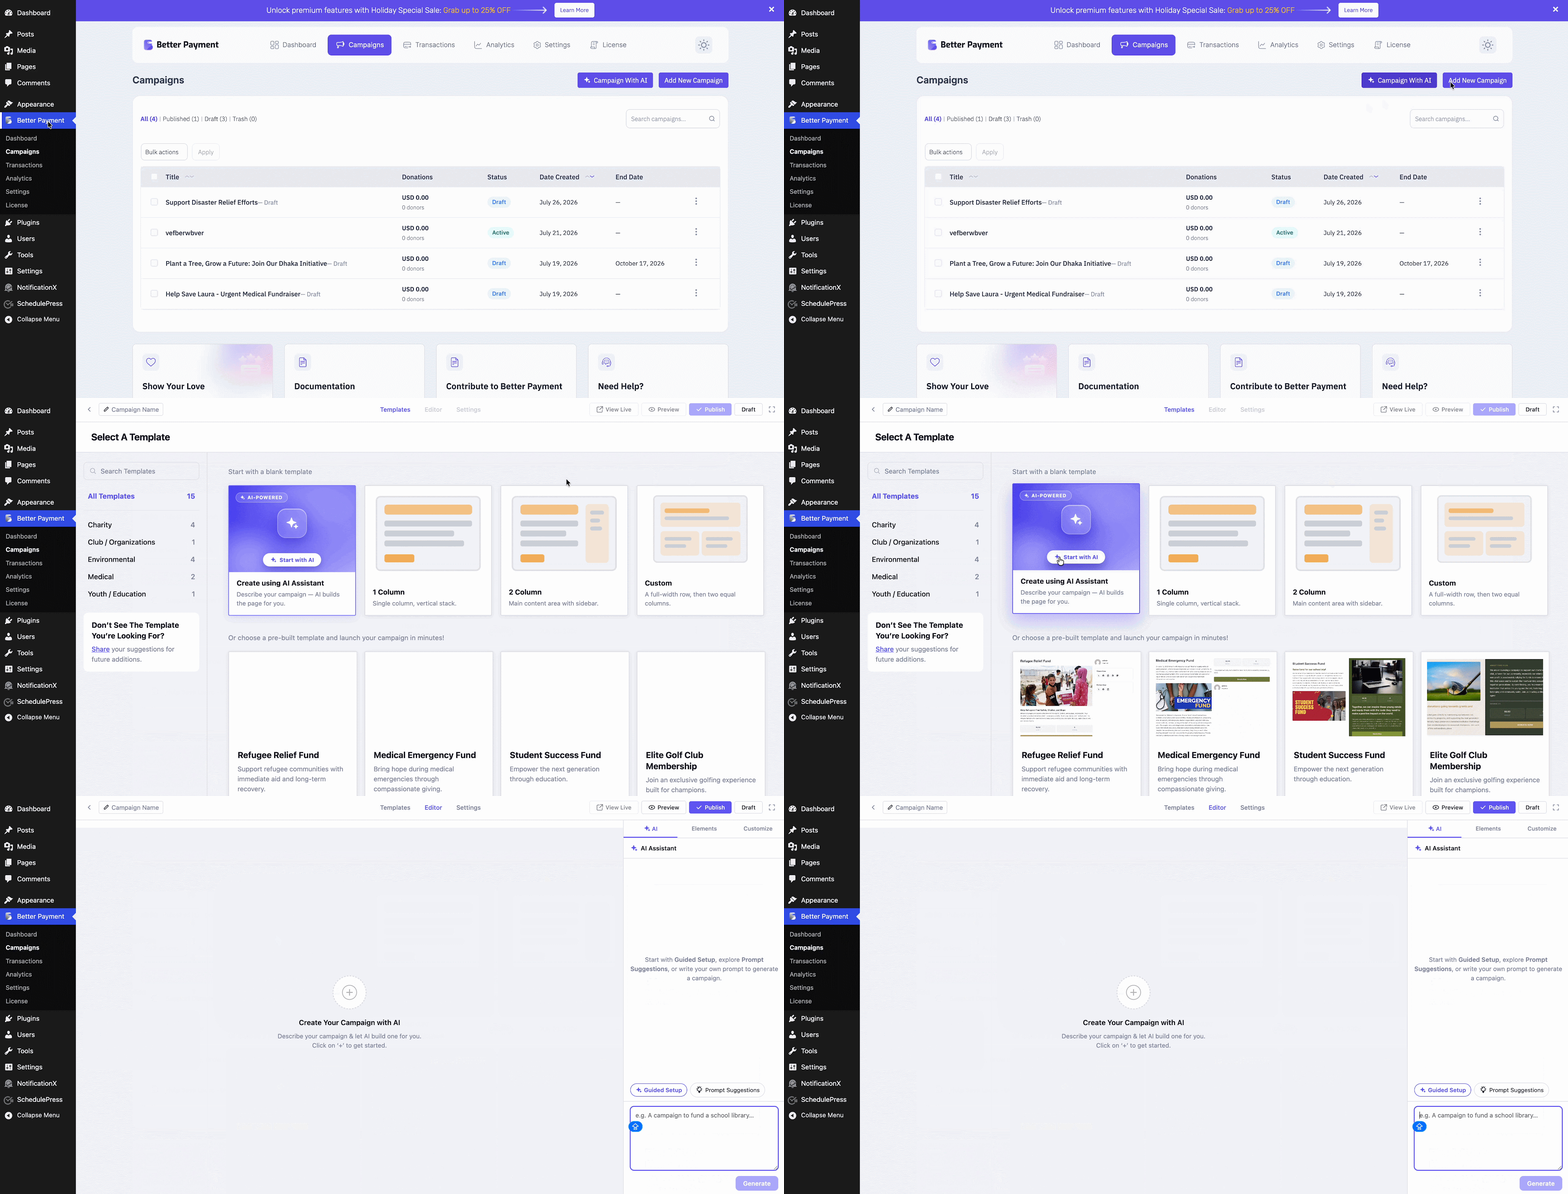
To add a new campaign with AI using Better Payment, go to your dashboard & navigate to ‘Better Payment’ → ‘Campaigns’ → ‘Add New Campaign‘ & on the resulting page click on ‘Start with AI’ as shown below.
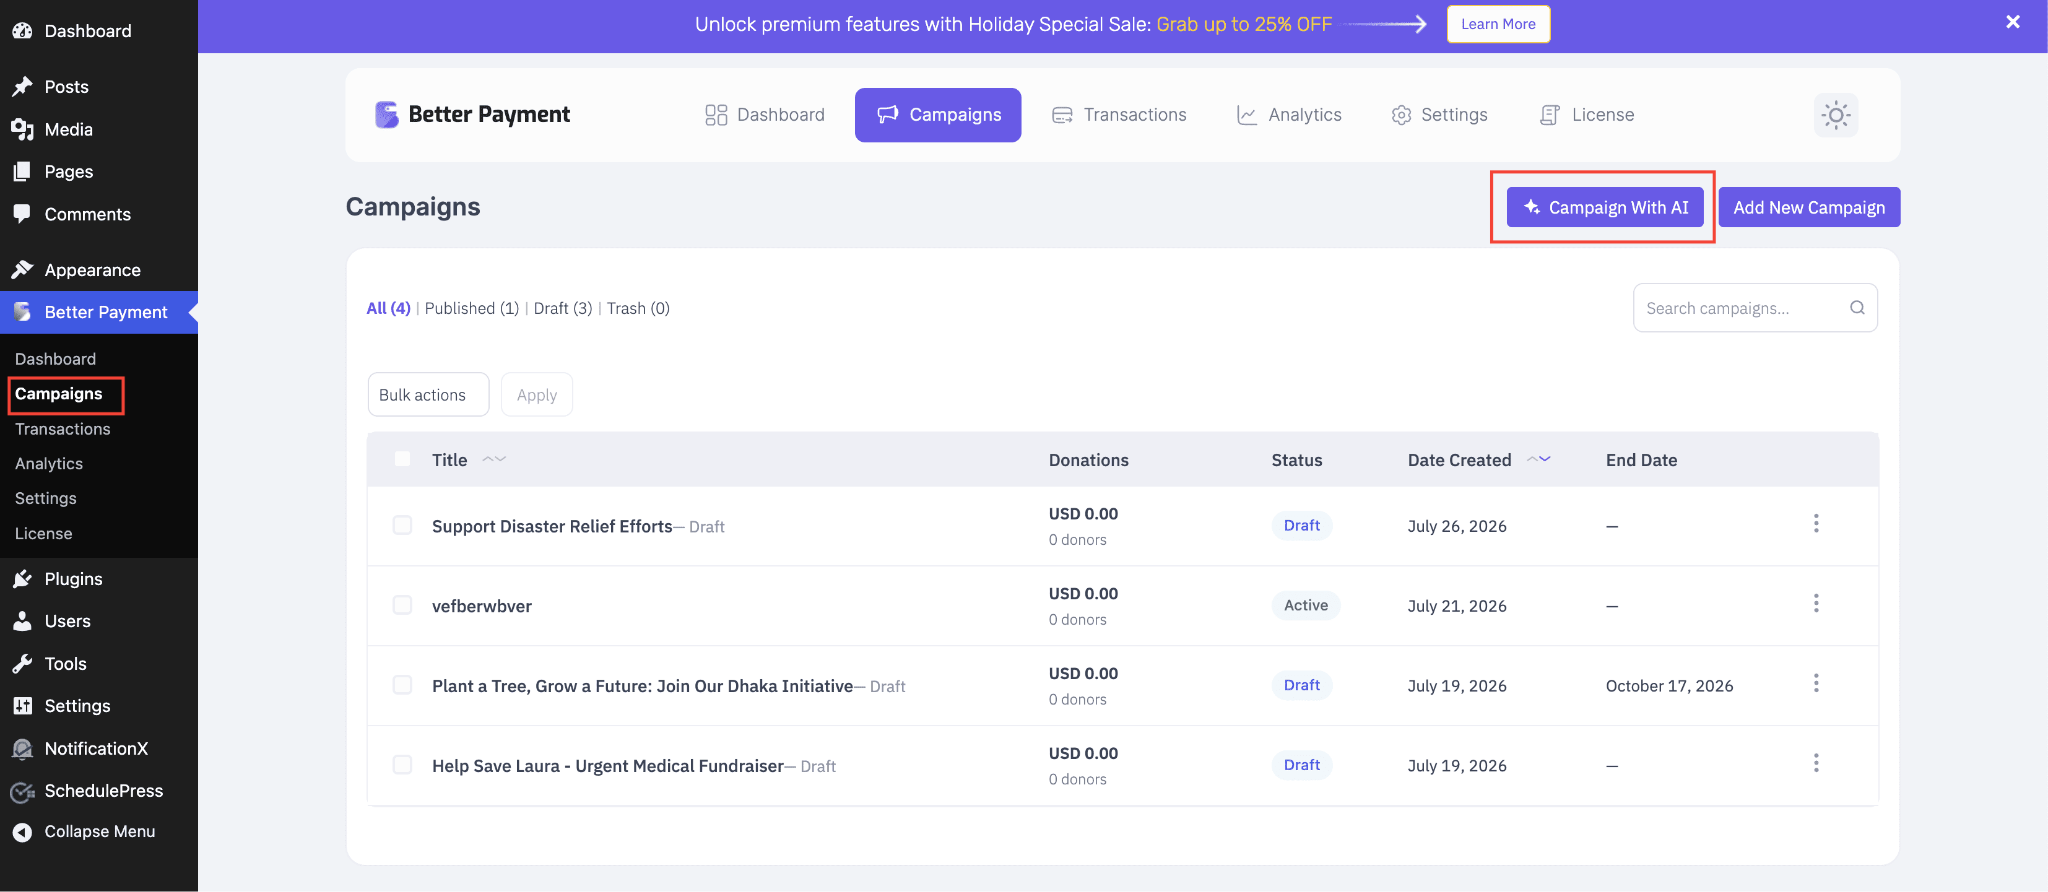
Another way to do it: from the dashboard, navigate to ‘Better Payment’ → ‘Campaigns’ → ‘Campaign with AI’ & you’ll be redirected to the same exact page as above.
Step 2: Create Your Campaign with AI #
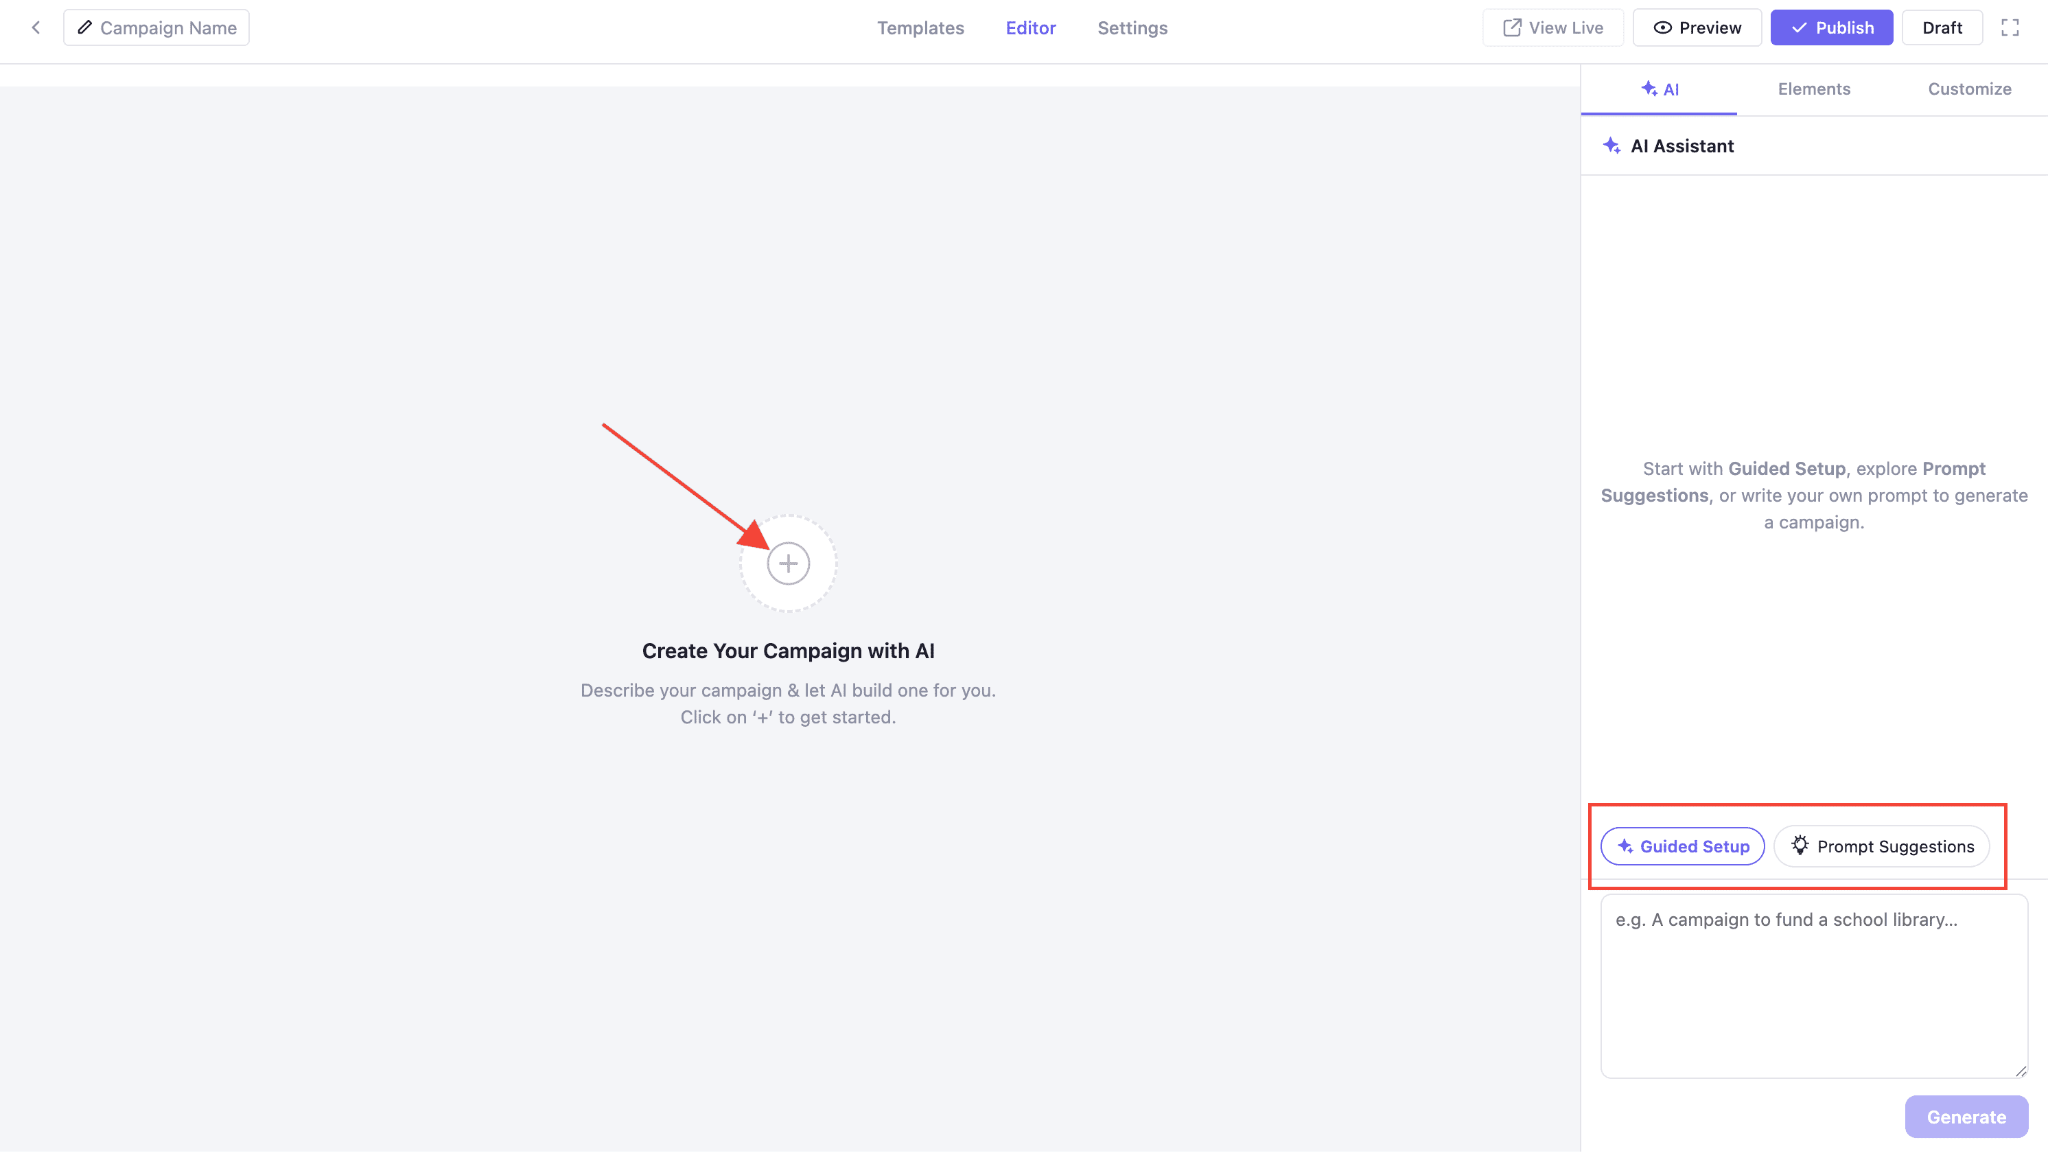
Click on the ‘+’ icon and it’ll lead you to the AI chatbox. From there, you can write your own prompt to create your campaign. Or take the ‘Guided Setup’ or ‘Prompt Suggestions’ options for creating your campaign.
Once you select the ‘Guided Setup’ option opens. Just answer a few quick questions and AI will write the rest.
- Campaign Layout — Choose Let AI Decide, 1 Column, 2 Column, or Custom.
- Category — Select a cause from the dropdown.
- More Details (optional) — Add any specifics about your campaign.
- Location (optional) — Enter a city, region, or country.
- Goal Amount (optional) — Enter a custom amount or pick a quick-select option ($500–$50,000).
- Campaign Content Tone — Set your campaign tone based on the audience.
- Campaign End Date — Set how long the campaign will be open.
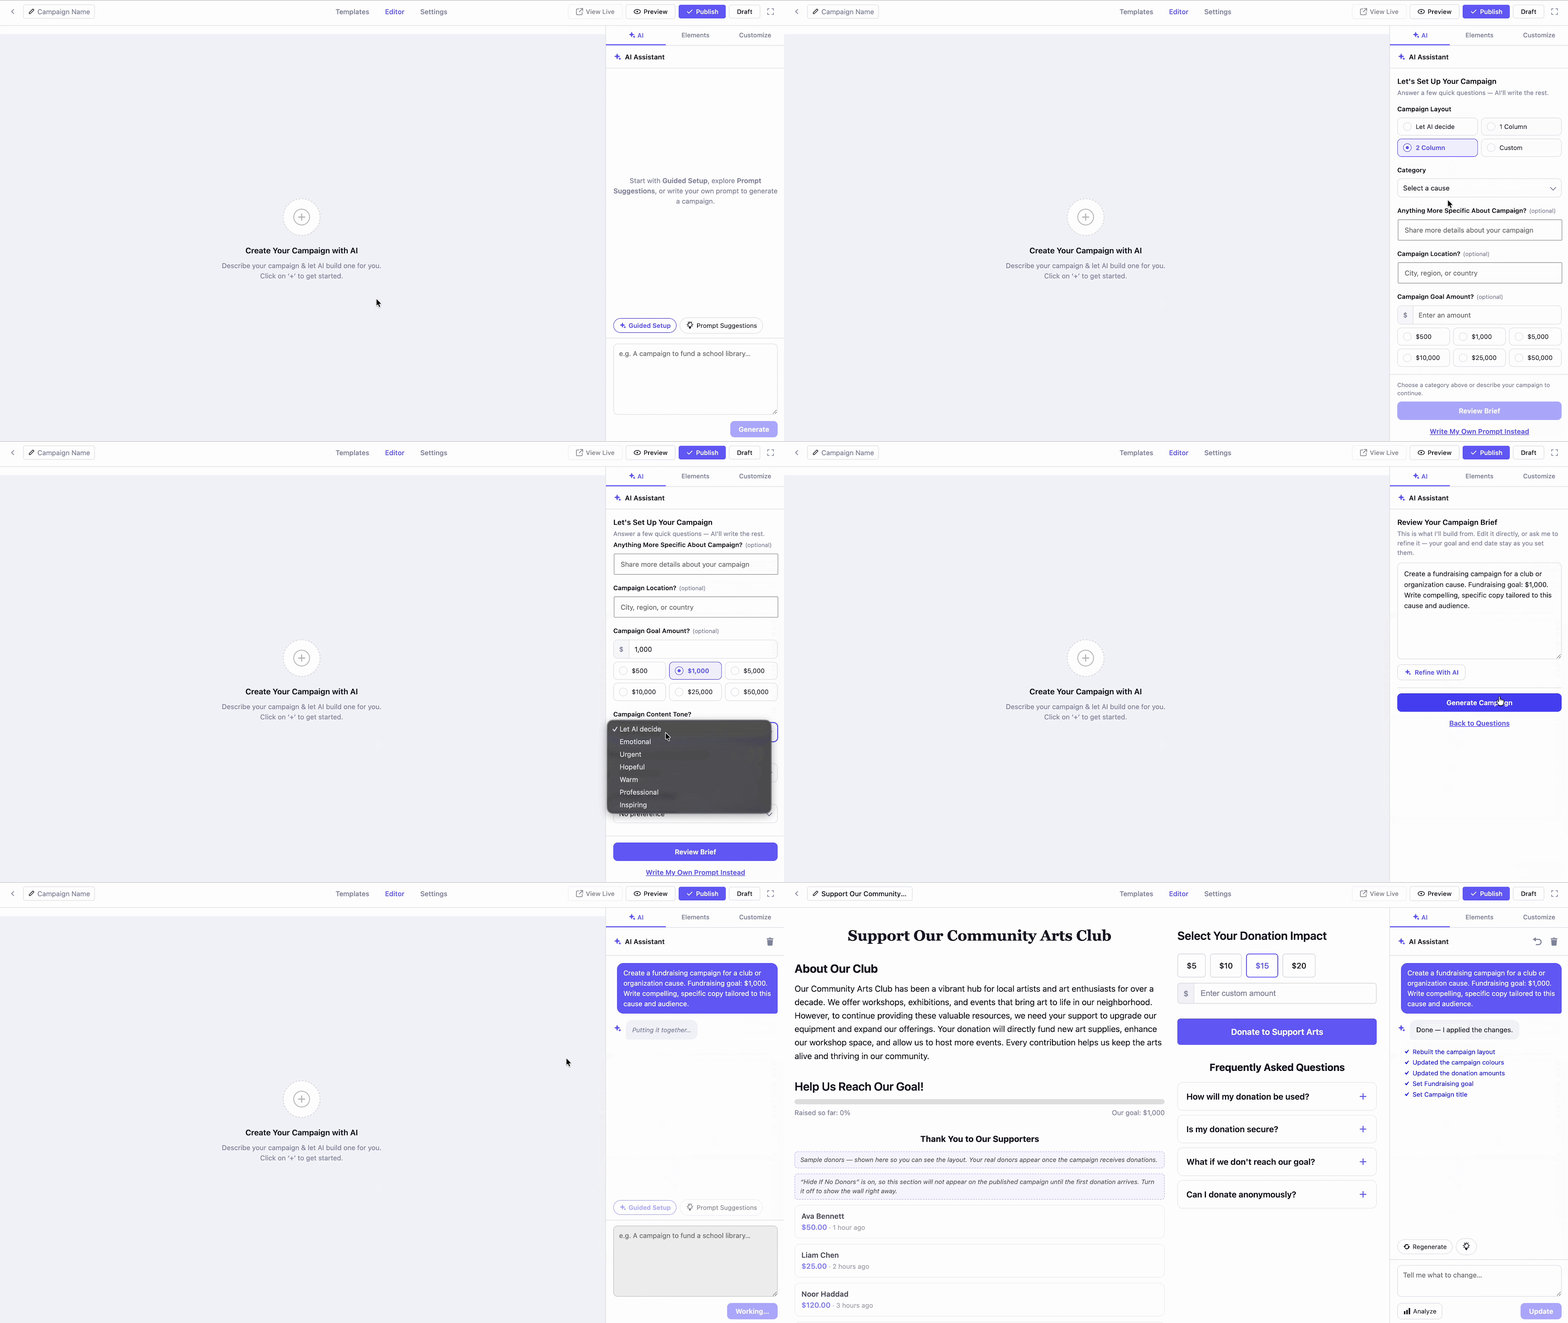
With the ‘Prompt Suggestions’ option selected, you’ll get multiple ready prompts. Pick the one according to your requirements, edit the prompt if you want and hit the ‘Generate Campaign’ button. Your campaign will be ready as shown below.
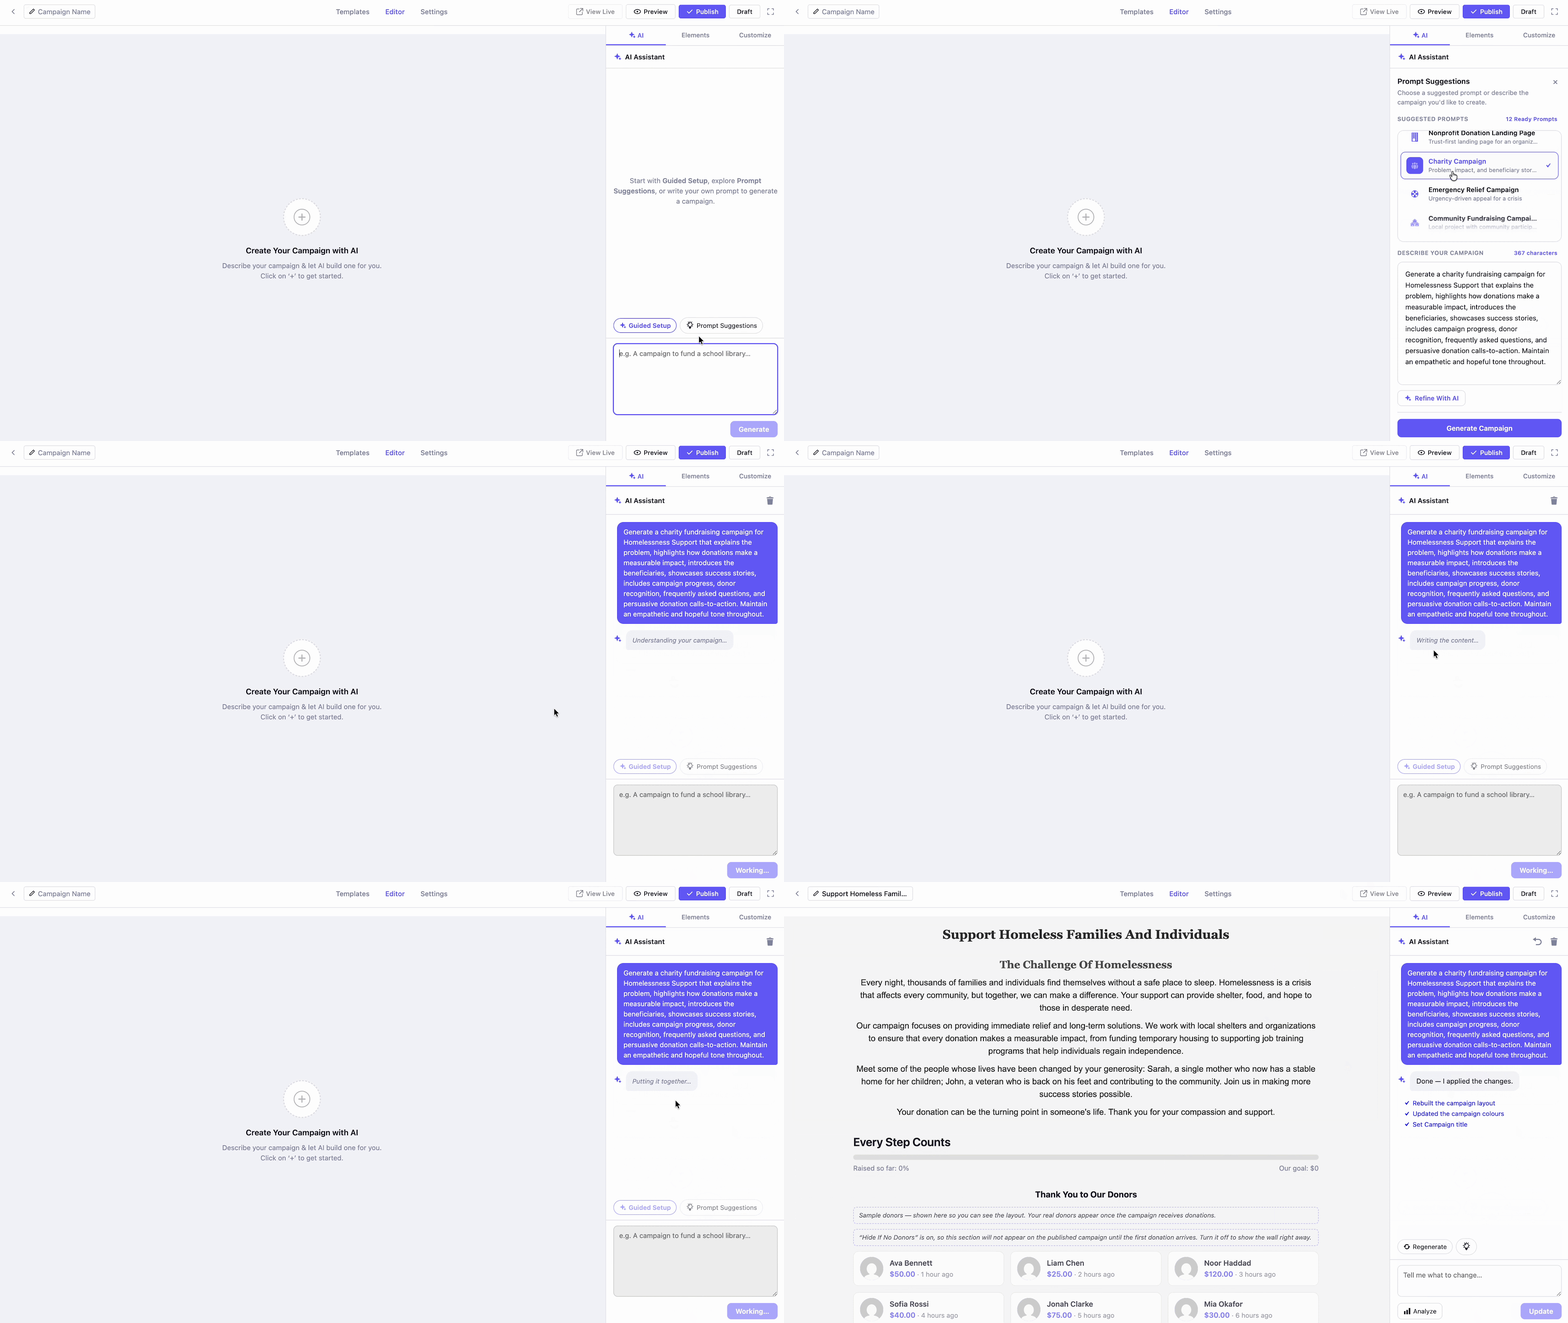
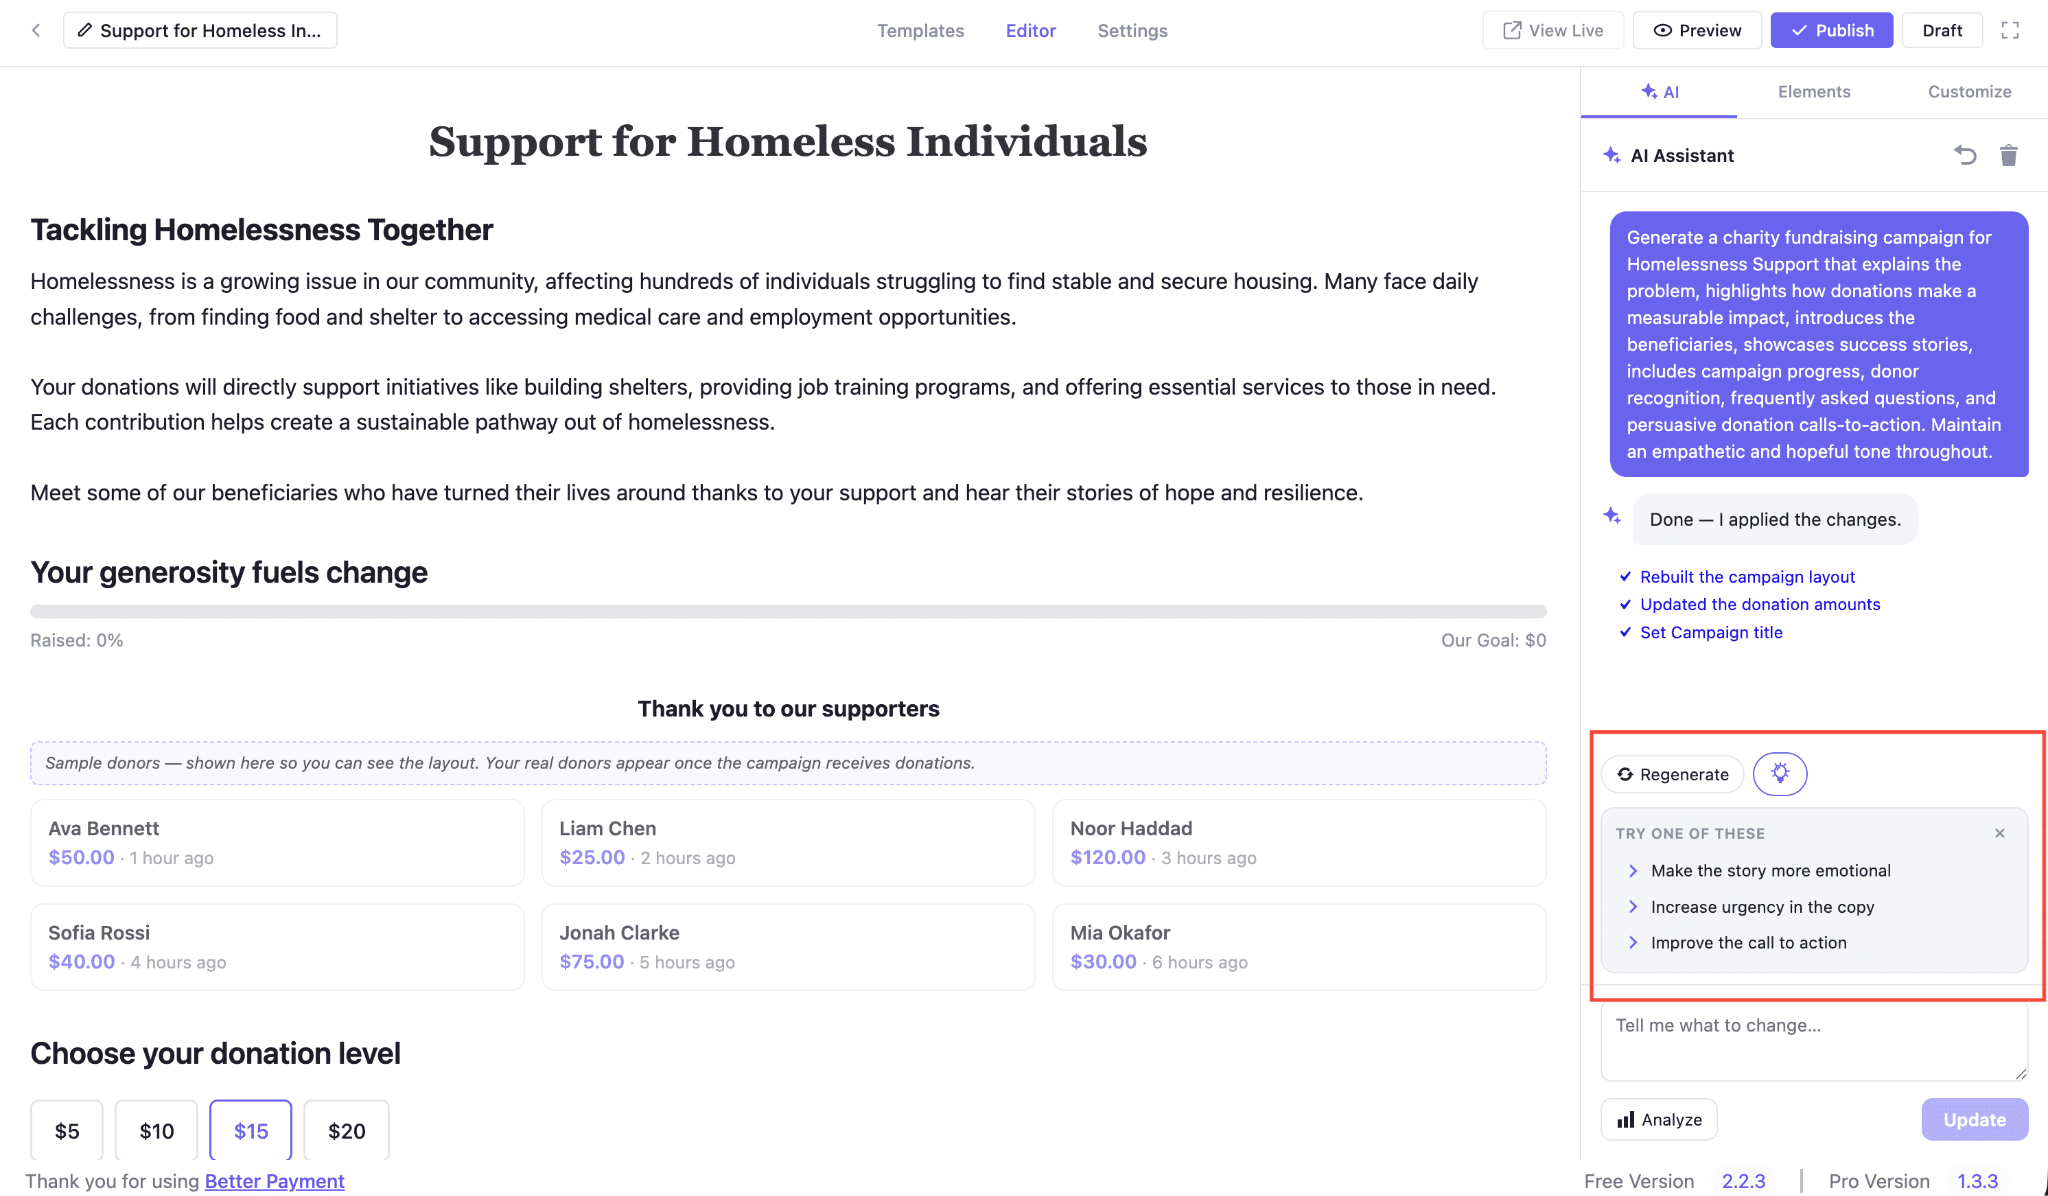
Once your campaign is generated, use the AI Assistant panel on the right to keep improving it.
- Regenerate — Not happy with the result? Click this to generate a fresh version.
- Suggestions (lightbulb icon) — Click to see quick refinement ideas, such as: ‘Make the story more emotional’, ‘Increase urgency in the copy ’, or ‘Improve the call to action’. Click any suggestion to apply it directly.
- Tell me what to change — Type your own custom instructions in the text box (e.g., “shorten the intro” or “add a section for volunteer opportunities”).
- Analyze — Get AI feedback on your current campaign content.
- Update — Click to apply your custom instructions from the text box.
Step 3: Editing a Field with AI Quick Edit #
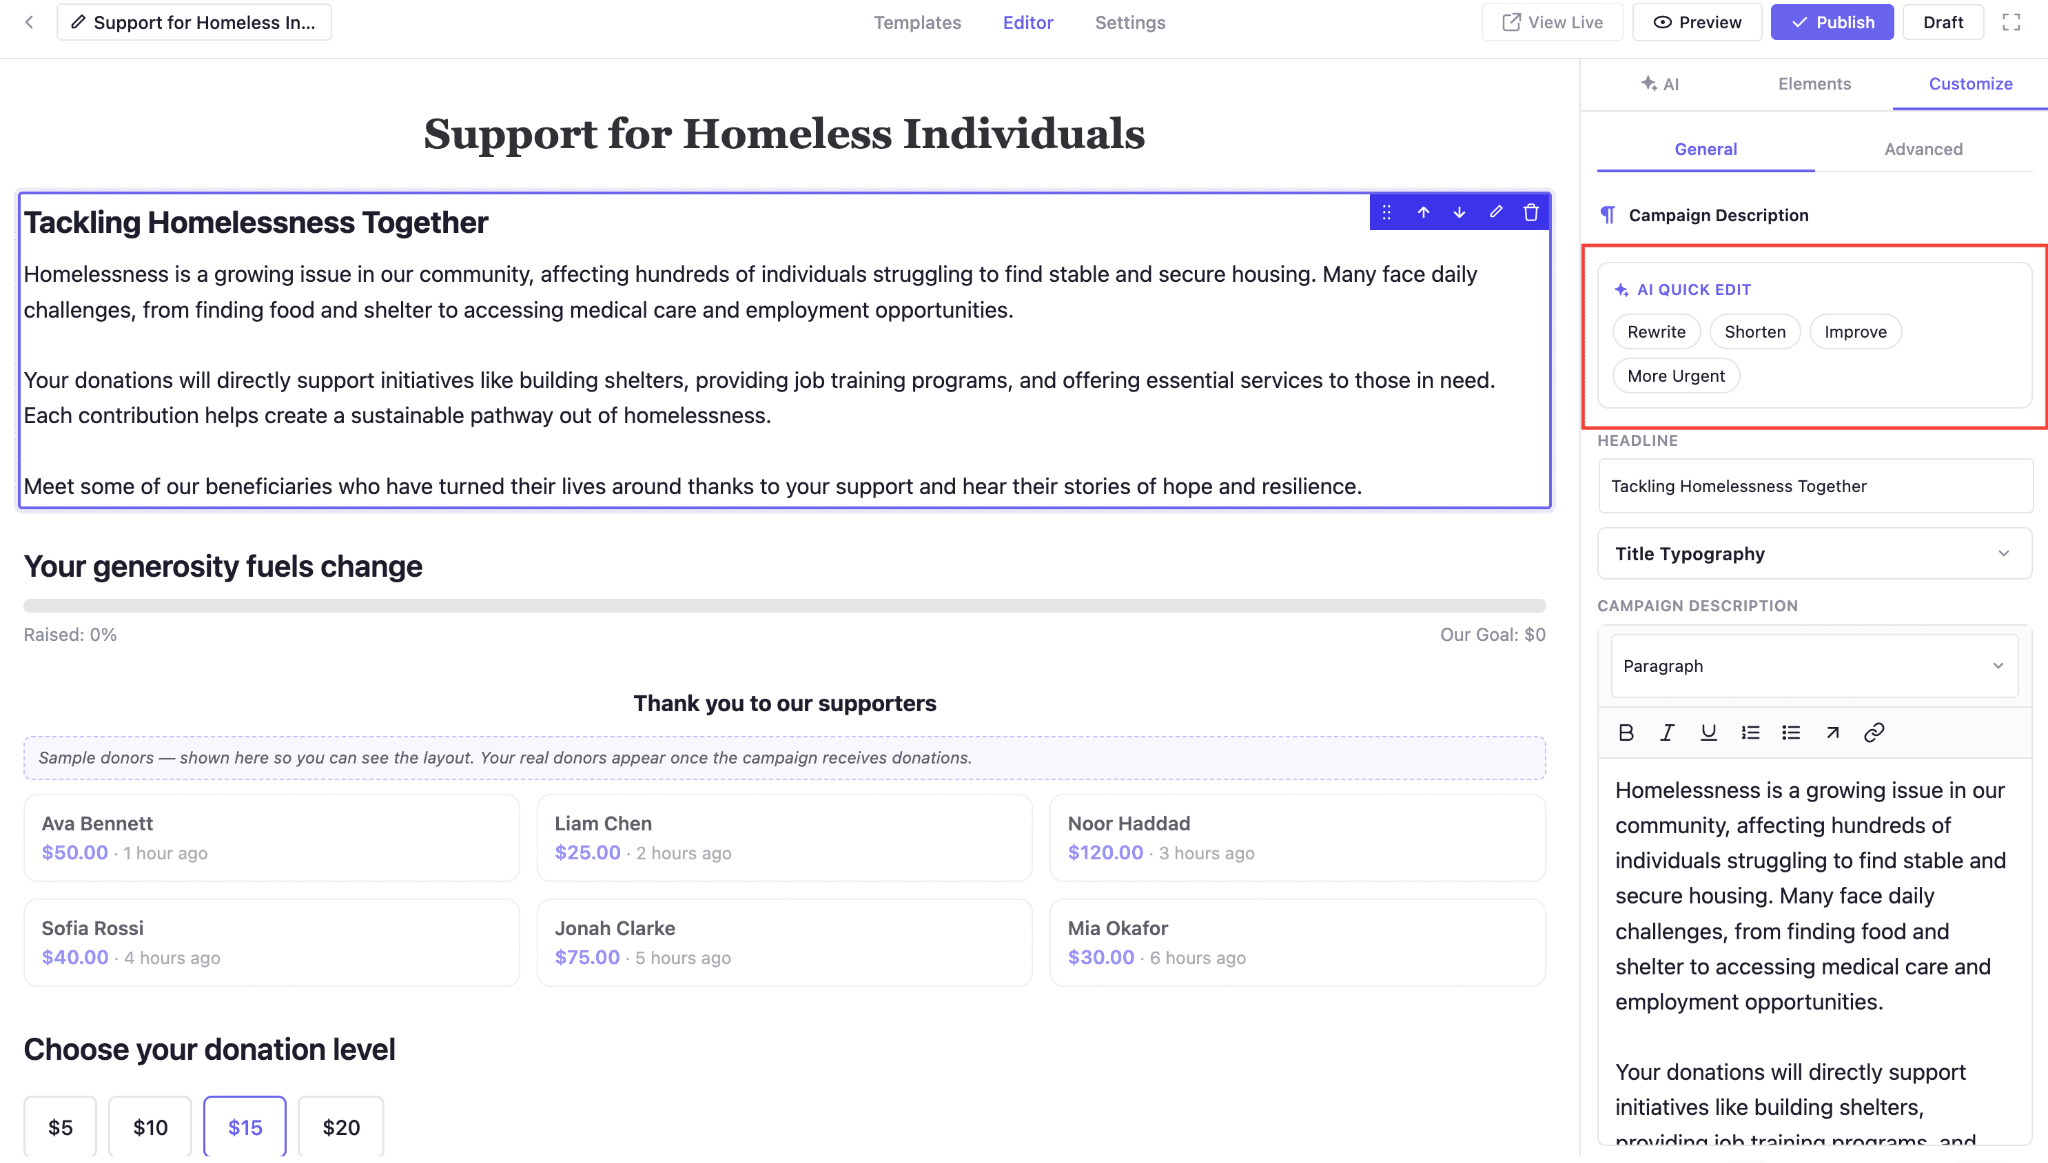
You can also fine-tune AI content on a field-by-field basis. Click on any field (e.g., Campaign Description) to select it, then head to the ‘Customize’ tab on the right panel. Under ‘AI Quick Edit’, choose from:
- Rewrite — Generate a fresh version of the selected field.
- Shorten — Make the content more concise.
- Improve — Enhance the overall quality of the writing.
- More Urgent — Adjust the tone to drive faster action.
This gives you AI-powered editing for individual fields, without having to regenerate the entire campaign.
Step 4: Publish Your Campaign #
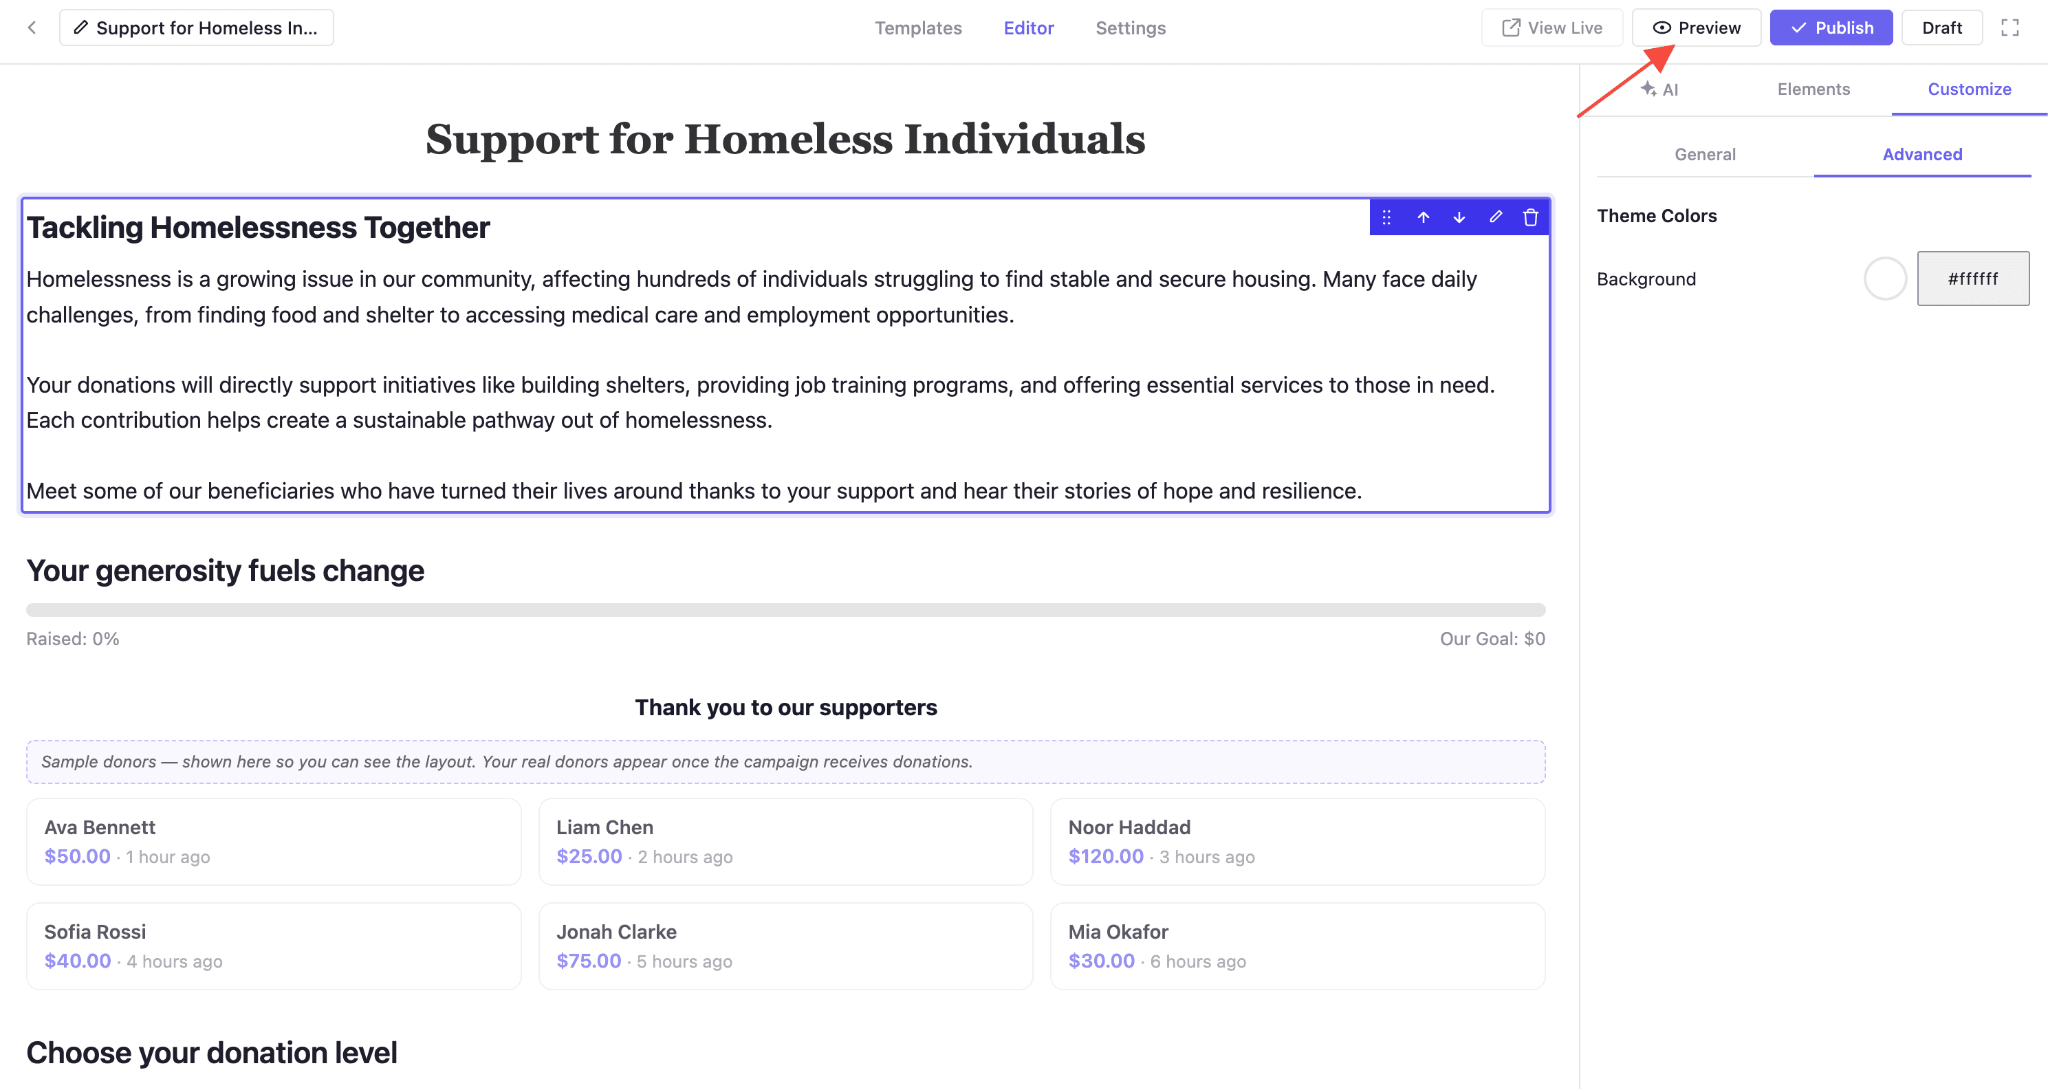
Once you’re done with every customization, you can preview by clicking on ‘Preview’ before hitting the ‘Publish’ button.
Final Outcome #
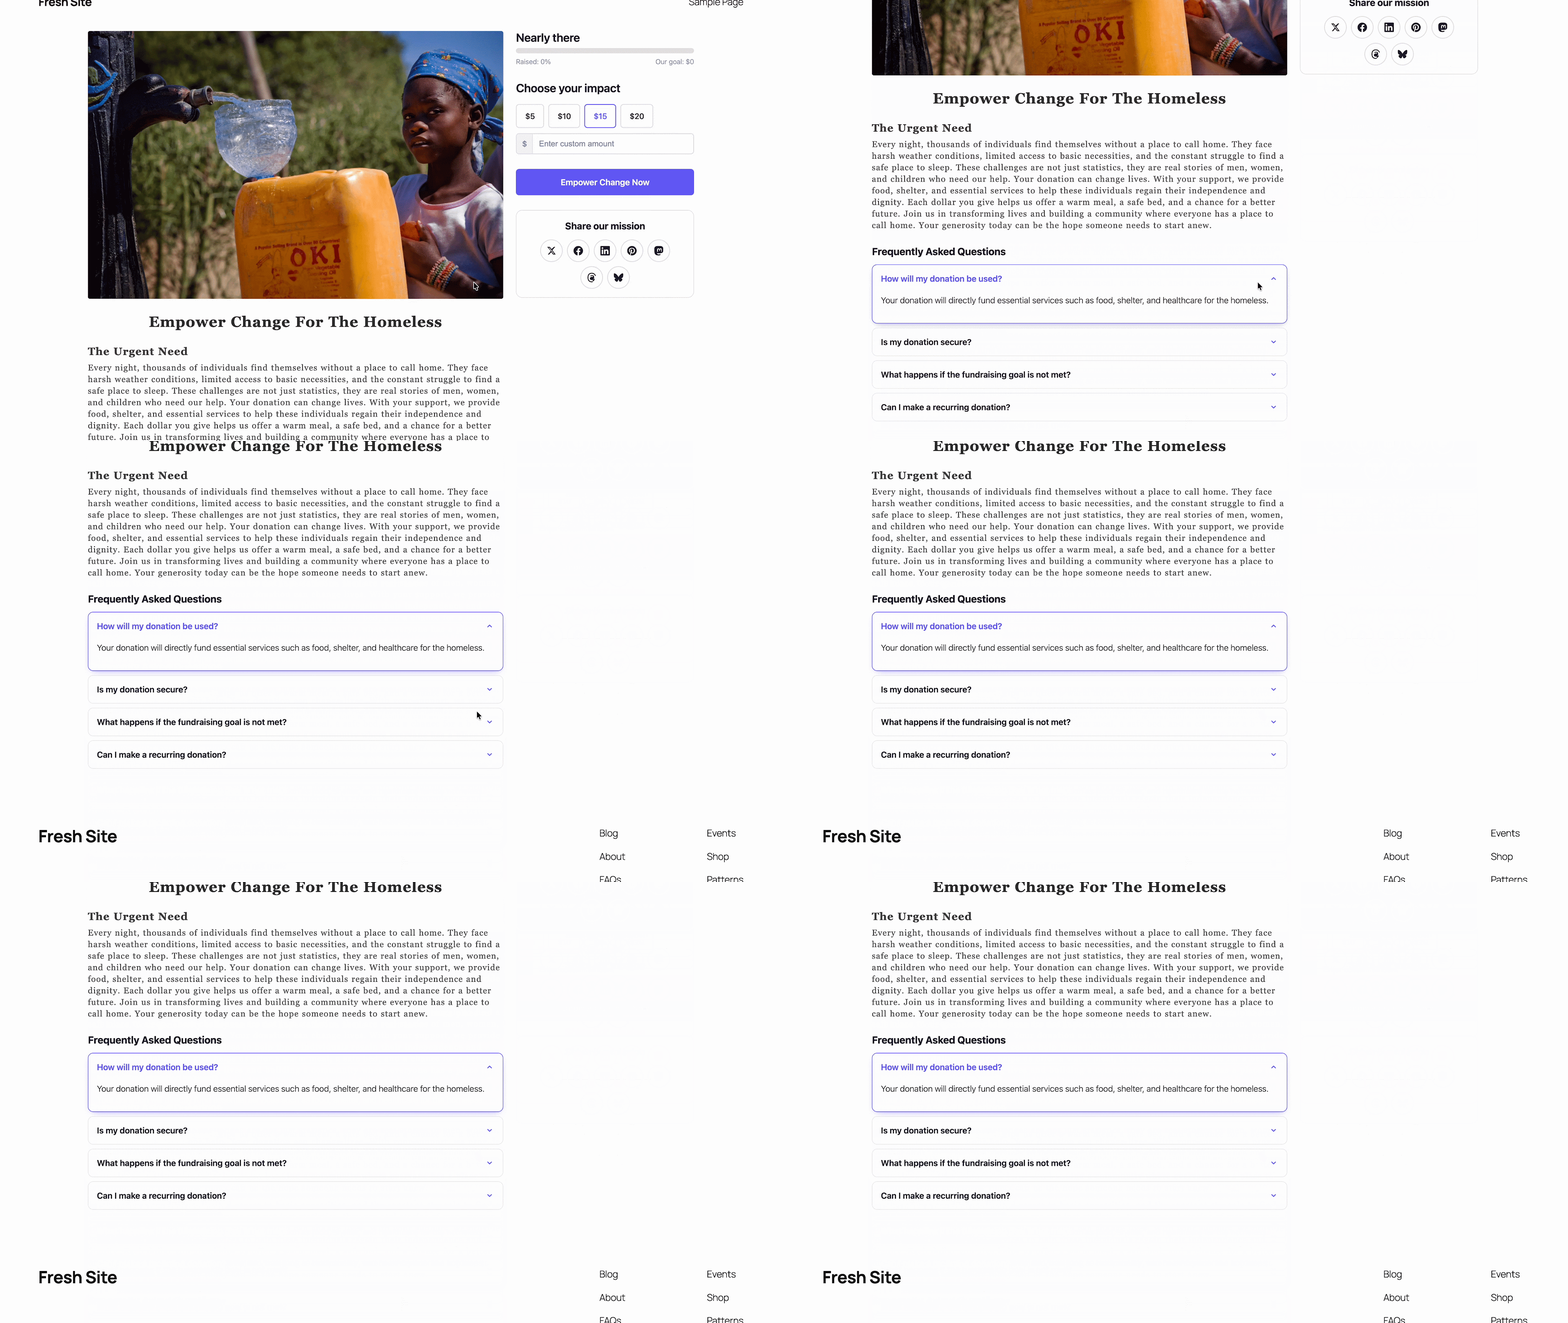
By following all the steps above, you can have your campaign LIVE with AI in Better Payment. Here is how it looks finally.
Getting stuck? Feel free to contact our support team for further assistance.