Better Payment is an Elementor payment plugin that will help you to manage and collect your transaction smoothly through Stripe and Paypal. Using this WordPress payment plugin, you can also save your payment history and analyze them from your Dashboard.
Follow this step-by-step guide below to find out how to configure Elementor Form with Better Payment:
Note: To configure the Elementor form with Better Payment you have to install and activate Elementor Pro on your WordPress website.
Configure Elementor Form With Better Payment #
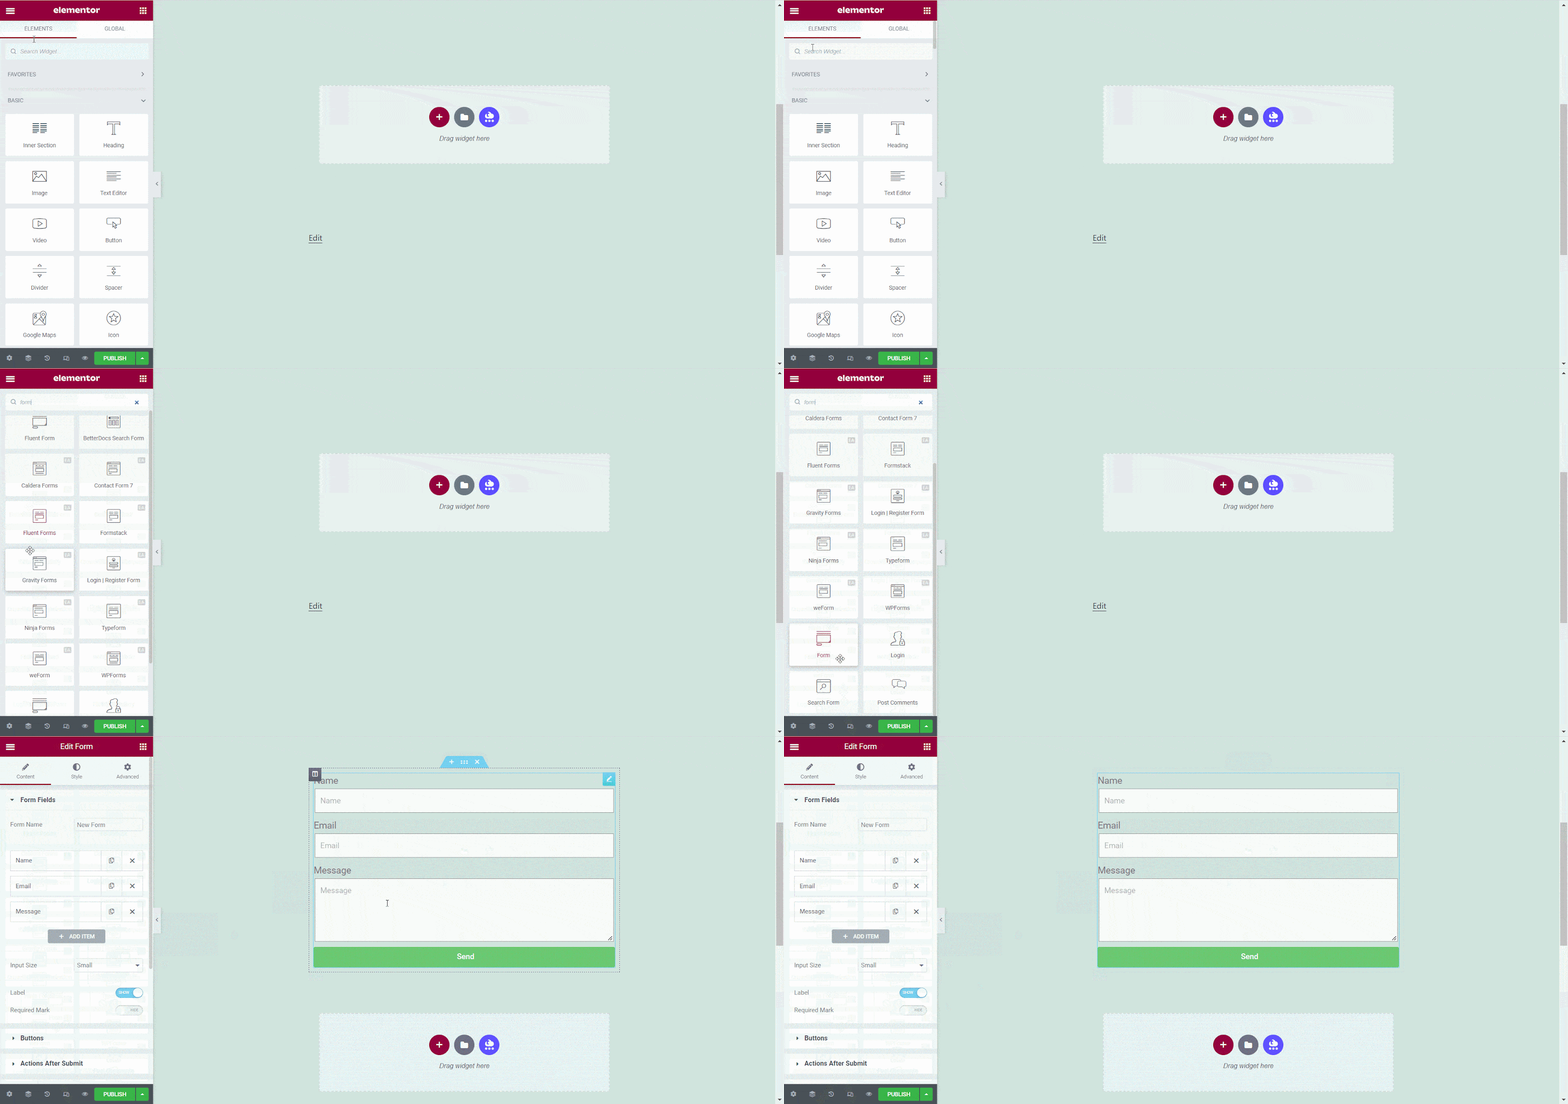
First of all, you have to go to your WordPress Dashboard Page → ‘Add New‘→ ‘Edit With Elementor‘ button. Now, find the ‘Form’ widget from the search option then Drag & Drop this widget on any section.
Form Fields #
Now, you have to make adjustments to the ‘Form Fields’ section. Click on the ‘Add Item’ then change its ‘Type’ to ‘Pay Amount’ & Name the ‘Lebel’ before toggling the ‘Required’ option.
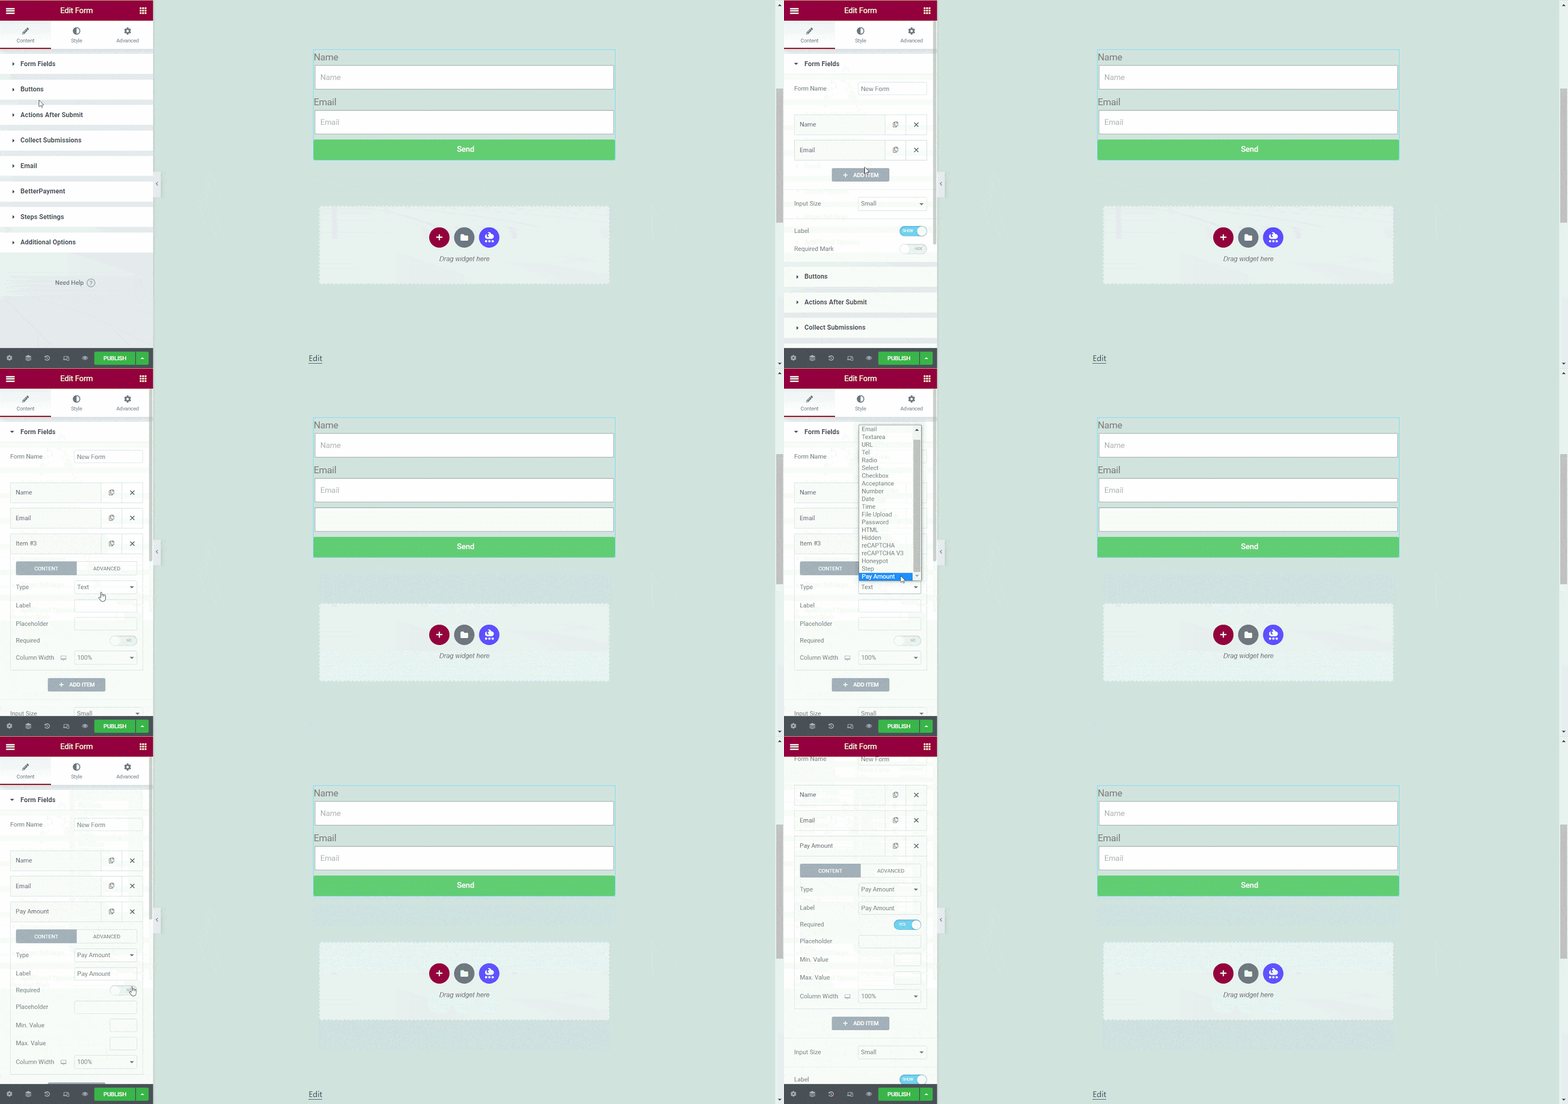
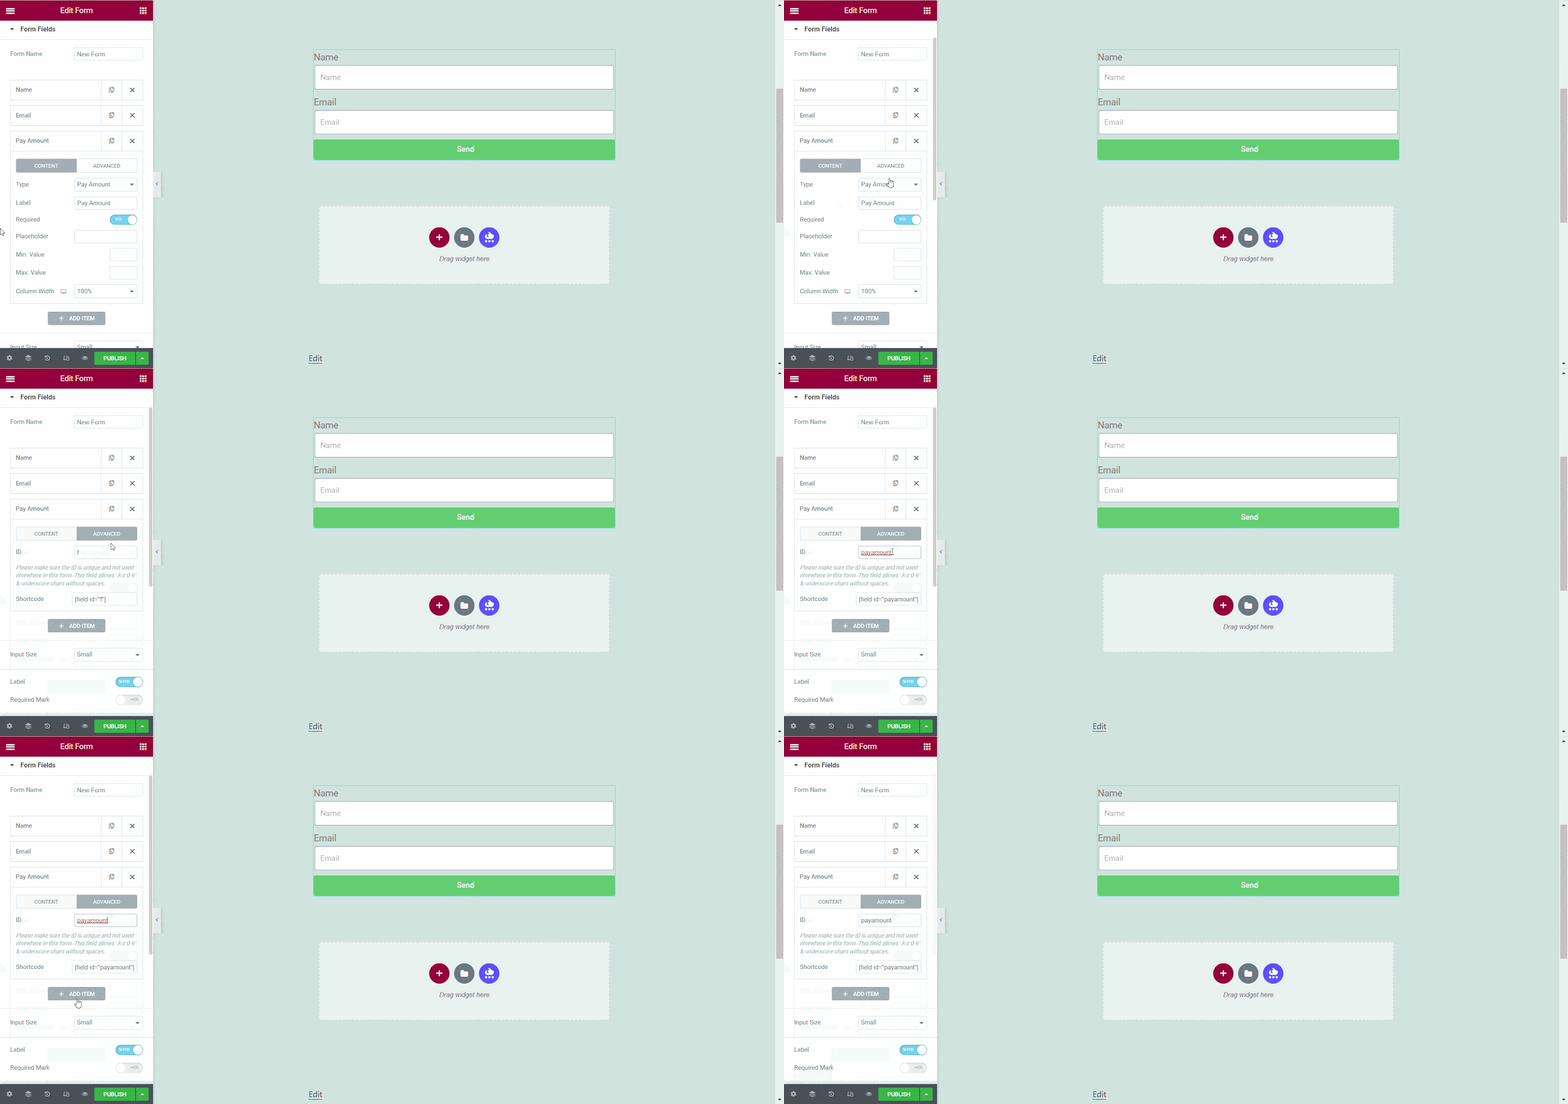
After that, go to the ‘Advanced’ tab. Here you need to give a unique ‘ID Name’ for this Item.
Better Payment #
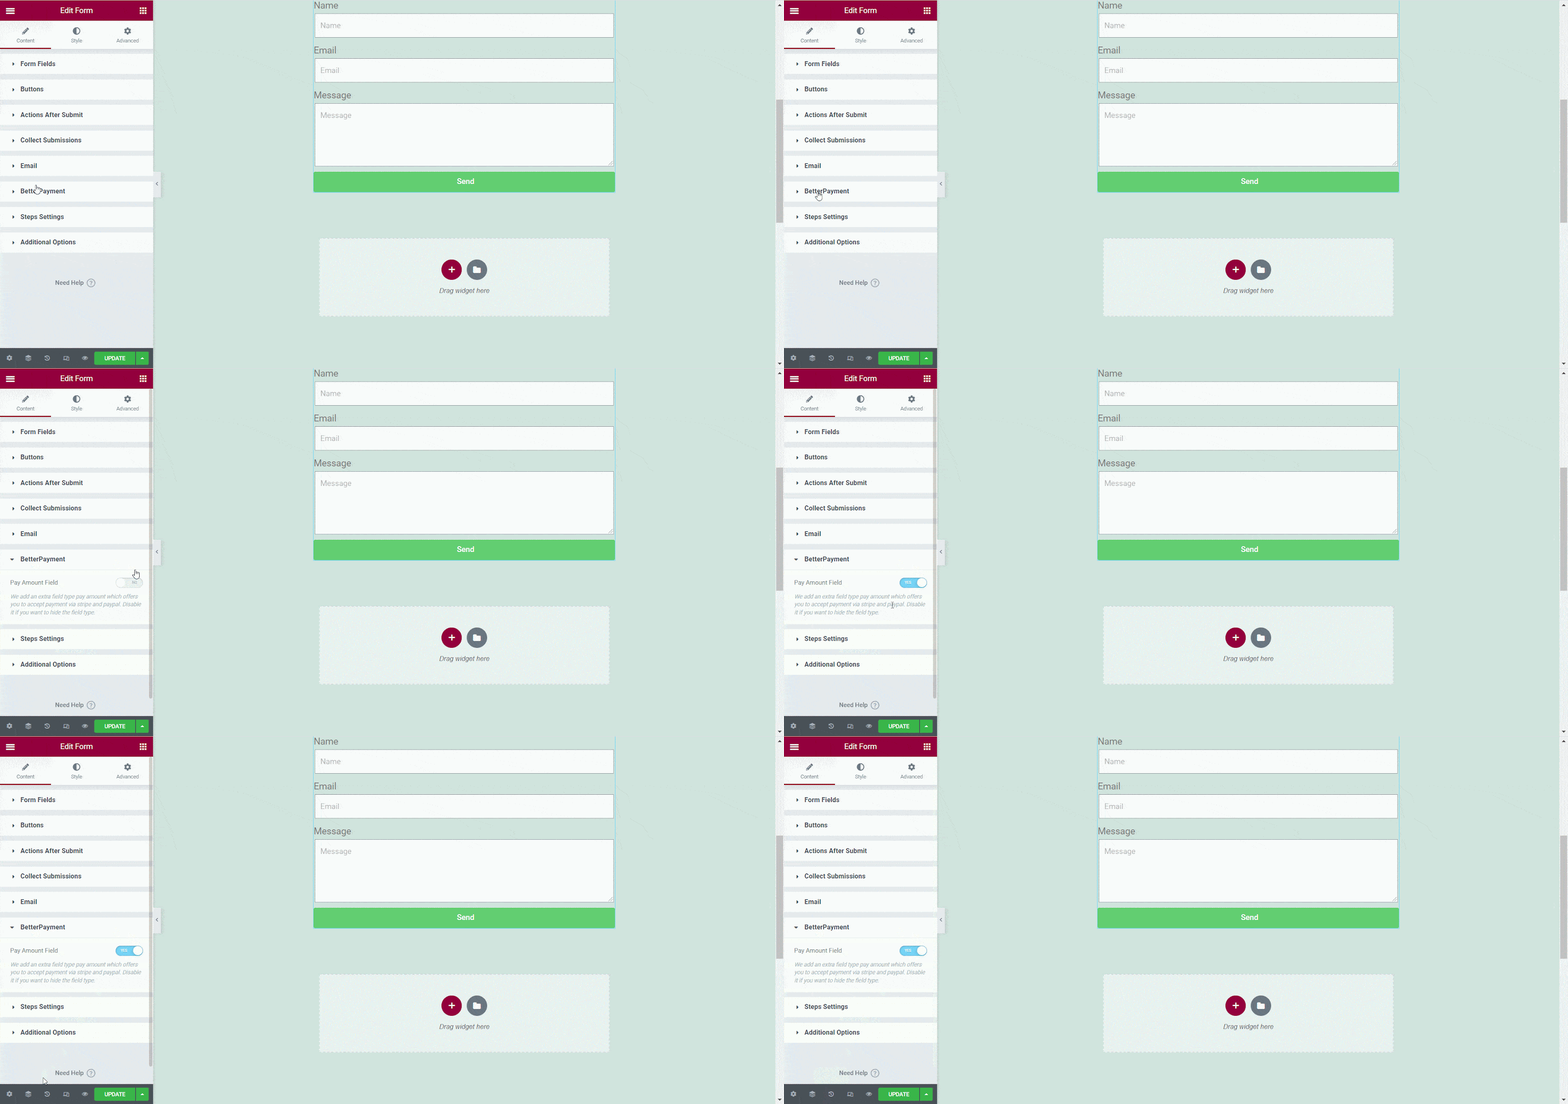
After finishing this step, navigate to the Better Payment section. Now, you should toggle the ‘Pay Amount Field’ button to configure Better Payment with the Elementor form.
Configure Elementor Form With Stripe #
Using the Elementor form, you can add one payment method at a time. So, if you want to add Stripe with Elementor form, follow the instruction below:
Action After Submit #
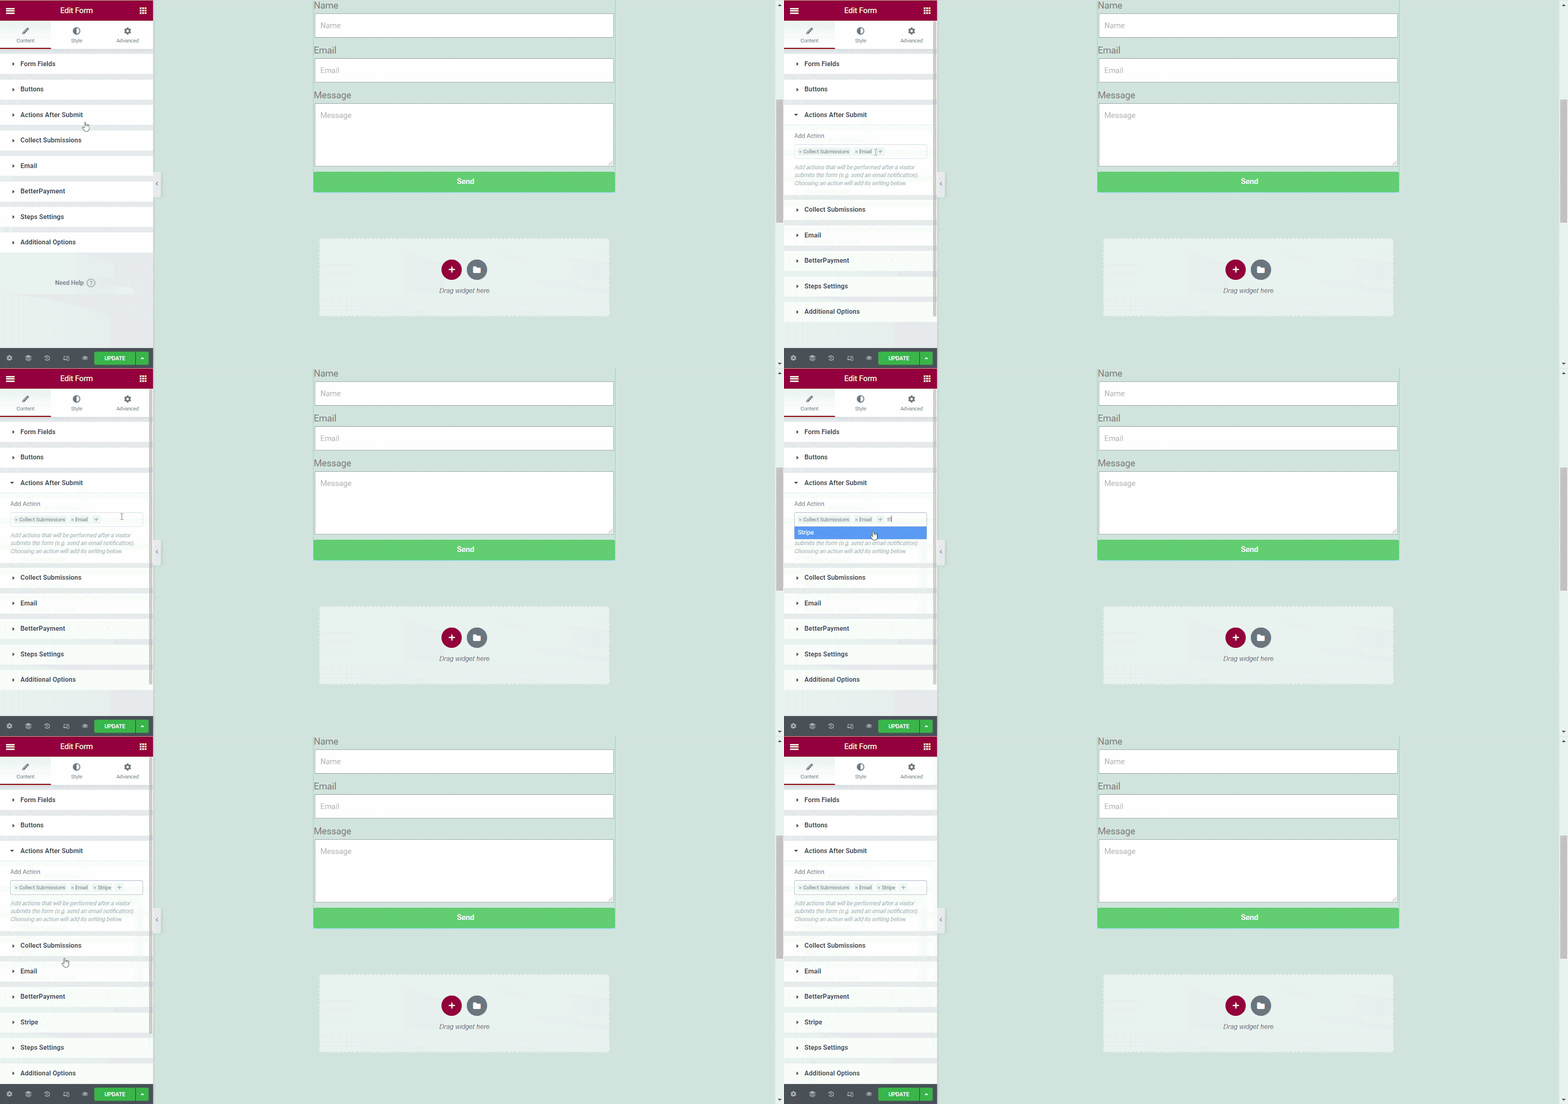
To configure Stripe with Elementor, go to the ‘Action After Submit’ section. Now, you need to find and add ‘Stripe’ as an action.
Stripe #
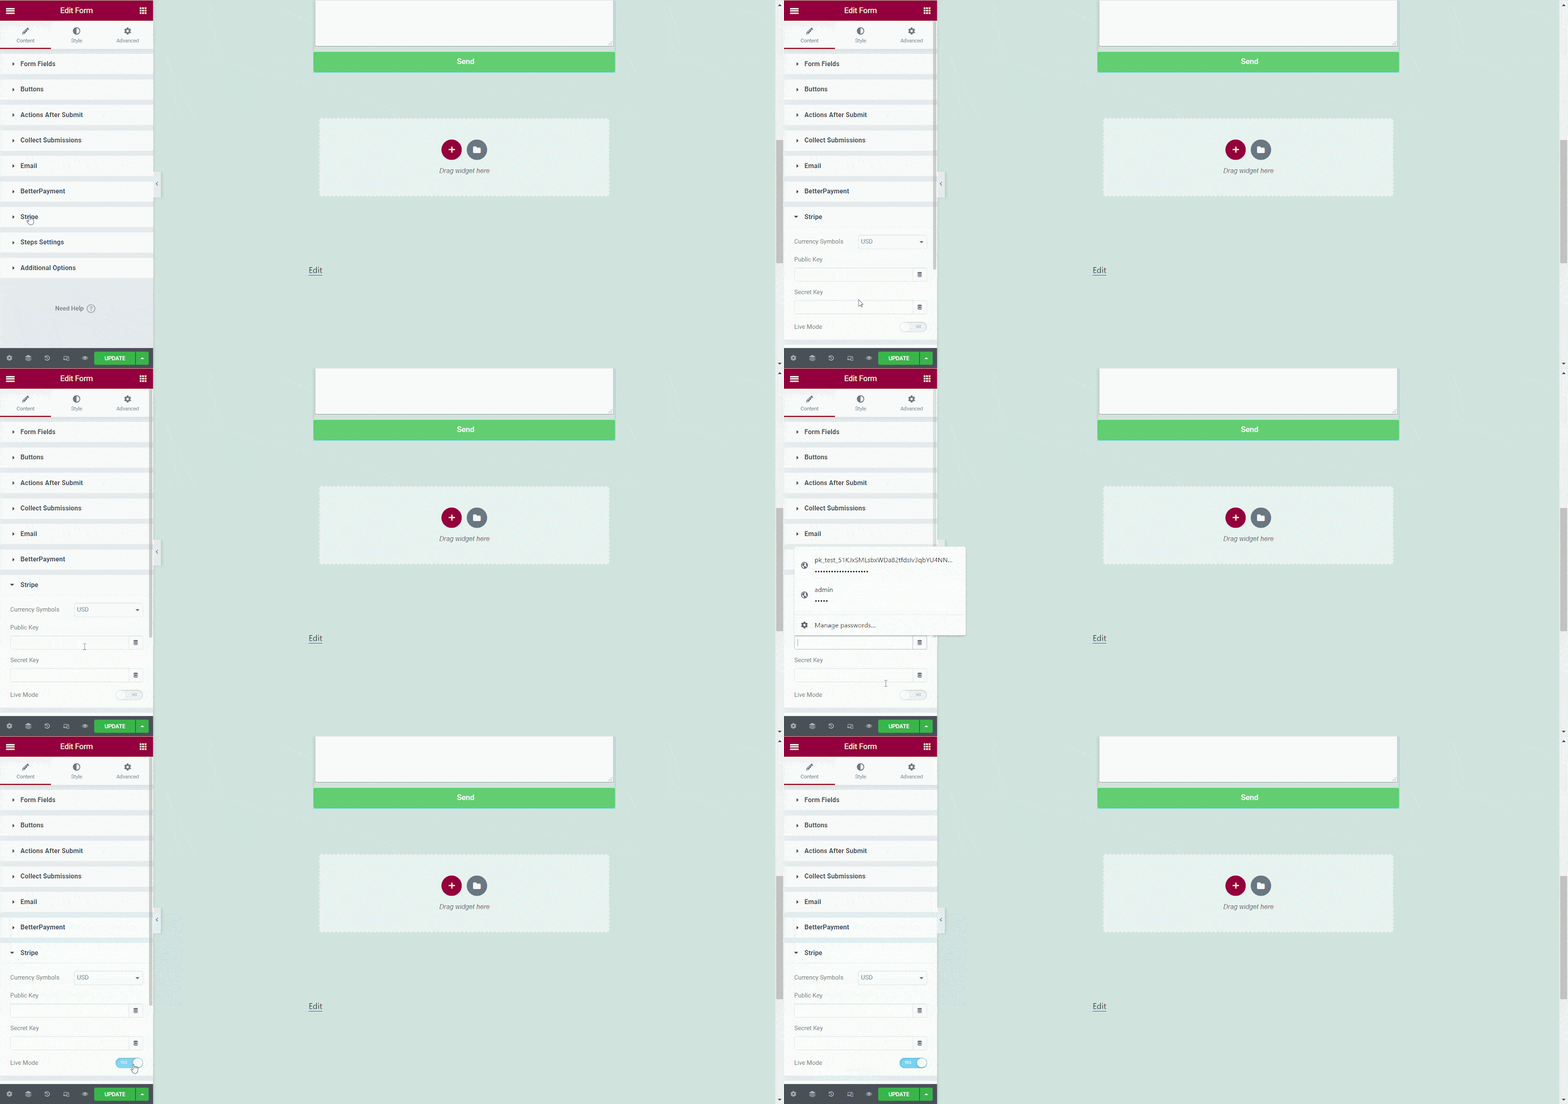
Now, head over to the ‘Stripe’ section and input your Stripe ‘Public Key’ & ‘Secret Key’ before clicking on the live mode. You can easily collect your Stripe ‘Public Key’ & ‘Secret Key’ from your Stripe Dashboard.
Final Outcome #
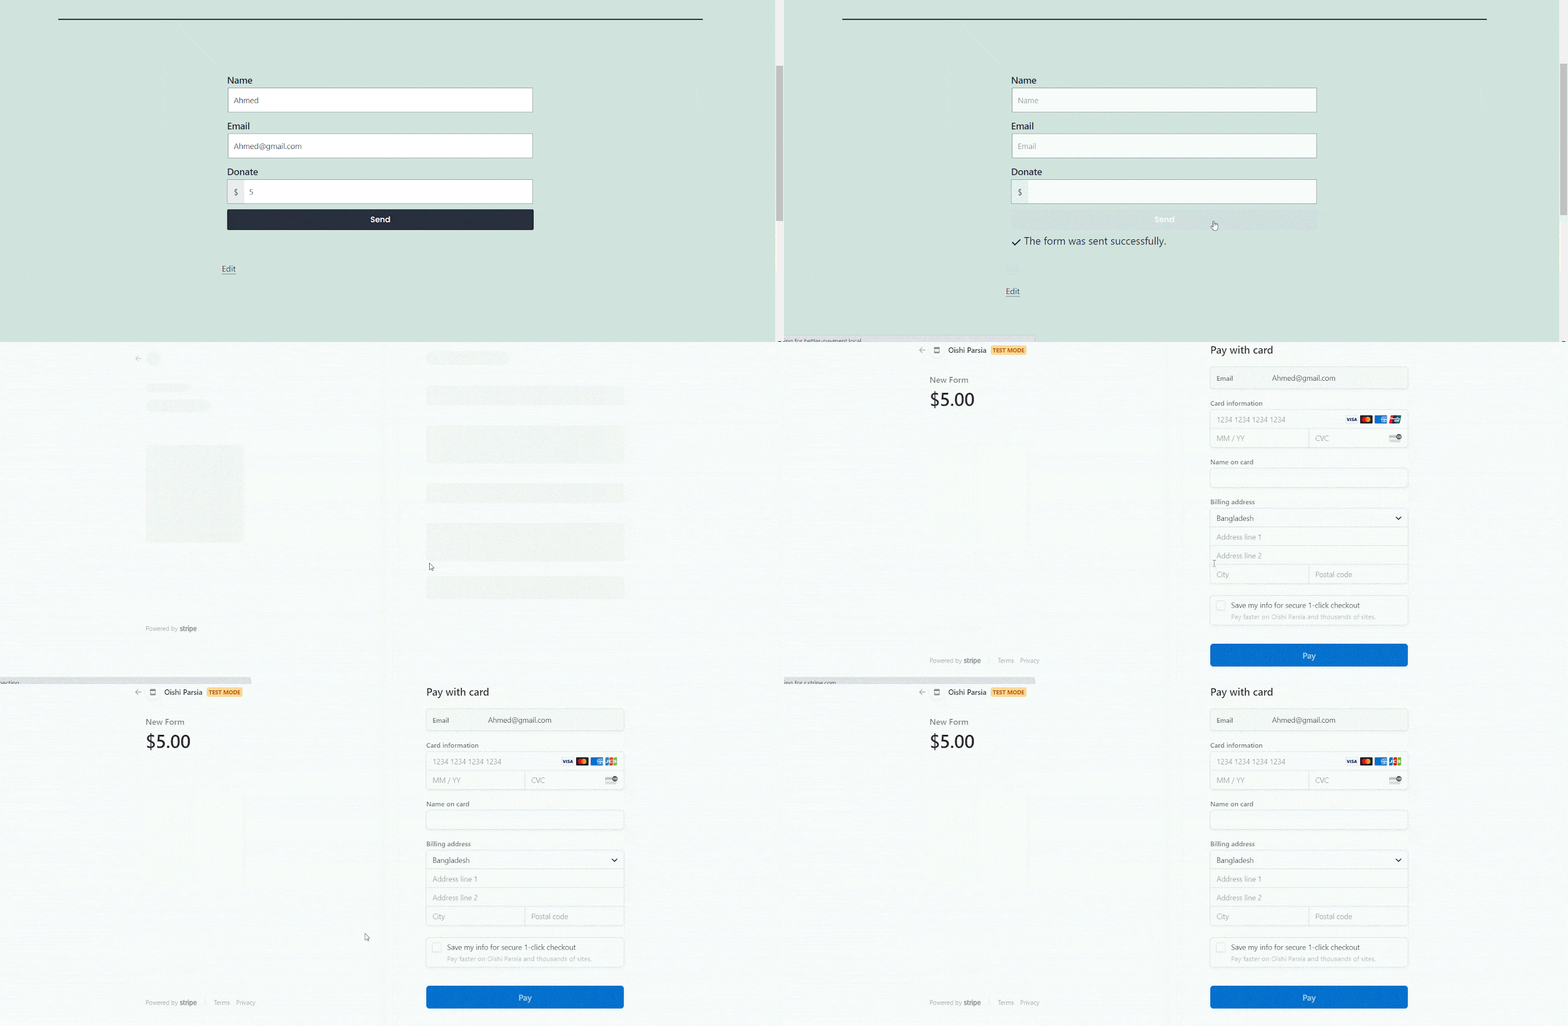
If you have done everything according to this guideline you will find your outcome just like the following gif below:
Configure Elementor Form With PayPal #
[Note: While adding PayPal as your payment method for the Elementor form, you can not add Stripe there.] Now, if you want to configure the Elementor form with PayPal follow the guideline below:
Action After Submit #
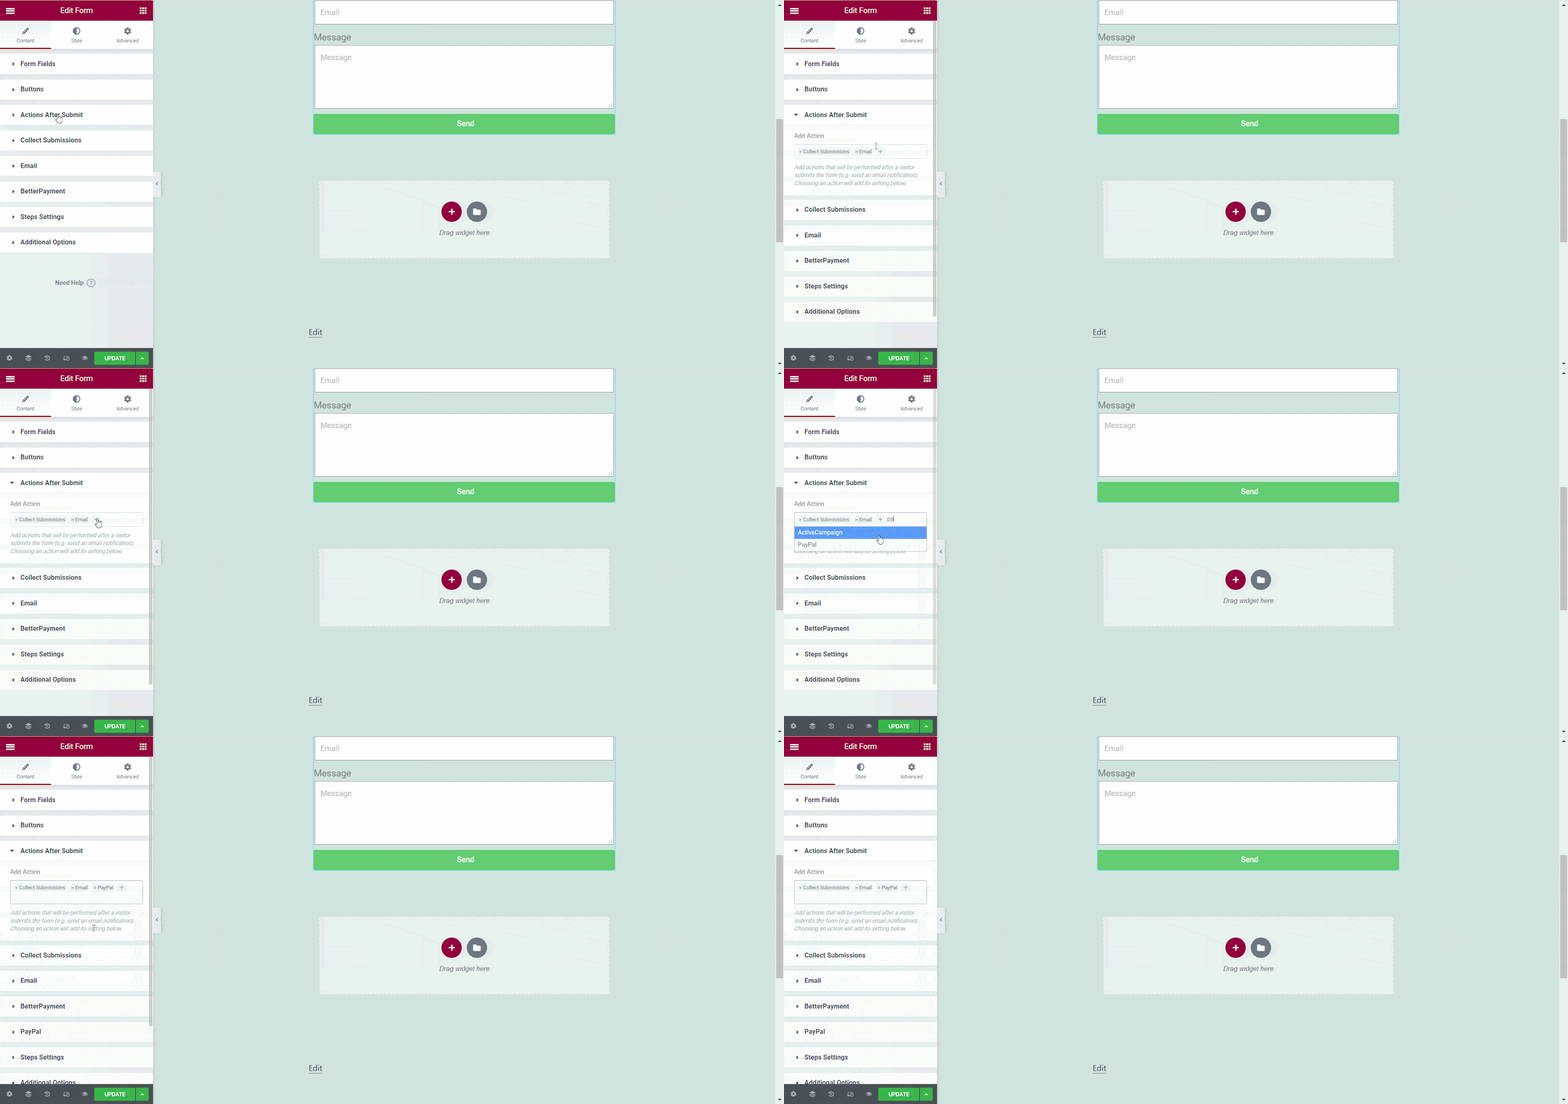
Similar to Stripe set up, you need to go to the ‘Action After Submit’ section first. Now, find ‘PayPal’ and add it as an action.
PayPal #
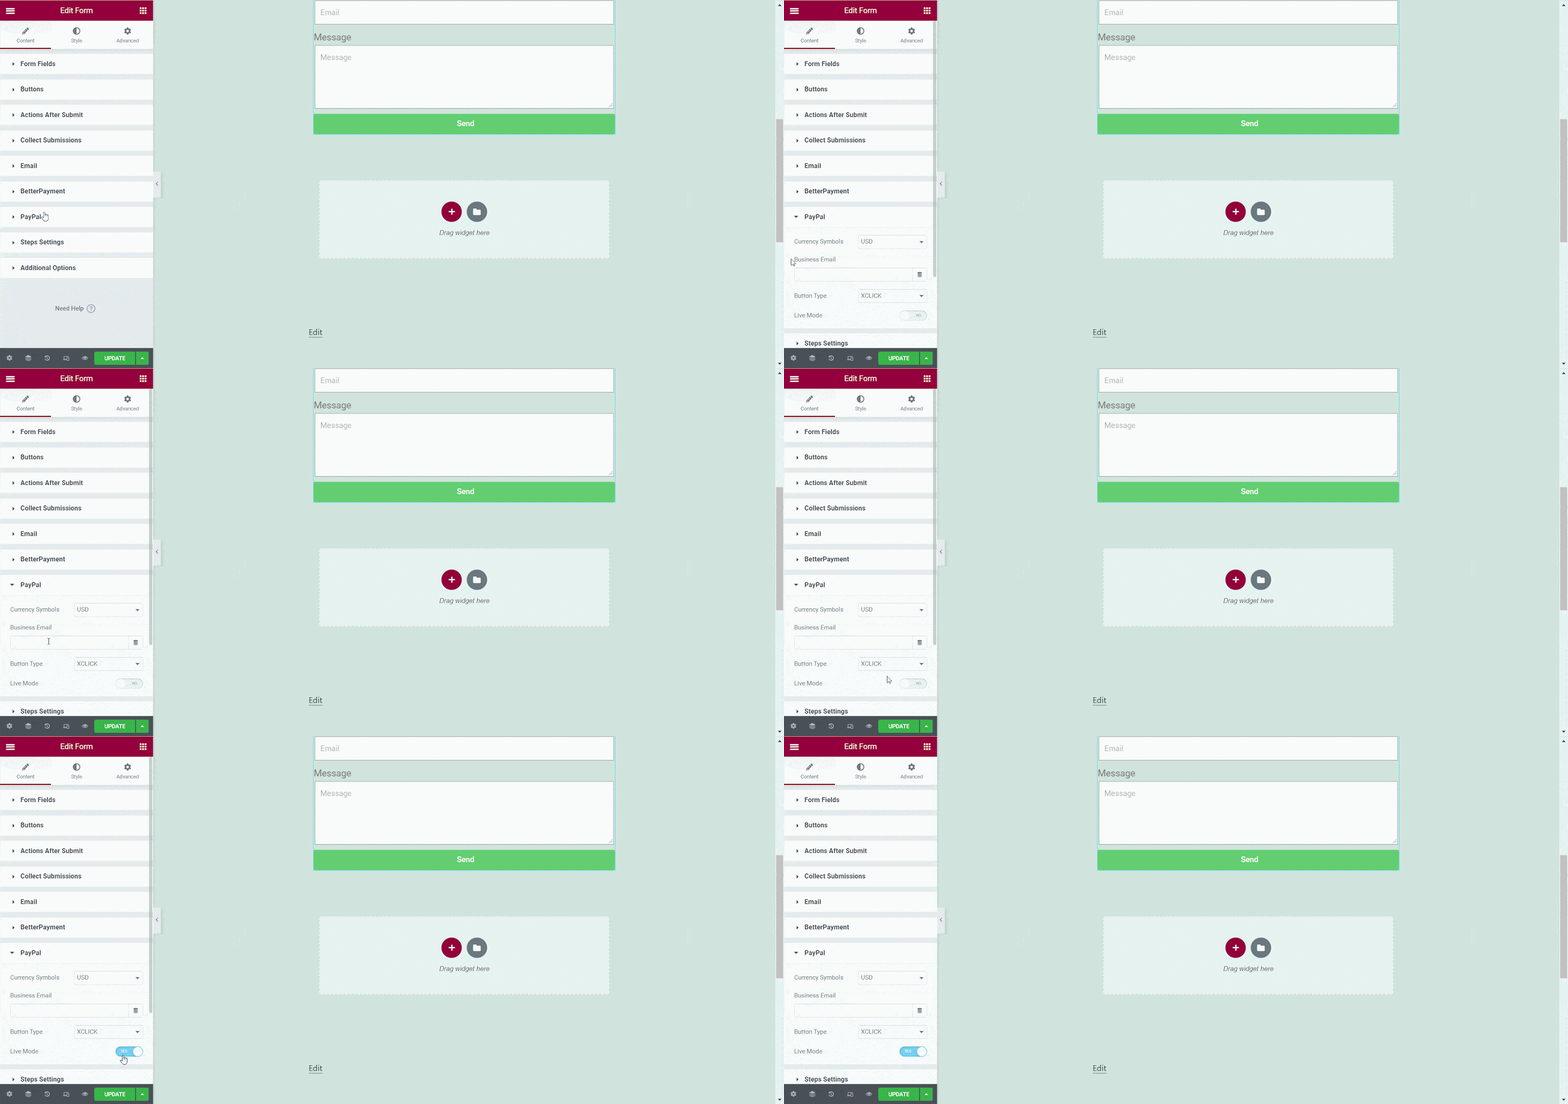
Now, click on the ‘PayPal’ section in your Elementor Form widget. There you have to add your business email before toggling the ‘Live Mode’.
Final Outcome #
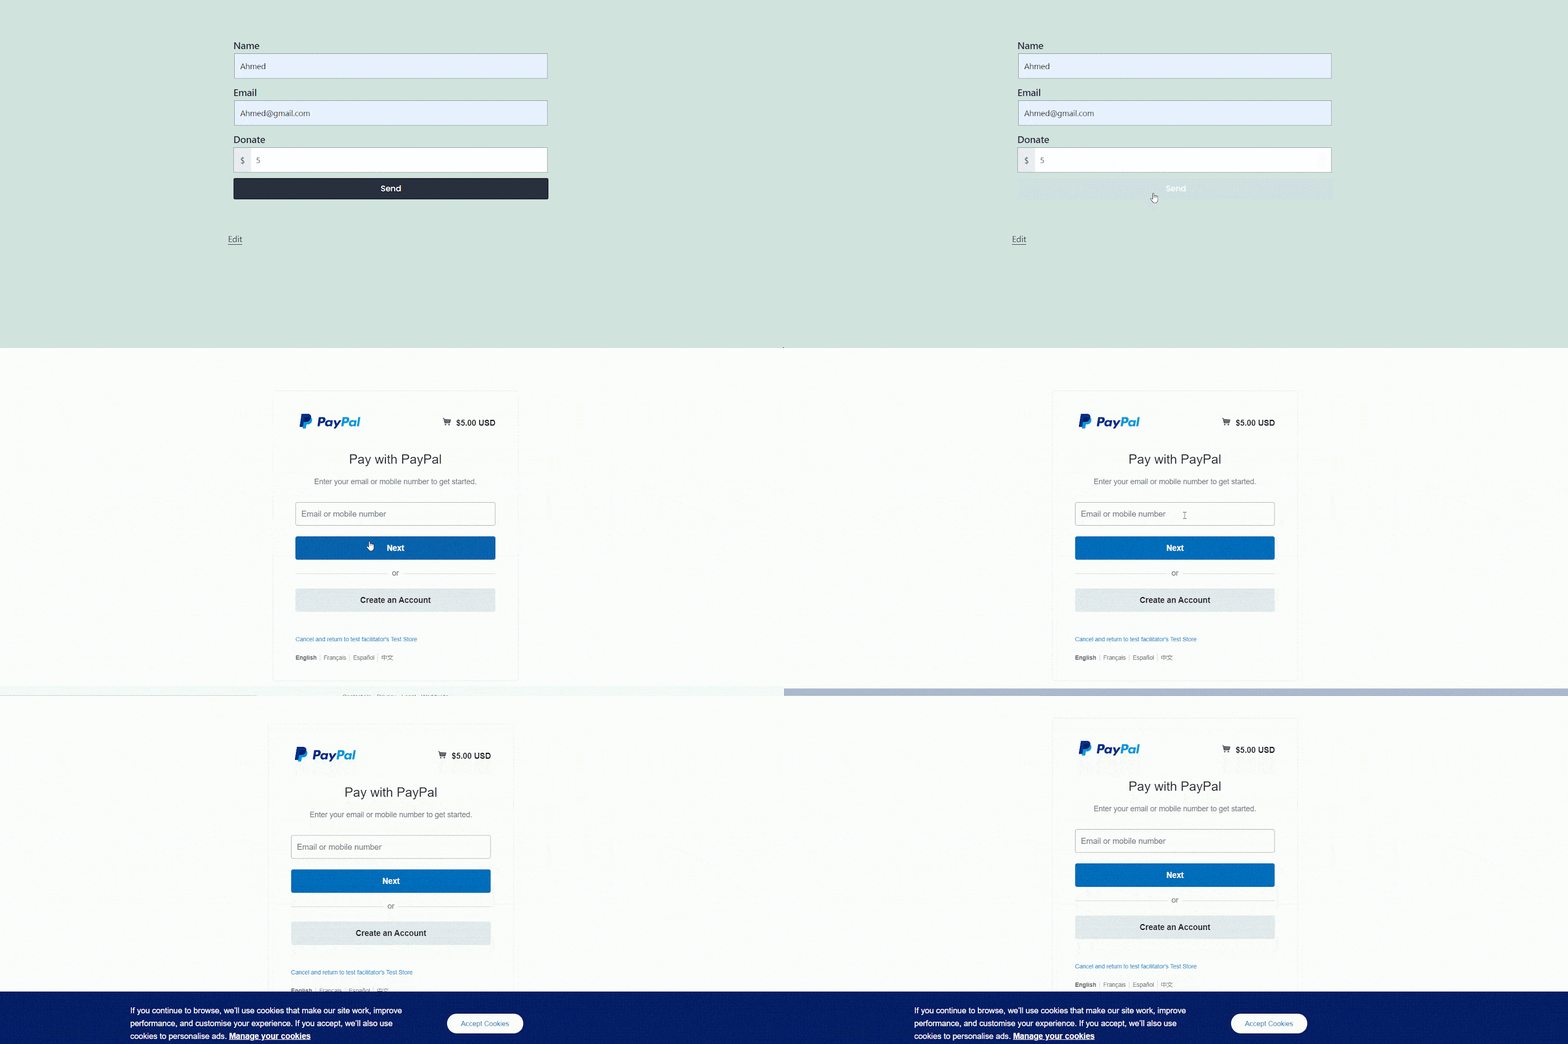
If you could follow these above steps the outcome will be just like this gif below:
This is how easily you can configure Elementor Form with Better Payment.
Need assistance? Feel free to contact our dedicated support team.


