Better Payment lets you turn any WooCommerce product into a recurring subscription and collect payments automatically through Stripe. You do not need a separate subscription plugin or a special product type. You enable one option on a product you already have, set the billing terms, and Better Payment handles the billing for you.
This guide shows you how to set up a WooCommerce product subscription, what your customers see at checkout, and how to manage every subscription from your dashboard.
Note: Make sure you have installed and activated Better Payment on your WordPress website. Since subscription charges are processed through the Better Payment (Stripe) gateway, you should also set up your Stripe account with Better Payment first.
How to Connect Better Payment (Stripe) from WooCommerce Payments Provider #
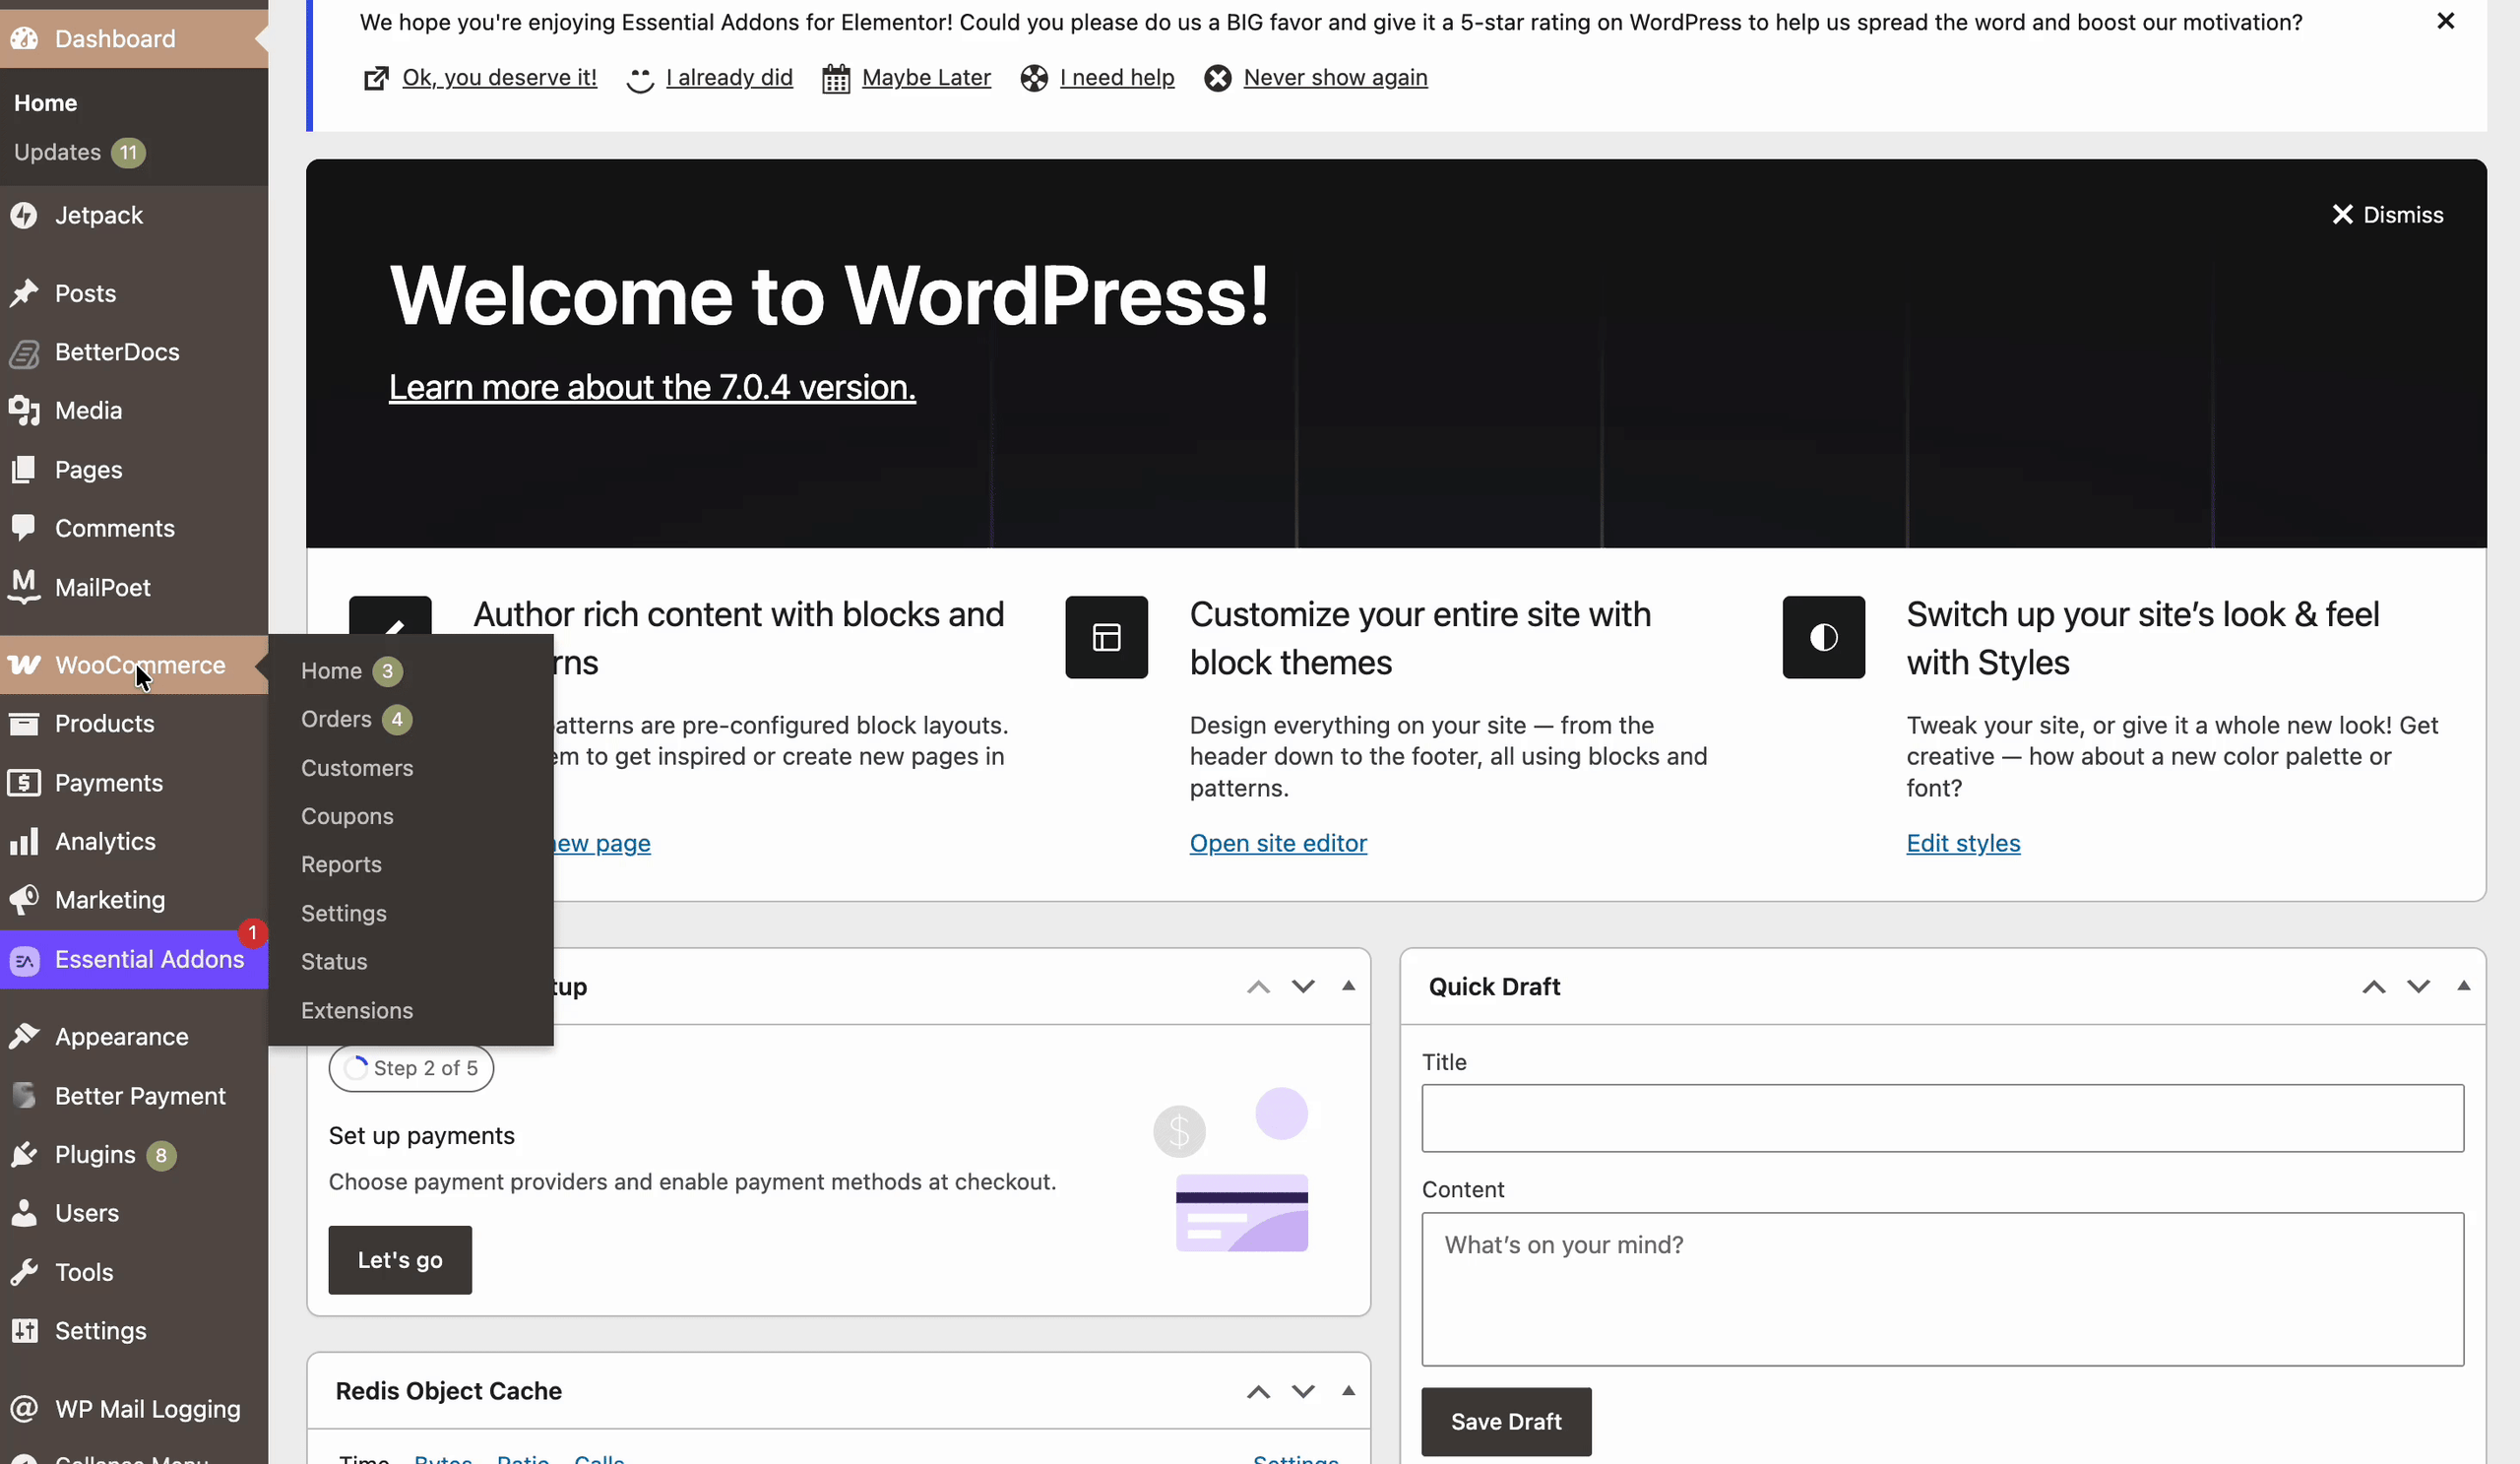
To connect Better Payment (Stripe) as a WooCommerce payments provider, navigate to ‘WooCommerce’ → ‘Payments’ & click on the ‘Enable’ button right beside the Better Payment (Stripe) option from your dashboard.
How to Set Up a WooCommerce Product Subscription Using Better Payment #
Setting up a subscription happens on the same product-editing screen you already use for regular products. There is no separate subscription-creation flow. Follow the steps below.
Step 1: Open a Product And Find the Better Payment Subscription Panel #
From your WordPress dashboard, go to ‘WooCommerce’ → ‘Products’ and open the product you want to sell as a subscription, or click ‘Add New’ to create one.
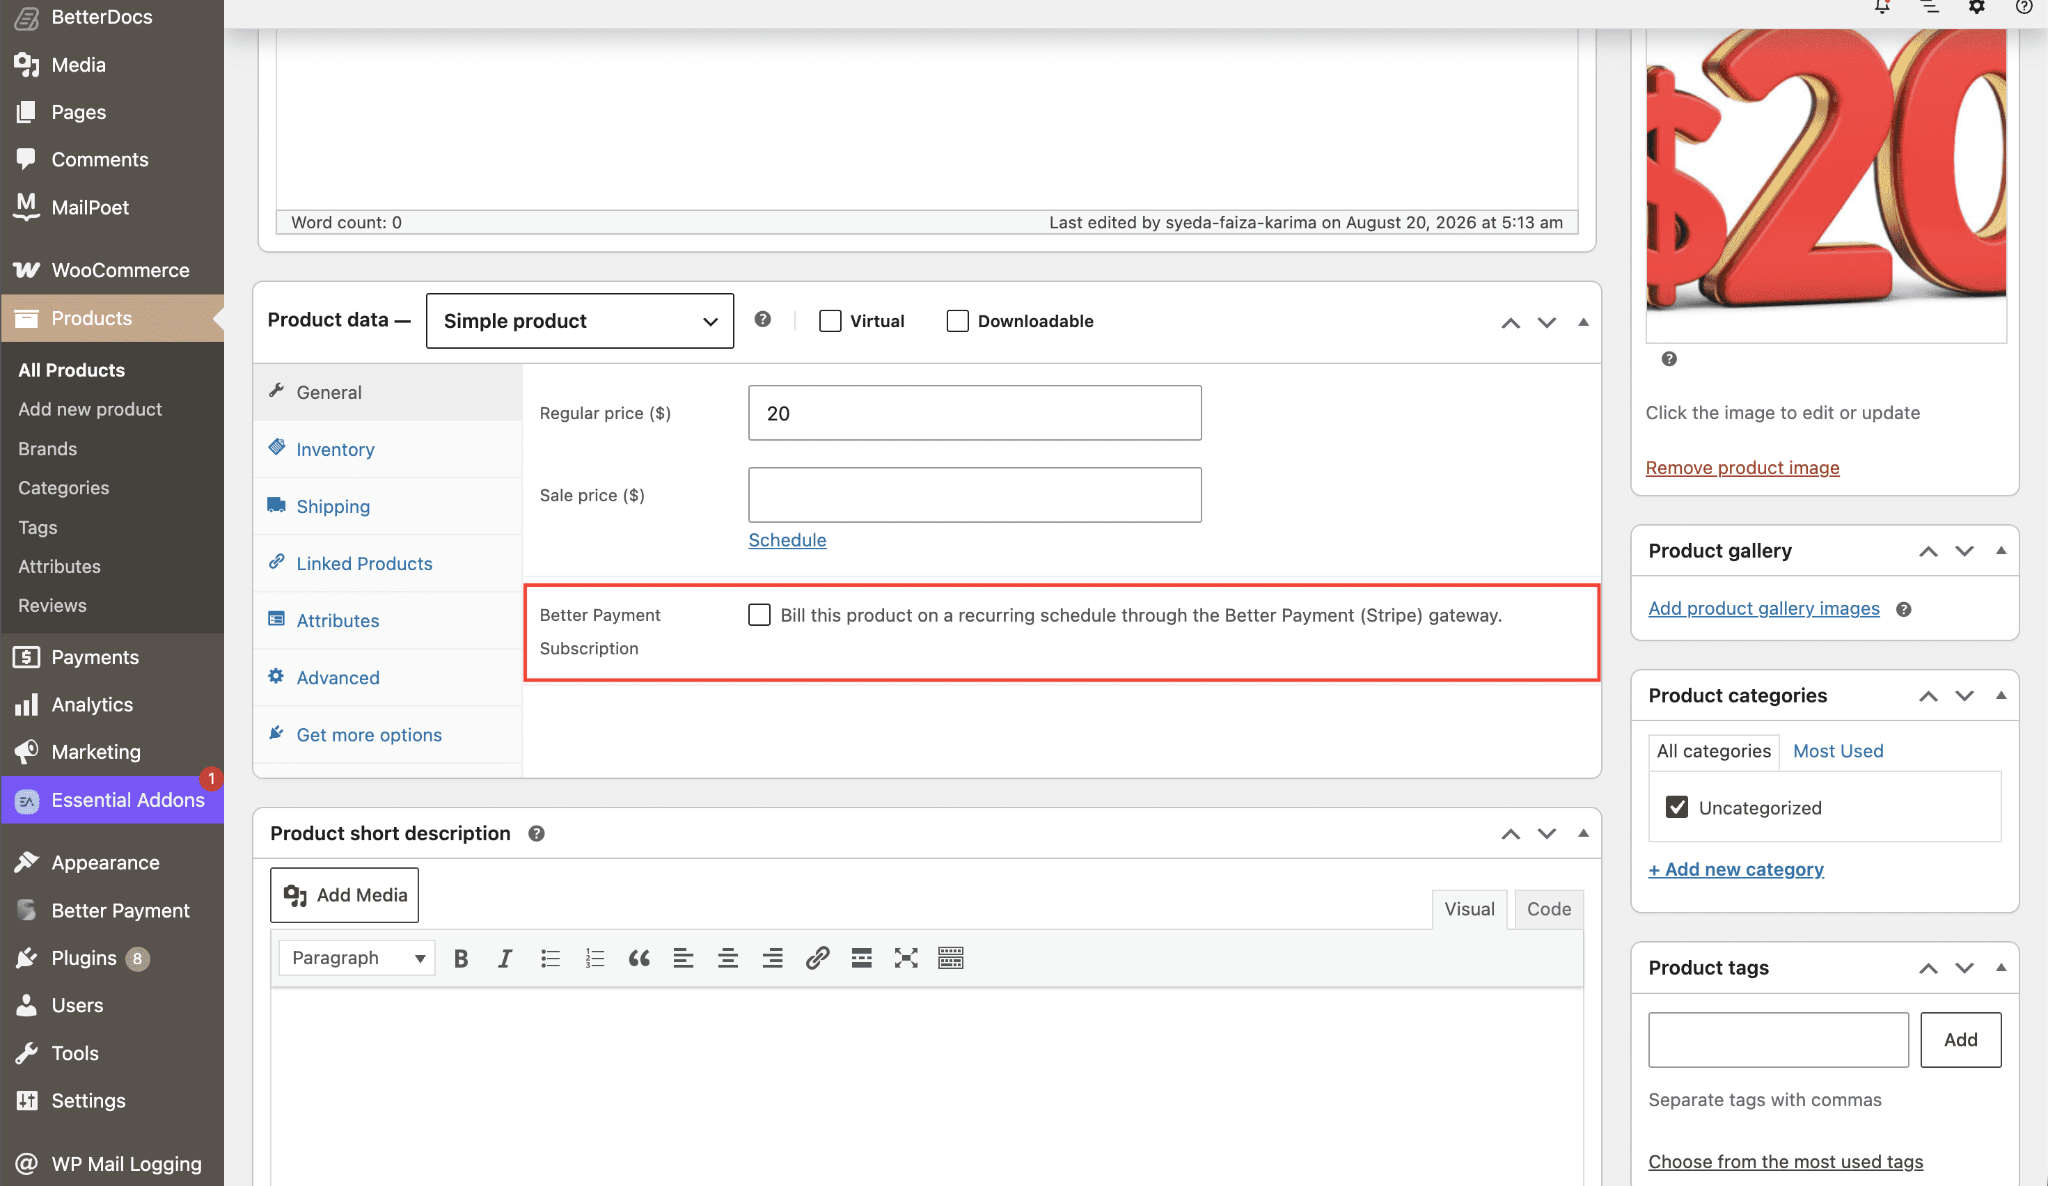
Scroll to the ‘Product data’ box and stay on the ‘General’ tab. There you will find the ‘Better Payment Subscription’ section.
Step 2: Enable Recurring Billing #
Tick the ‘Better Payment Subscription’ checkbox labeled “Bill this product on a recurring schedule through the Better Payment (Stripe) gateway.”
Once the box is ticked, the product will bill the customer on a repeating schedule instead of charging only once. Ticking the box also reveals the rest of the subscription fields you will configure next.
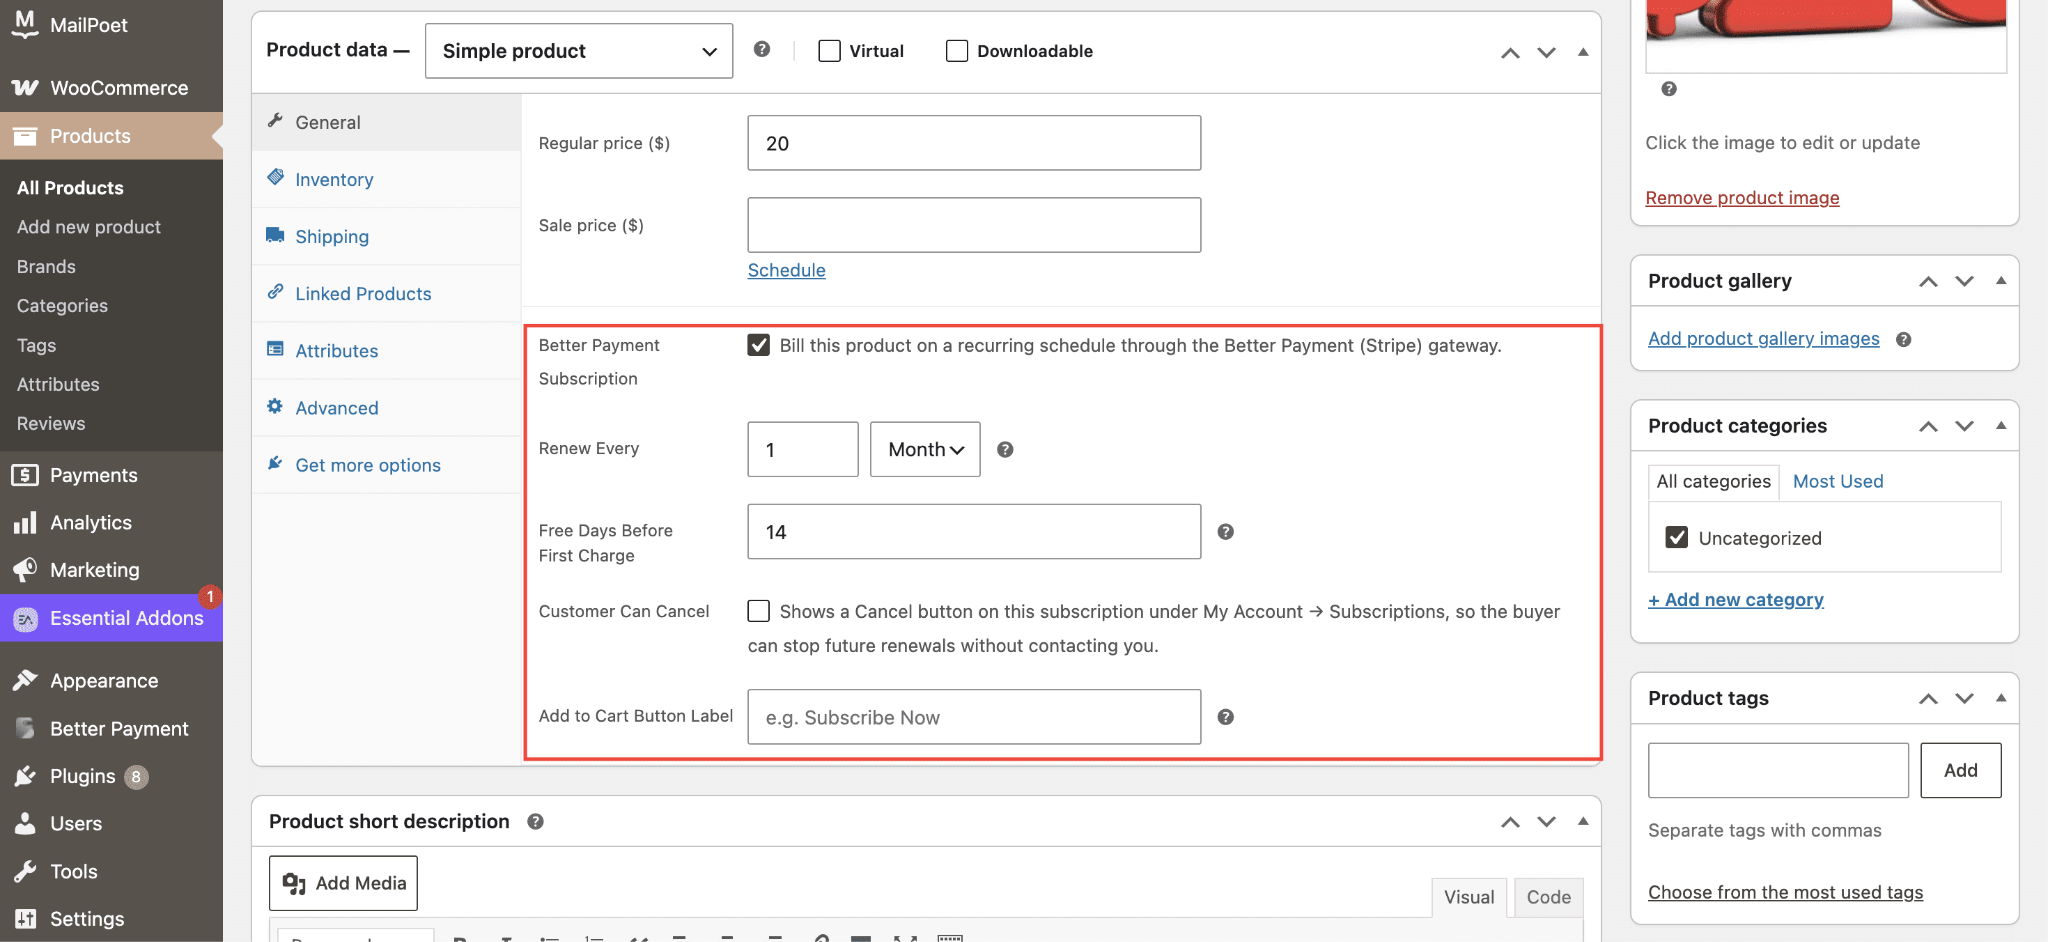
With the subscription option enabled, you can now define exactly how the product bills. Configure each field below to match your plan.
i. Renew Every (Billing Interval) #
The field sets how often the customer is charged. Enter a number, then choose Day, Week, Month, or Year from the dropdown. For example, set 1 Month for a monthly plan, or 1 Day for a daily plan.
ii. Free Days Before First Charge #
The field lets you offer a free trial before the first real charge. Enter the number of trial days. When the value is above 0, the customer pays nothing at signup and the first charge happens automatically once the trial ends. Set it to 0 for no trial, so billing starts right at checkout.
iii. Customer Can Cancel #
The filed checkbox controls whether customers can cancel the subscription themselves. When checked, the customer sees a self-service cancel option inside their My Account dashboard. When unchecked, they cannot cancel on their own, and cancellation is handled by you from the admin dashboard. This is useful for commitment or contract-style plans.
iv. Add to Cart Button Label #
The field overrides the default add-to-cart label on the product page. Enter wording such as ‘Subscribe Now’ to make it clear the customer is starting a subscription. Leave it blank to keep the default label.
Step 3: Save the Product #
Once your billing terms are set, update or publish the product as usual. Your WooCommerce product subscription is now live and ready to accept recurring payments.
What Your Customers See at Cart And Checkout #
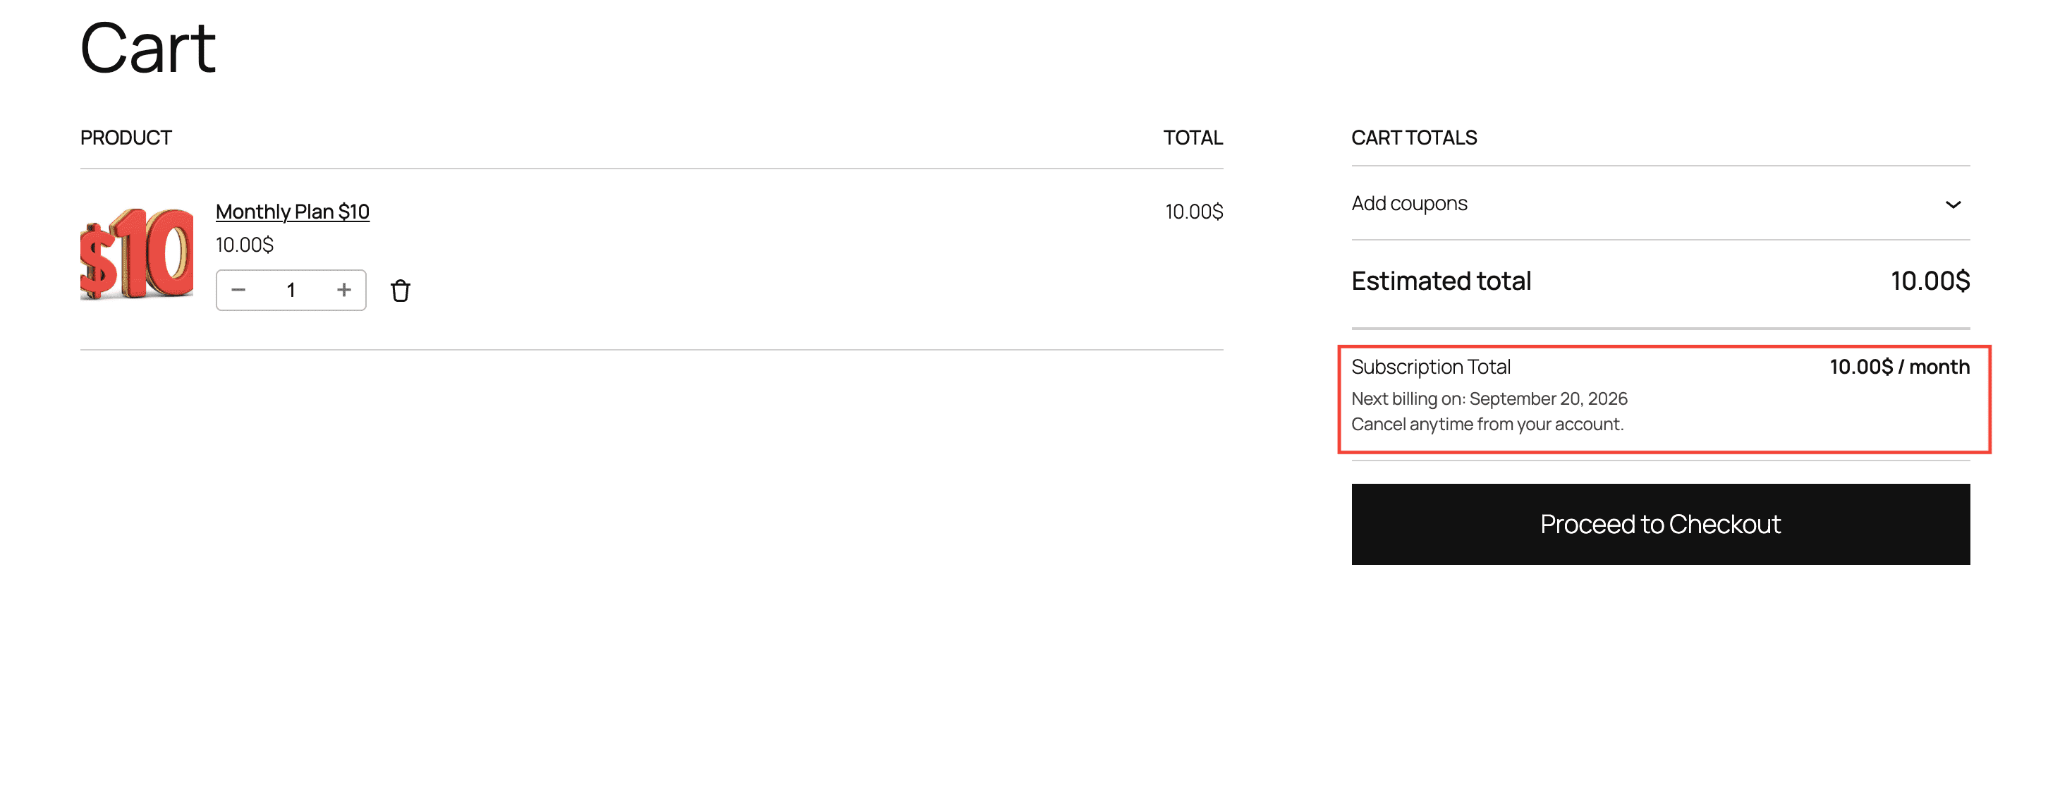
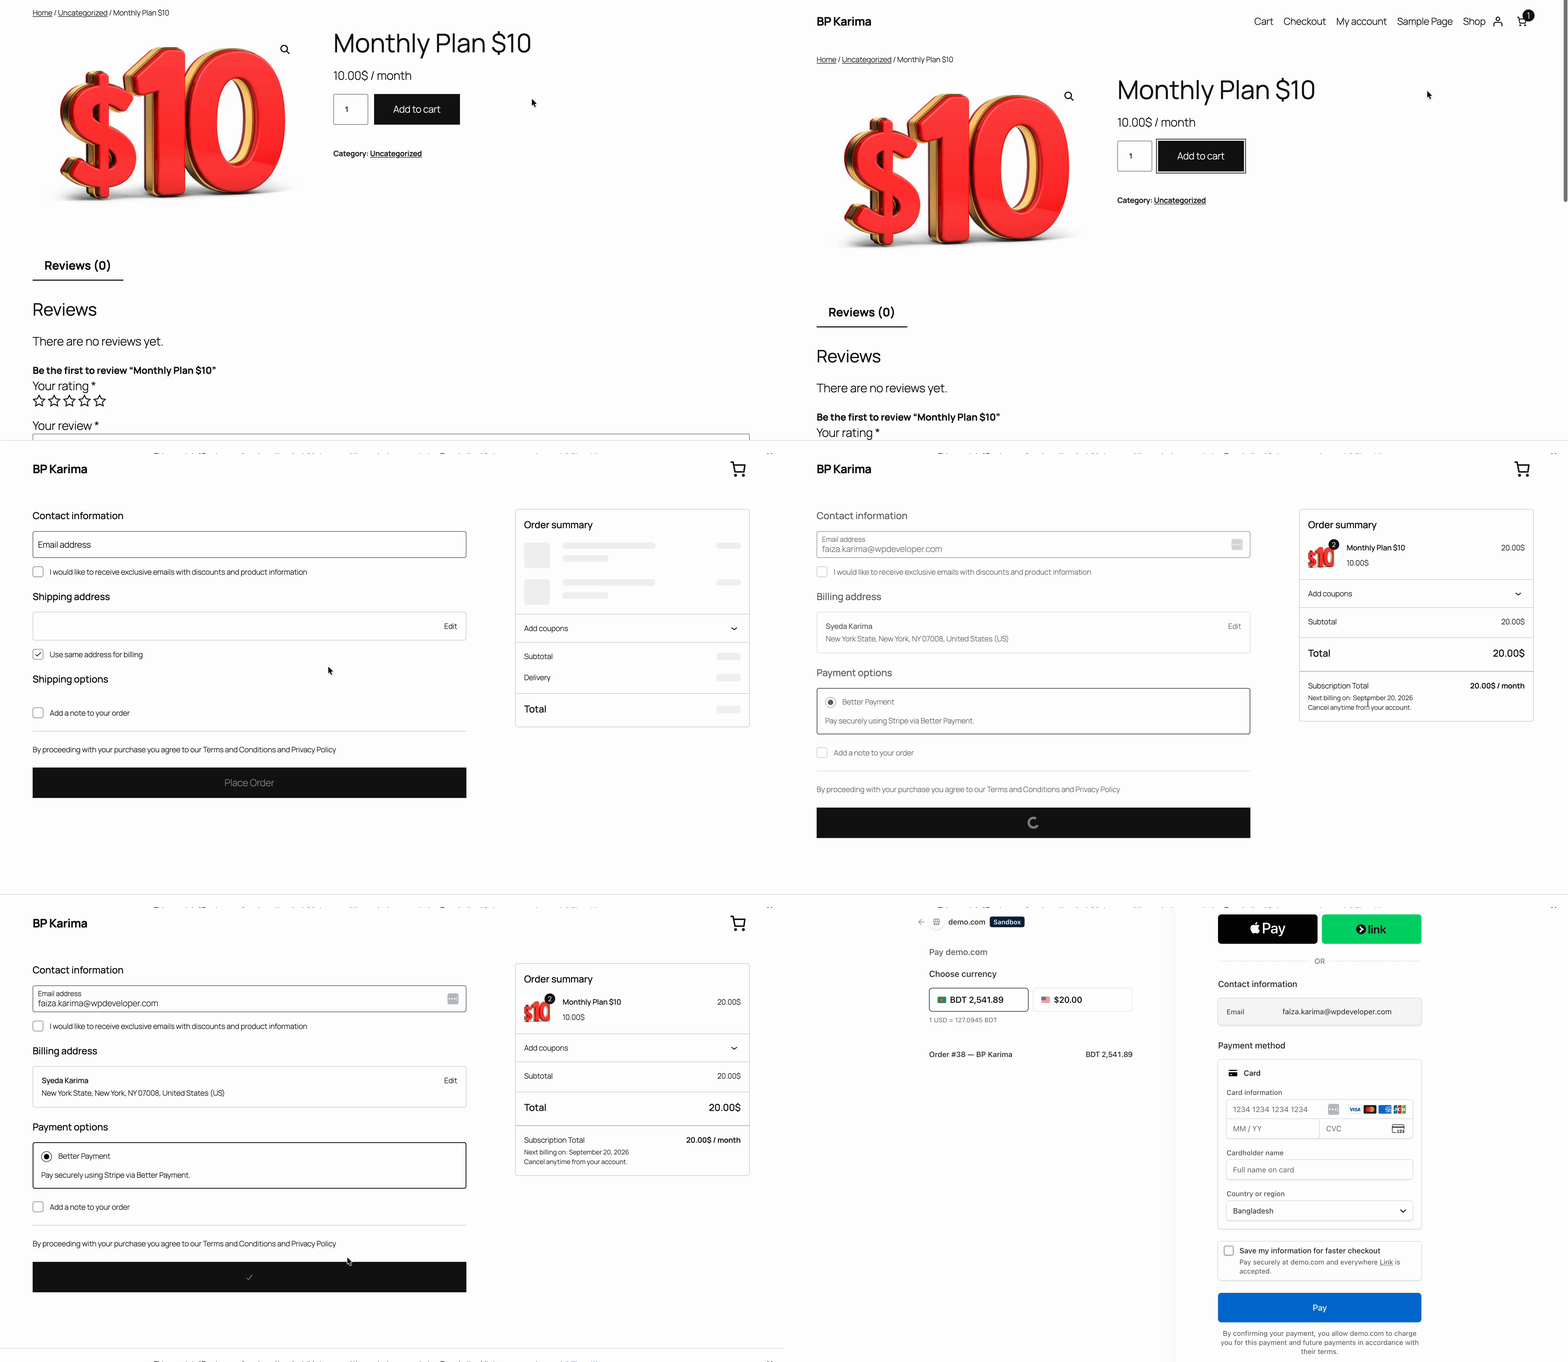
When a subscription product is in the cart, Better Payment makes the recurring nature of the purchase clear before the customer pays.
i. Subscription Billing Summary #
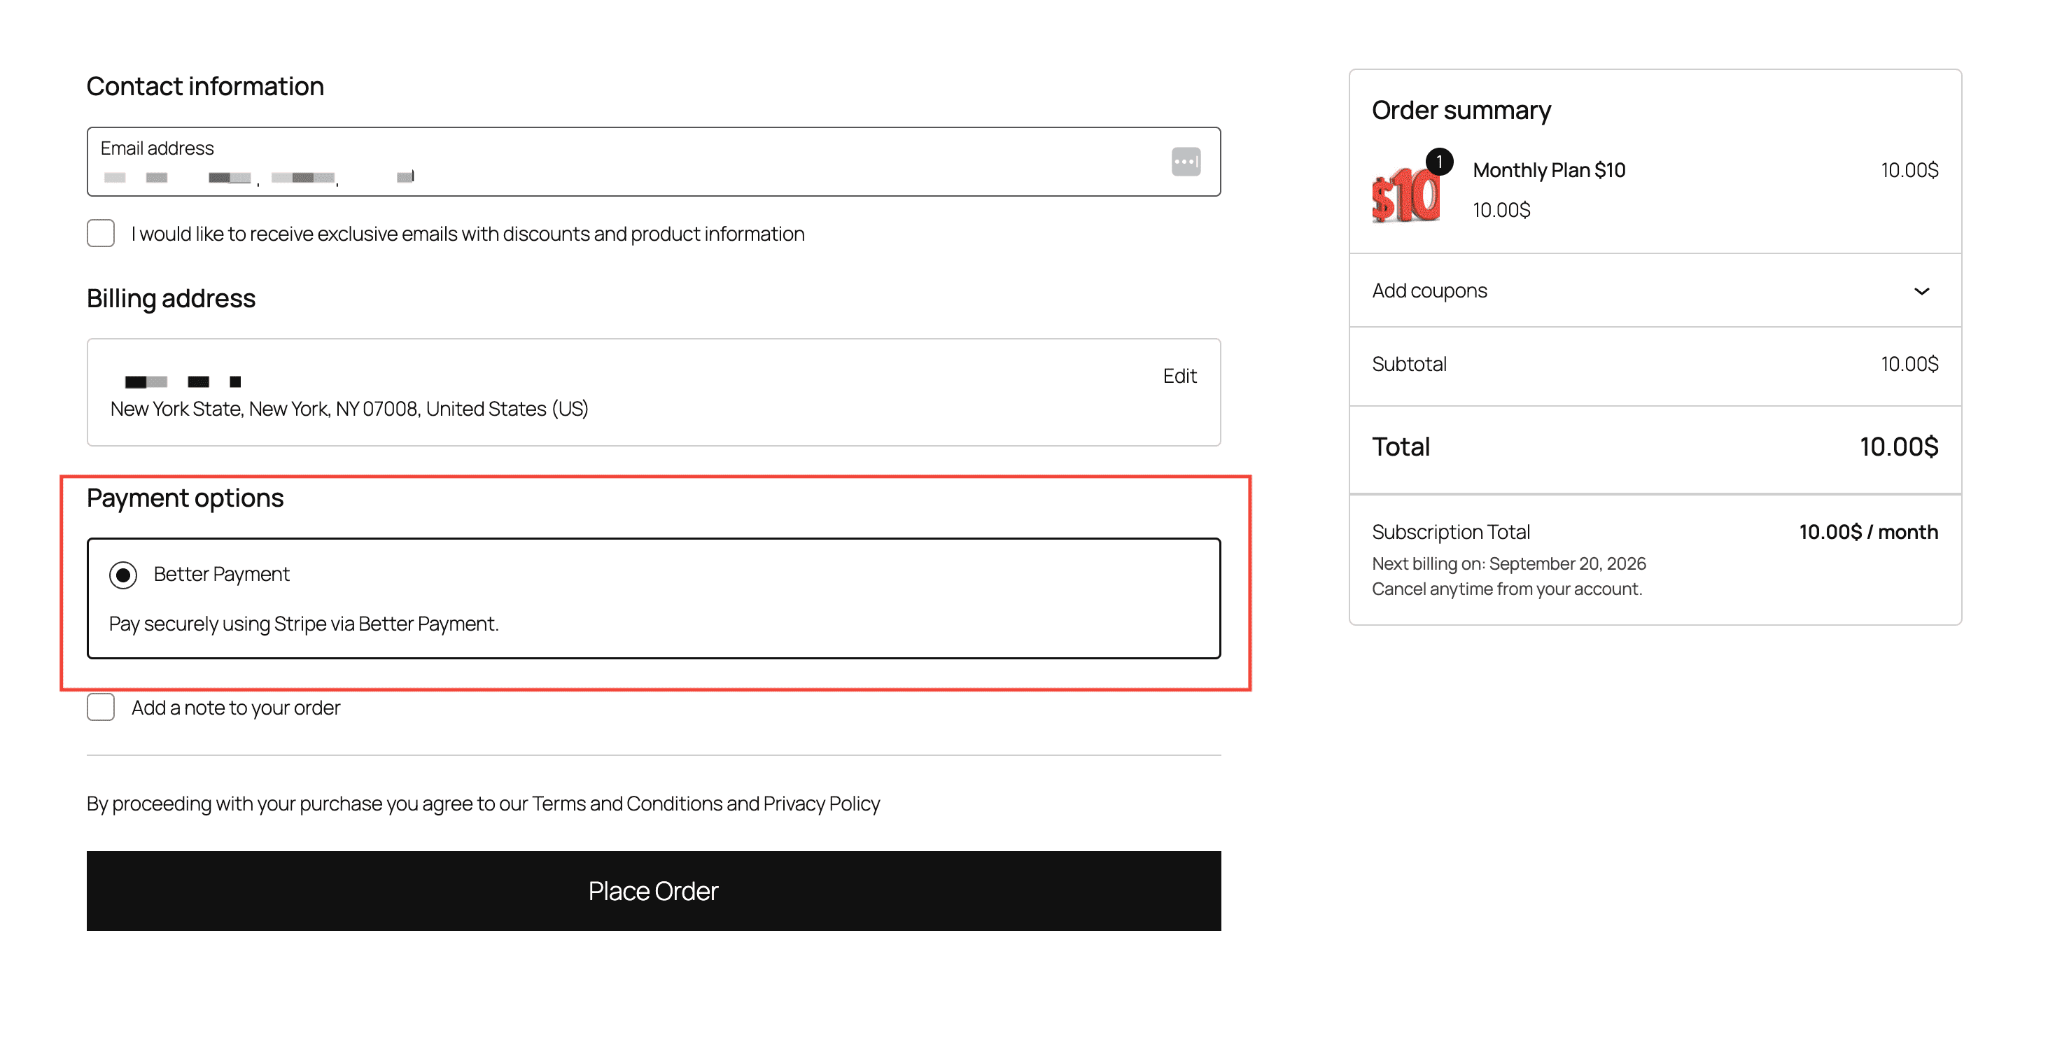
Directly below the ‘Total’ line on the cart and checkout pages, Better Payment adds a summary block that shows the recurring amount, the billing cadence, and the next billing date. For a daily plan it reads like “Subscription Total: 5.00$ / day” along with the next billing date and a reminder that the subscription can be cancelled at any time.
This block is generated automatically from the product’s subscription settings, so you do not need to configure it separately.
ii. Payment Gateway Restriction #
When a subscription is being purchased, the checkout shows only the Better Payment (Stripe) payment method. Other gateways you offer for one-time purchases are hidden automatically, so the customer gets one clear path for the recurring charge.
How to Manage Subscriptions from the Admin Dashboard #
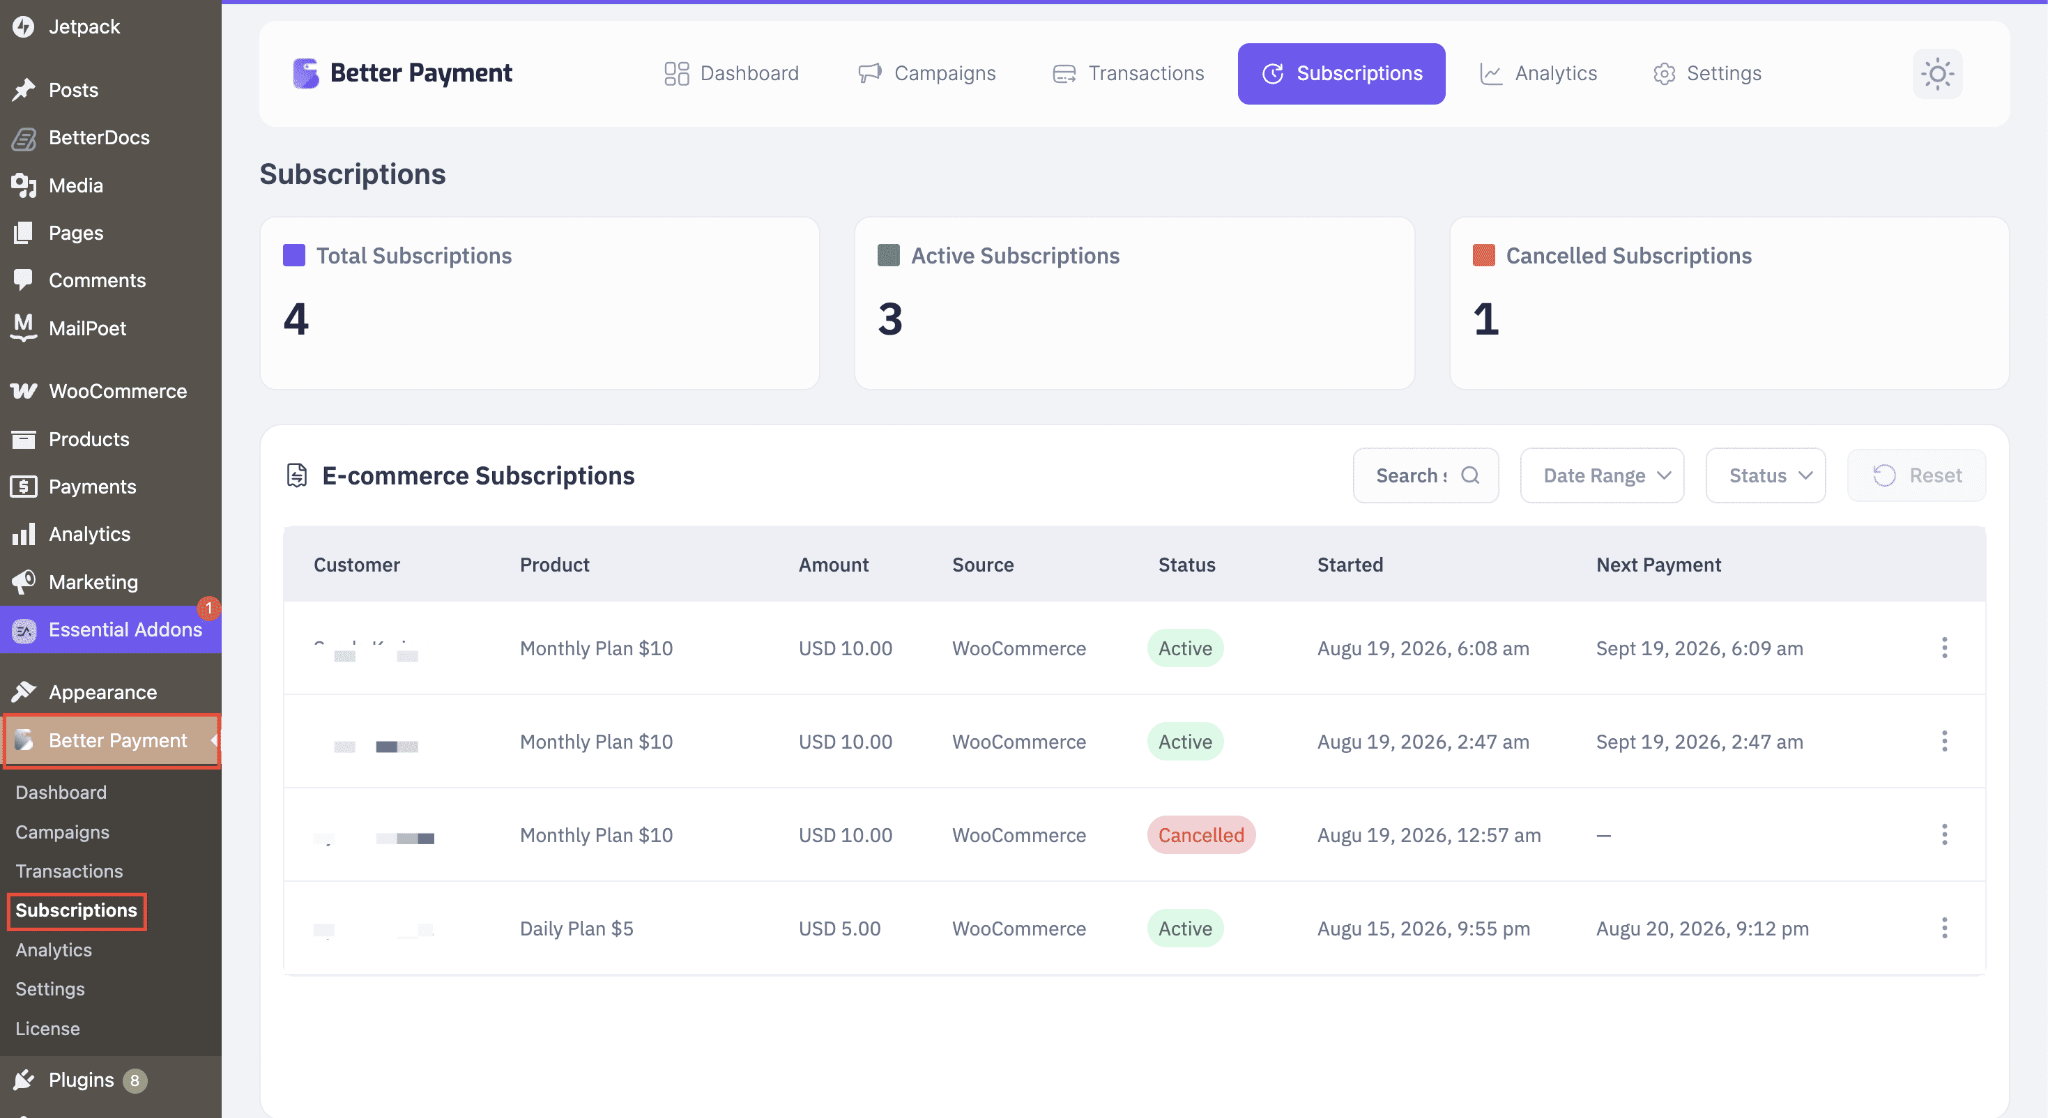
Every subscription created in your store is listed in one place. Go to ‘Better Payment’ → ‘Subscriptions’ from your WordPress dashboard.
i. Subscriptions Overview and Stats #
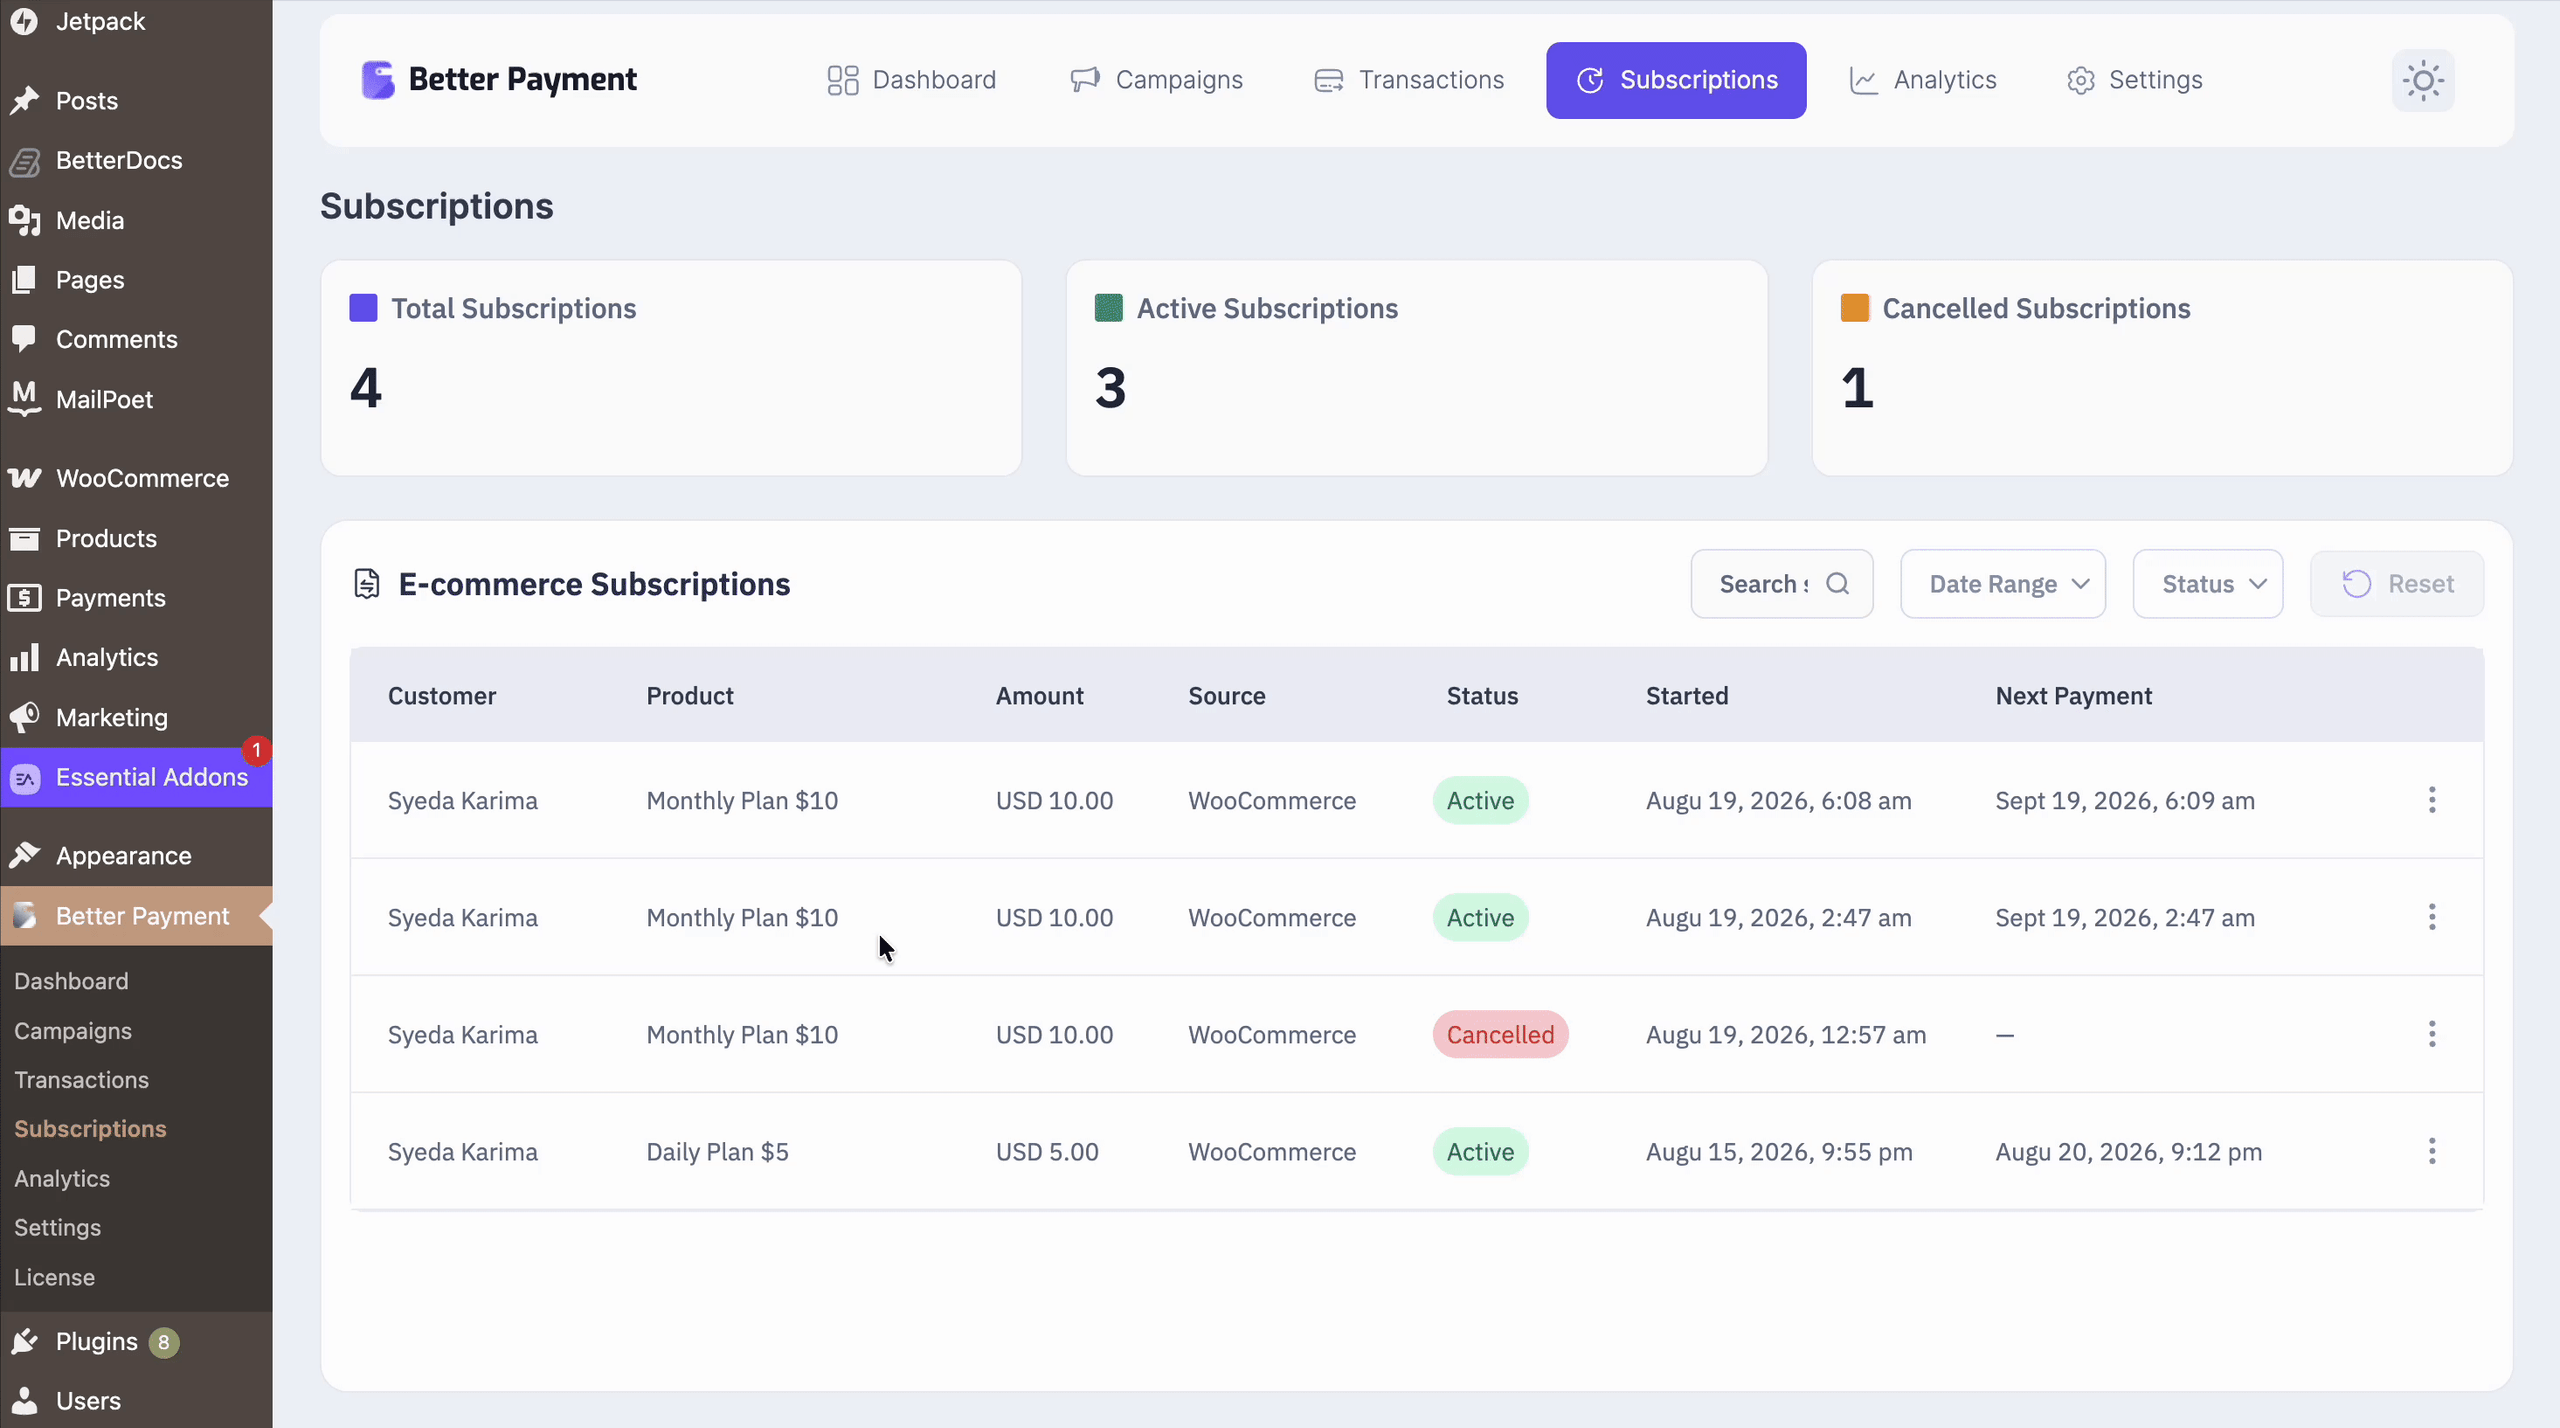
At the top of the page, summary cards give you an at-a-glance read on subscription health: Total Subscriptions, Active Subscriptions, and Cancelled Subscriptions.
ii. E-commerce Subscriptions Table #
Below the stat cards, the ‘E-commerce Subscriptions’ table lists one row per subscription with the Customer, Product, Amount, Source, Status, Started date, and Next Payment date. The Source column shows where the subscription came from, such as WooCommerce. A ‘⋮’ menu at the end of each row opens further actions, including the detailed view.
iii. Subscription Detail View #
Opening a row shows the full record for that subscription, organized into four panels:
- Customer Information: name and email, with a copy-to-clipboard icon.
- Related Orders: every WooCommerce order tied to the subscription, starting with the initial “New Subscription Order,” including order number, type, date, status, and total.
- Subscription Information: subscription ID, product, amount, billing cadence, status, started date, next payment date, Renewals count, and Auto Renewal state.
- Source: the platform (for example WooCommerce) and a direct link back to the originating WooCommerce order.
Final Outcome #
By following the steps above, you can turn any WooCommerce product into a recurring subscription with Better Payment, collect automatic payments through Stripe, and manage every subscription from a single dashboard. Your customers get a clear checkout, a self-service account view, and optional cancellation, all built on top of the WooCommerce store you already run.
Want to manage subscriptions created through payment forms as well? Check out How to Manage Subscriptions Using Better Payment.
Getting stuck? Feel free to contact our support team for further assistance.