Better Payment is a payment plugin for Elementor where you can seamlessly integrate with PayPal to collect and transfer money in a quick and simple process. It is an easy process to set up PayPal account with Better Payment, requiring only a few steps.
Let’s follow the simple step-by-step guidelines below to learn how you can effortlessly set up your PayPal account in Better Payment and carry out smooth transactions.
Note: To get started with your PayPal account in Better Payment, ensure you have installed and activated Elementor on your website.
How To Retrieve PayPal Credentials For Payment Form? #
Before you can set up PayPal account with Better Payment payment plugin, you need to retrieve the necessary credentials that are needed for the integration. Follow the steps below to retrieve the credentials.
Step 1.1: Create A PayPal Account #
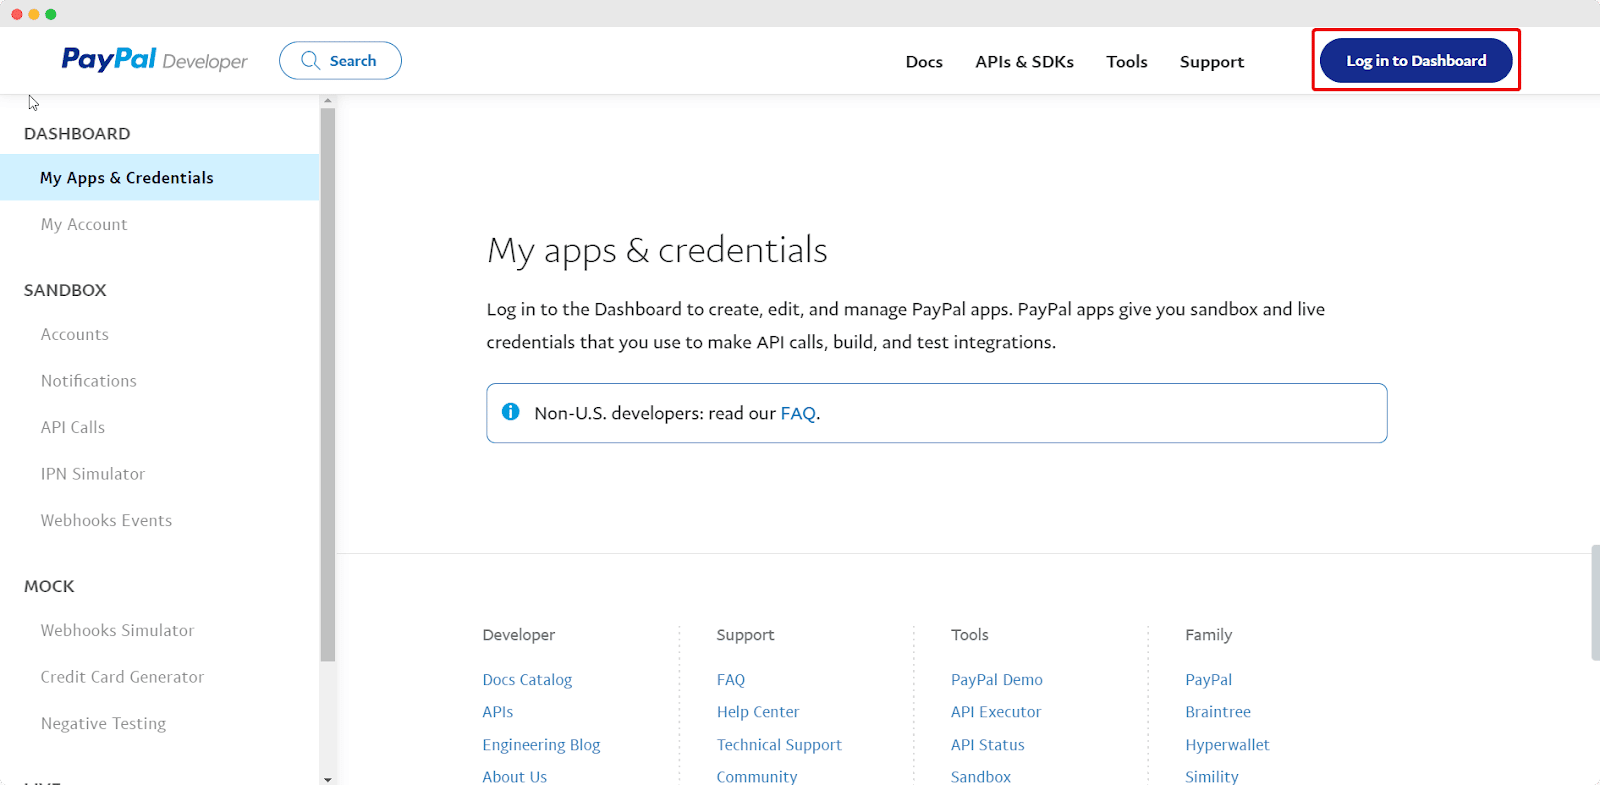
If you do not already have a PayPal account, you need to start off by creating a new one. To do so, go to the PayPal Developer site and click the ‘Login to Dashboard’ button, as shown below.
Here is the URL of PayPal Developer site: https://developer.paypal.com/home .
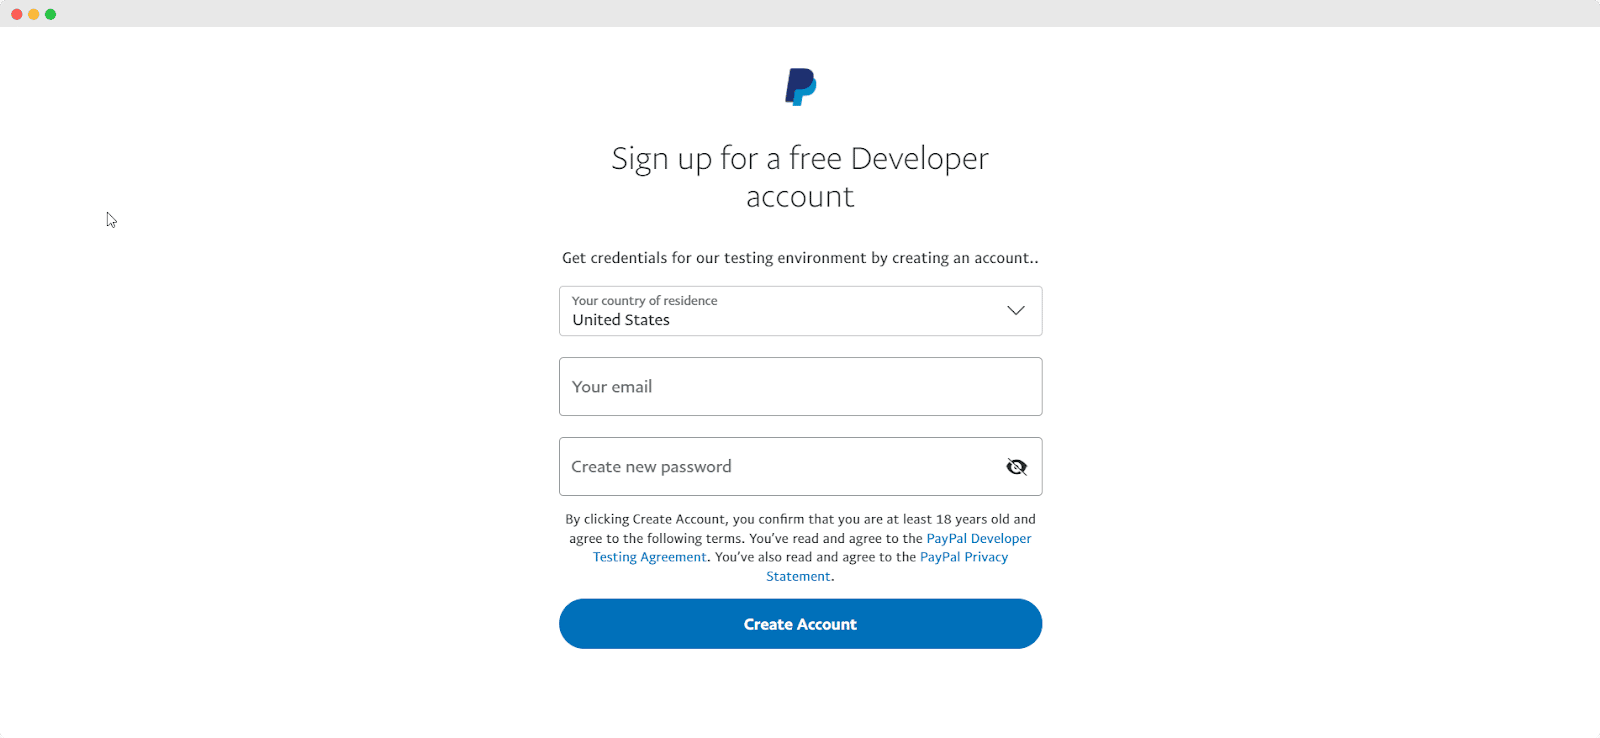
You will be redirected to the following window to sign up for a free Developer account. Provide the required information, as you can see from the image below to create your new account. Once done, click on the ‘Create Account‘ button to move to the next step.
Step 1.2: Copy The Business Email ID #
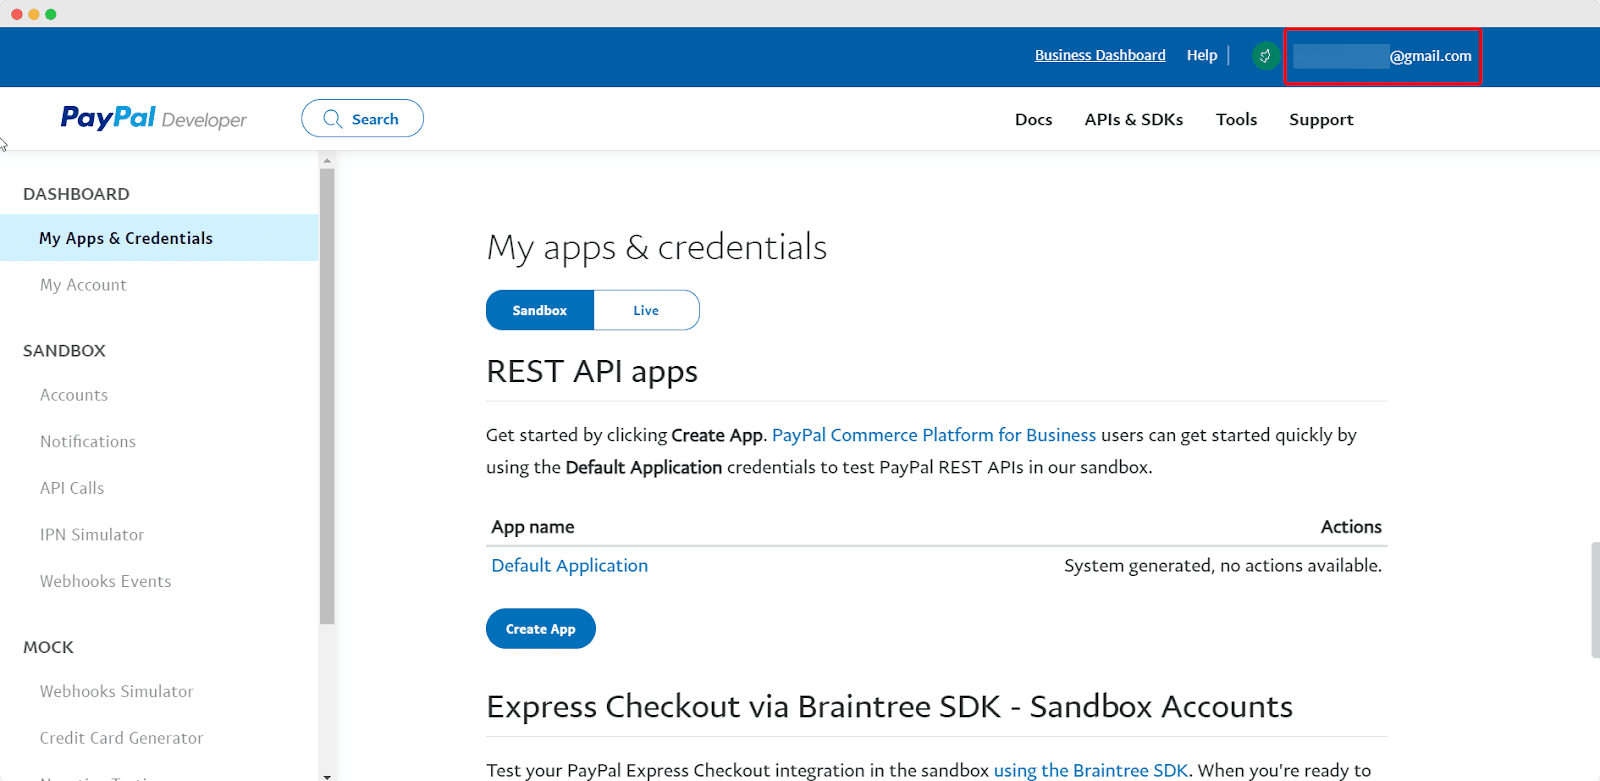
After you have set up your account, you need to retrieve the necessary credentials. Copy the ‘Business Email ID’ you used for creating the account as marked on the image below. You will need this ID to integrate and set up PayPal account with Better Payment.
How To Integrate PayPal Account With Better Payment In WordPress? #
There are two methods to integrate and set up PayPal account with Better Payment: by direct integration from the WordPress dashboard or by integrating from the Elementor editor panel.
Follow the easy step below to integrate PayPal with Better Payment straight from your website dashboard:
Step 2.1: Input The Retrieved Business Email ID #
Navigate to Better Payment → Settings → Payment. When you click on ‘Payment’ on the side panel, you will see an option to configure PayPal account settings from the drop-down menu that appears. Paste the copied Business Email ID in the Business Email field as marked below.
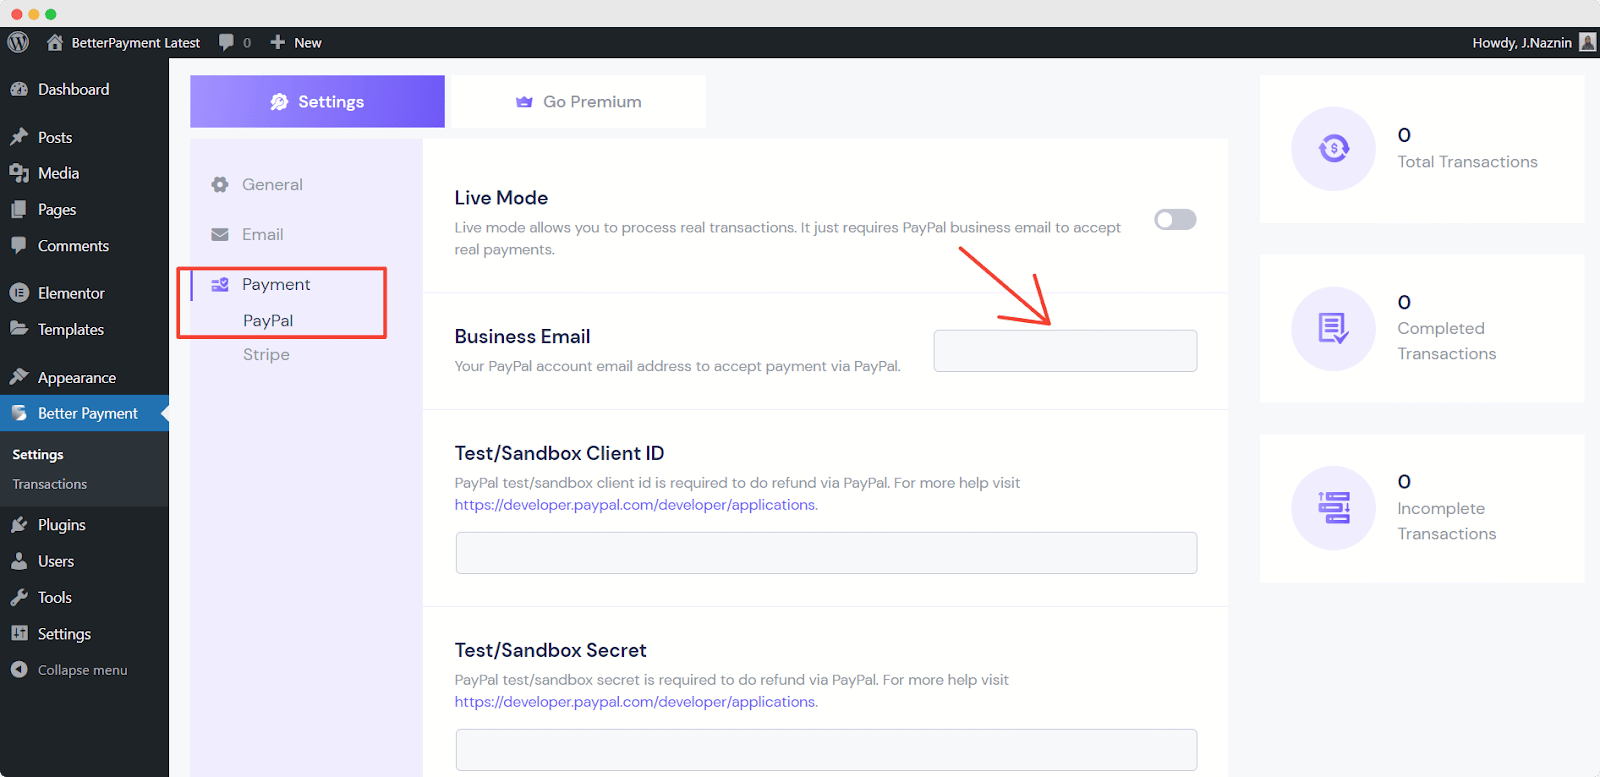
Note: If you want to carry out real transactions on your WordPress website, make sure to click on the ‘Live Mode‘ button to enable PayPal settings in real time. If the toggle button is disabled, it means you are in ‘Test Mode‘ and are only testing the feature out with no live payment.
How To Integrate PayPal Account With Better Payment In Elementor? #
To set up your PayPal account from the Elementor panel, follow the step-by-step guidelines as directed here.
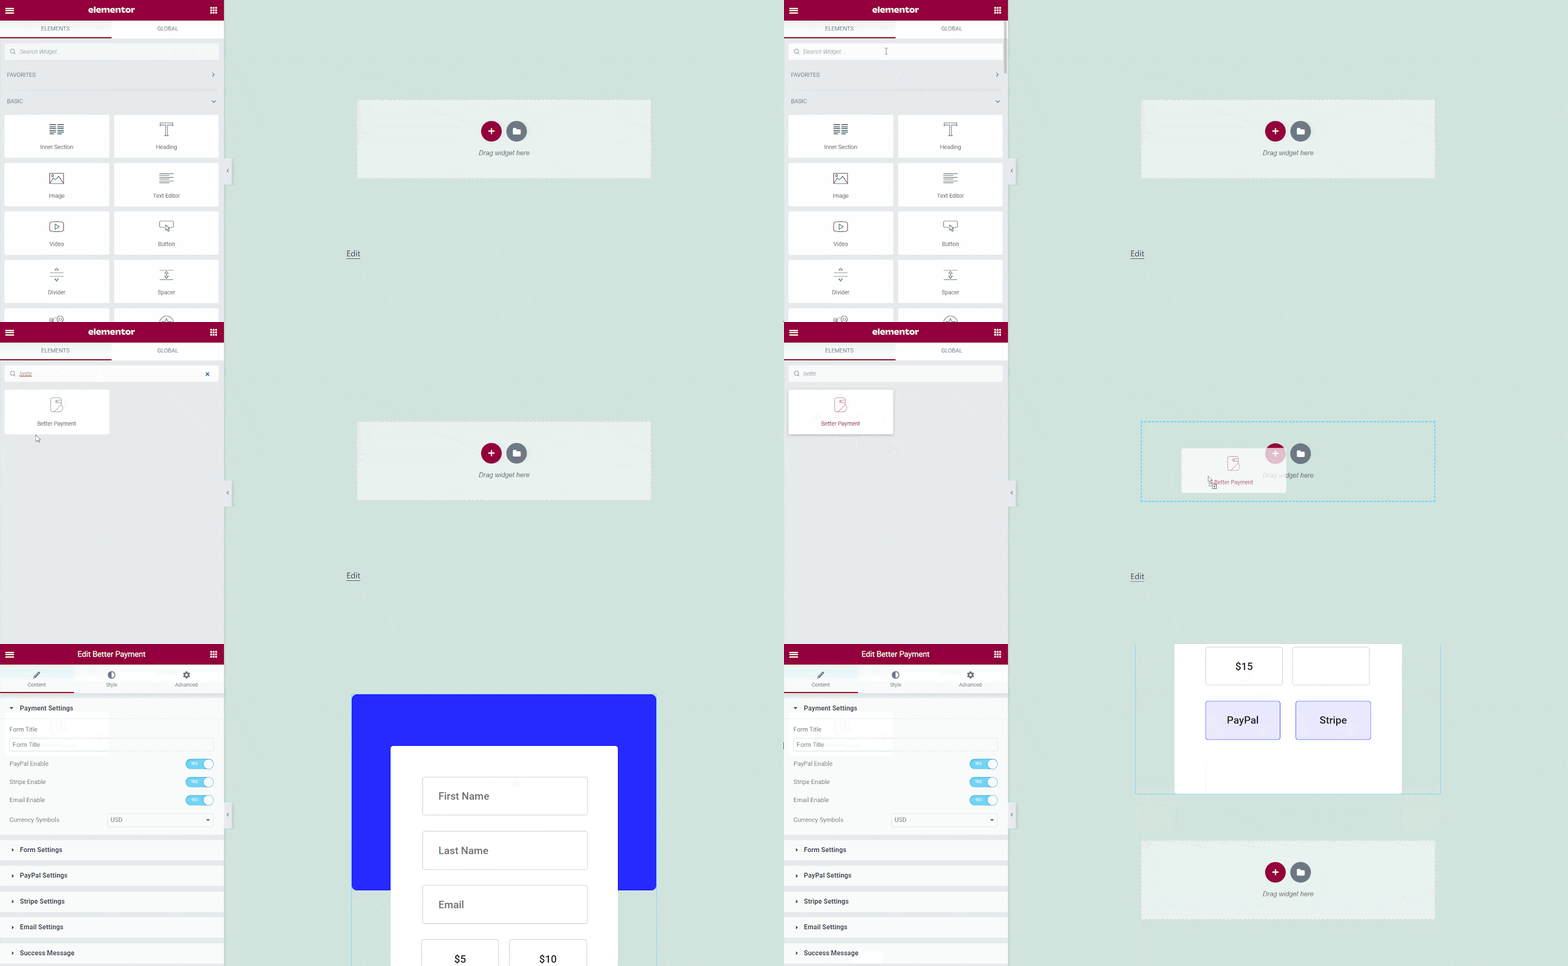
Step 3.1:Drag & Drop The Better Payment Widget #
For integrating your PayPal account with Better Payment, first, open a page where you want to integrate Better Payment. Click on the ‘Edit with Elementor‘ button to get started. Then search for the ‘Better Payment’ widget and drag & drop it into your page.
Step 3.2: Paste The Business Email ID #
First, under the ‘Payment Settings’ drop-down menu, click on the toggle button next to ‘PayPal’ to enable the feature in Better Payment.
Then, go to the PayPal Settings drop-down menu option and paste your PayPal Business Email ID that you copied in the relevant field. Again, make sure to turn on the ‘live mode’ to proceed with real-time transactions. On enabling Live Mode, all transactions made are sent to the institutions for processing.
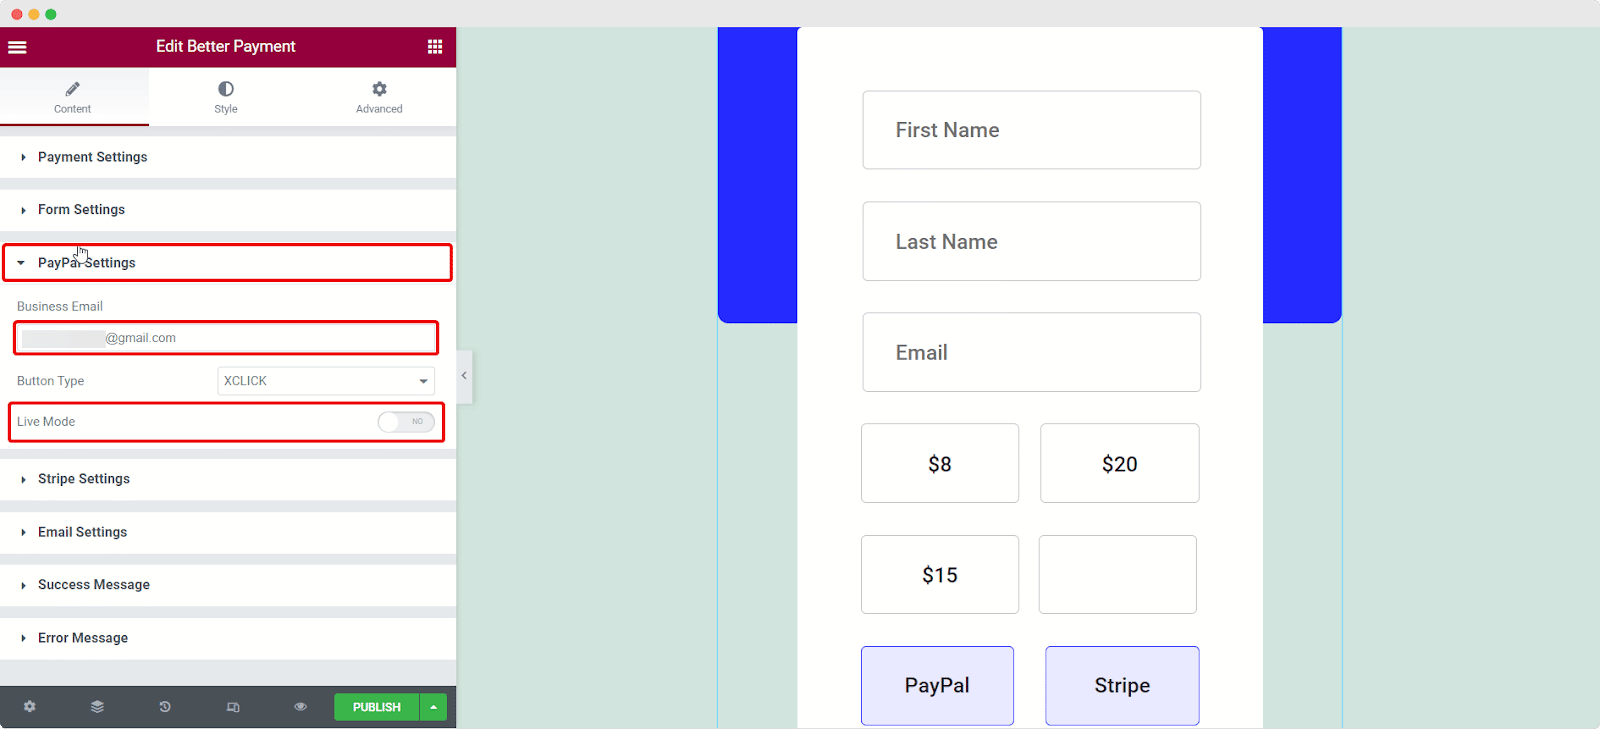
Now you are all set with your PayPal account in Better Payment from the Elementor editor directly.
This is how you can set up PayPal account with Better Payment in Elementor for a better transaction experience online using both the easy methods mentioned above.
Getting stuck? You are welcome to contact our dedicated support team to get further assistance.


