With the Better Payment plugin, users can easily create and manage subscription forms seamlessly. Now you can provide the facility to preview the subscriber User Dashboard by integrating an addon which is named User Dashboard using Better Payment. Your subscribers can directly see subscription details, take action, unsubscribe and much more.
Follow this step-by-step guideline to configure the User Dashboard and display customer subscription details from a website.
How to Configure the User Dashboard using Better Payment? #
Note: Subscription is a Pro feature of Better Payment. So you must install and activate Better Payment Pro.
Let’s check out how to configure the User Dashboard in Better Payment.
Preview of User Dashboard in Elementor Using Better Payment #
Follow the step-by-step process below to get a preview of the user dashboard on your Elementor website.
Step 1: Setup Subscription Using Better Payment #
First, you have to set up a subscription form. After that, when customers start to subscribe, all the data will be stored in the User Dashboard. To set up the subscription form, open a page on Elementor. Then select ‘Layout 4 | General’ from Layouts. Then set Payment Type as ‘Recurring’. Customize the styling of the subscription form.
After making all the changes, make the form live. This is how easily you can create a subscription form with Better Payment and start collecting subscriptions.

Check out the detailed process of configuring a subscription with Better Payment following this documentation.
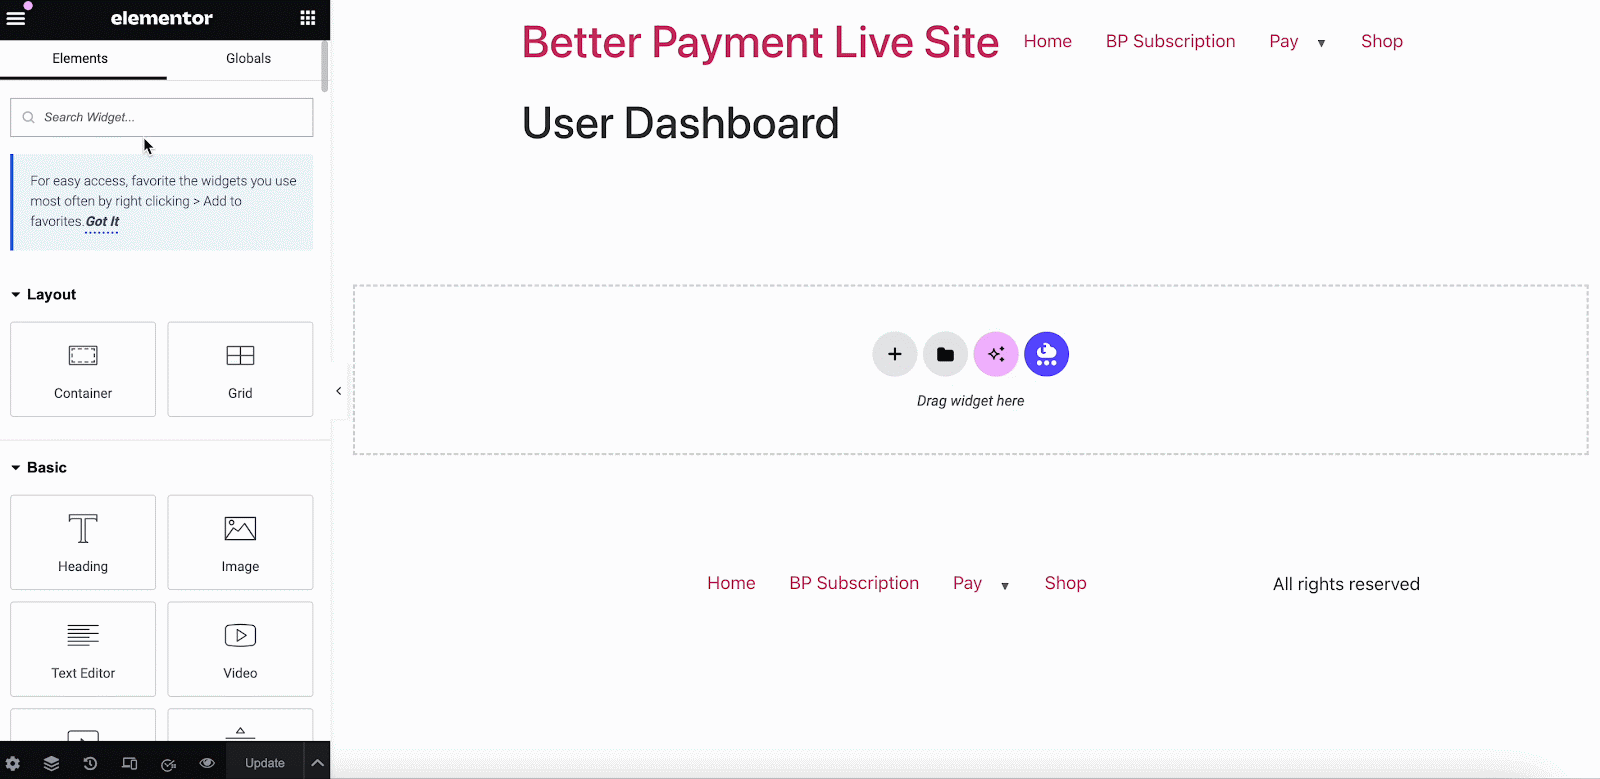
Step 2: Integrate the User Dashboard widget on Better Payment #
You can easily find the User Dashboard addons in the Elementor widgets library, as the addons will be auto-installed with the Better Payment plugin. Now open a page where you want to display the subscription User Dashboard.
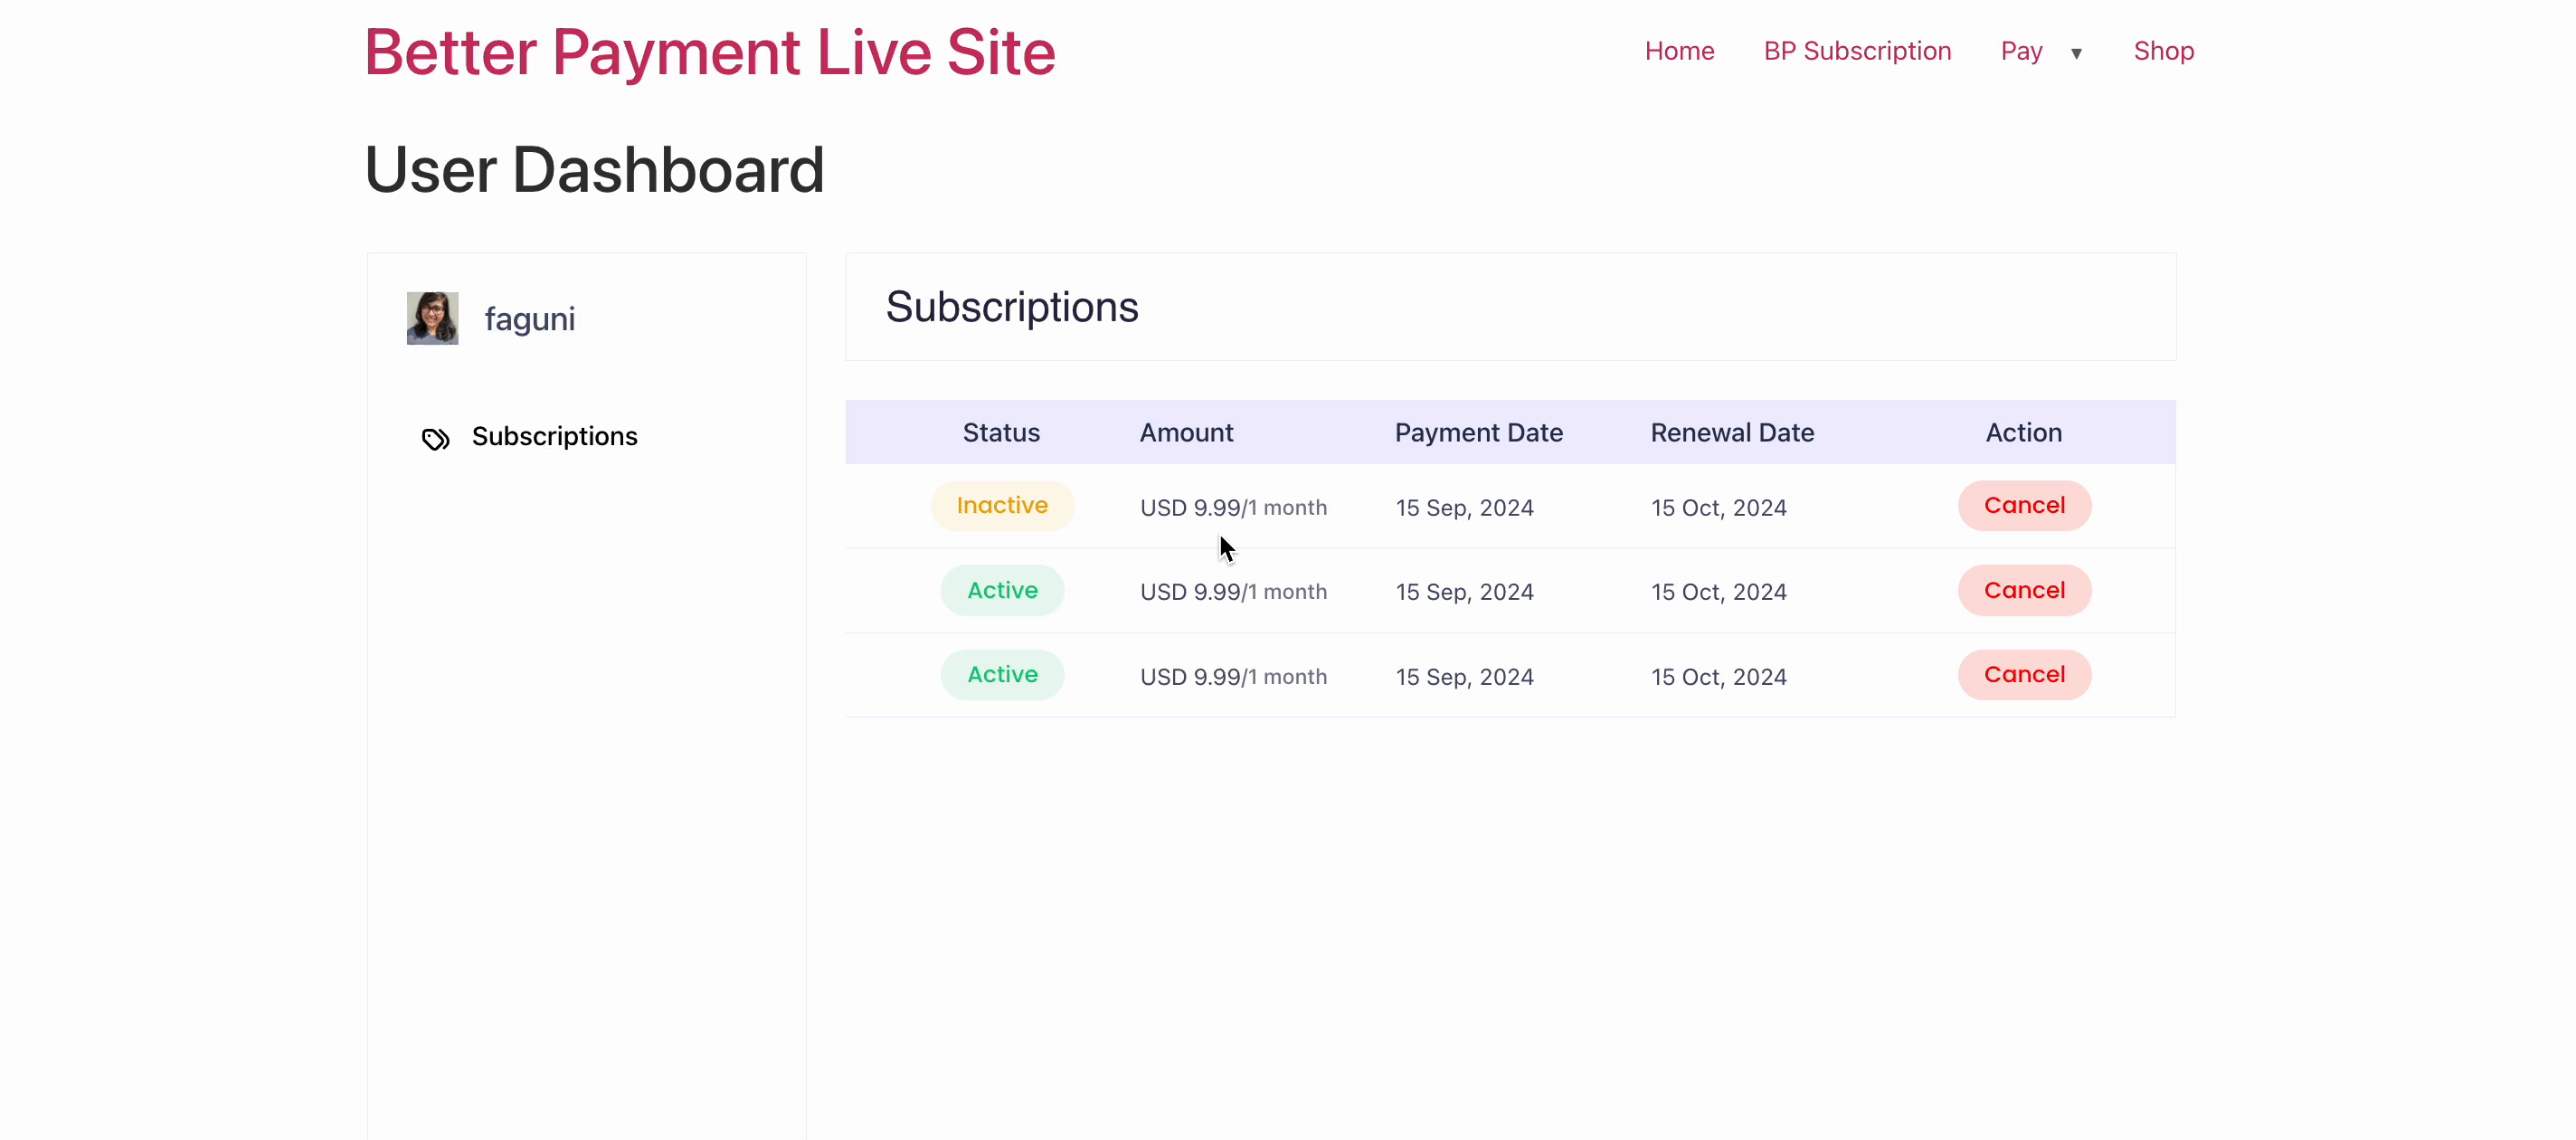
Search for the ‘User Dashboard’ widget, then drag and drop it into the page. The User Dashboard will be previewed as below. If you’ve already subscribed via the payment form, your data log will be displayed unless the log will be empty. For the tutorial purpose, we have made subscriptions via admin ID.
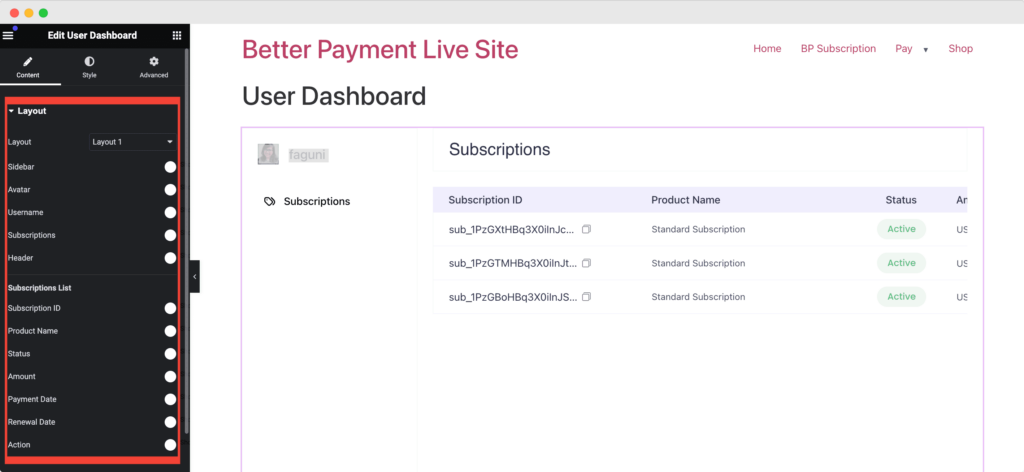
Step 3: Customize the User Dashboard Appearance #
Better Payment offers tons of customization options for the subscriber User Dashboard. Go to the ‘Layout’ tab. From there you can enable and disable these settings: Sidebar, Avatar, User Name, Subscriptions, Subscription ID, Product Name, Status, Amount, Payment Date, Renewal Date, etc.
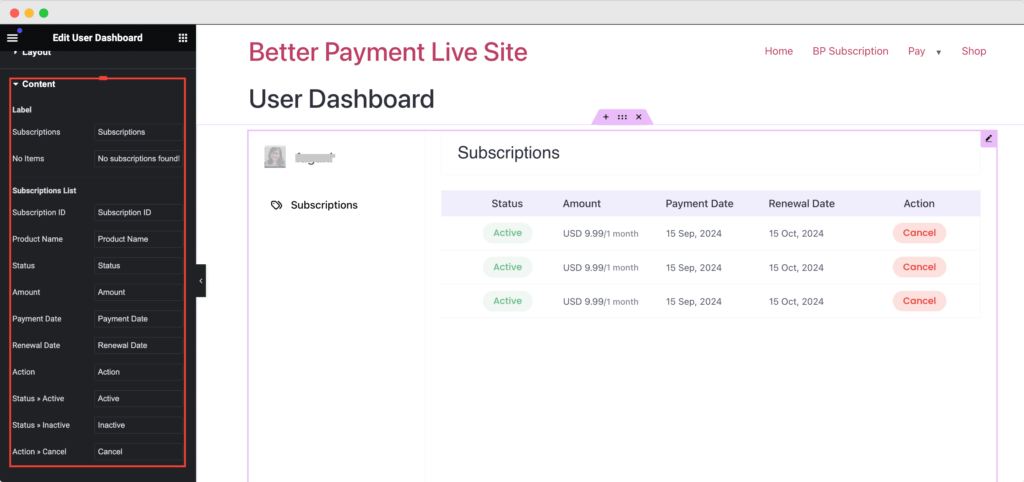
From the ‘Content’ tab, you can update the labels heading, column name, Actions names, etc. You Can modify all of these from here.
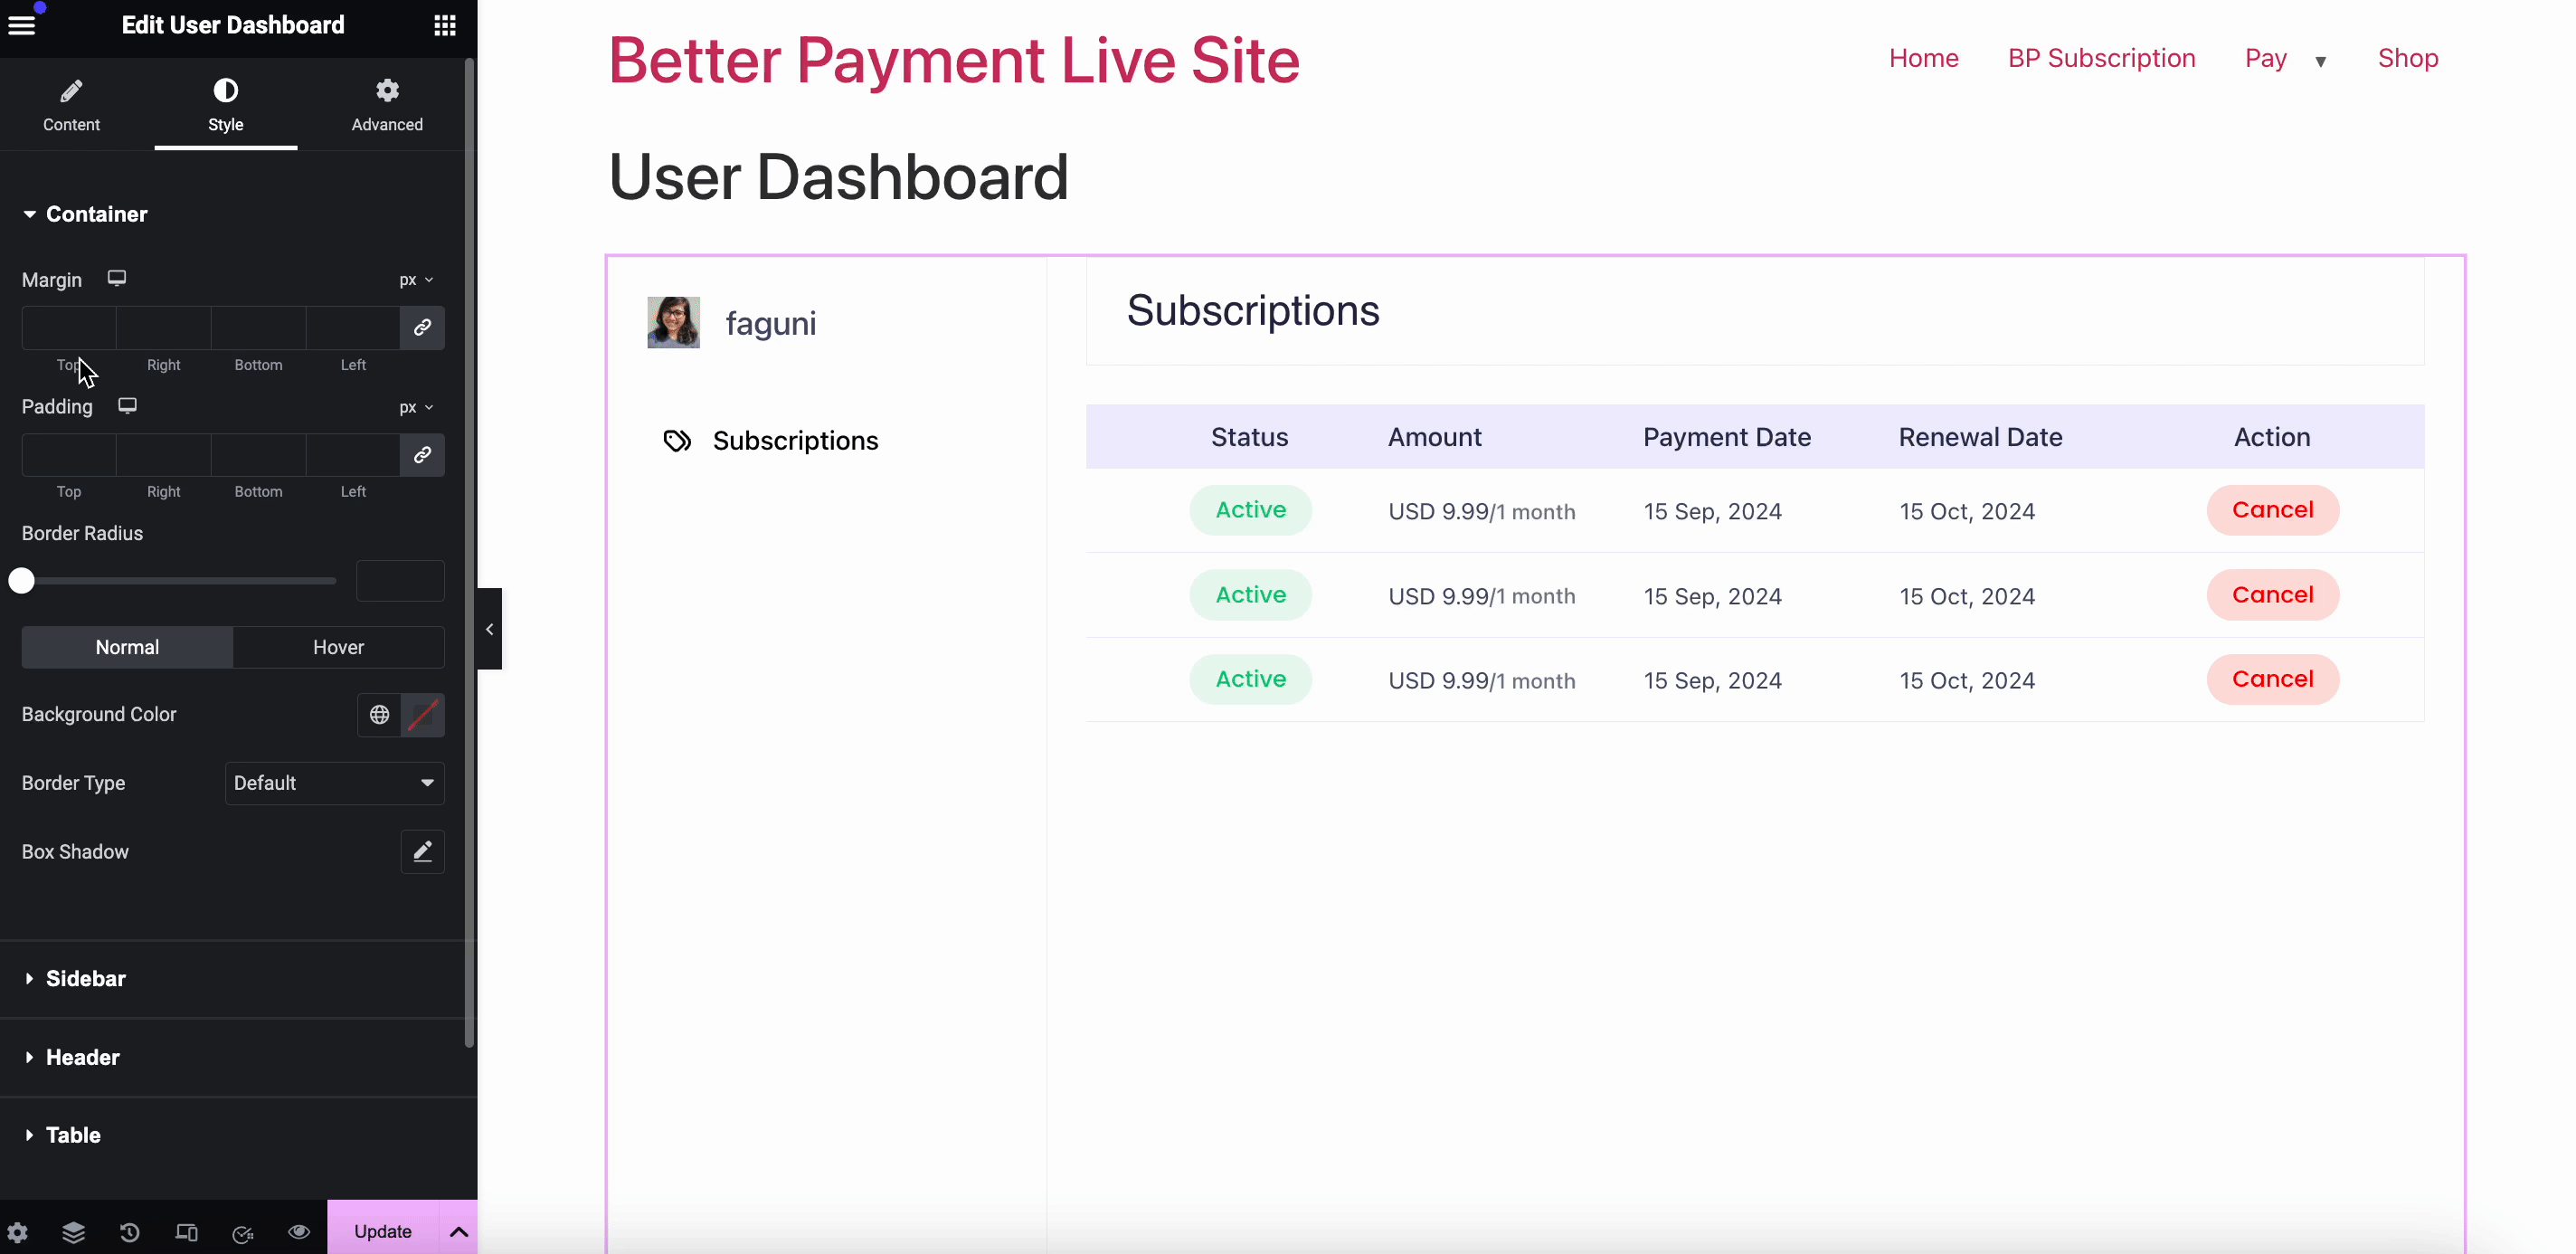
From the ‘Style’ tab, you can customize the container’s Margin, Padding, Border Radius, Hover Effect, etc. You can make more customizations from the ‘Advanced’ tab, like enabling Z-index, custom CSS, etc.
After making all the changes, you can publish the Subscriber User Dashboard. If any subscriptions are canceled, the status will be previewed as ‘Inactive’ in the front end.
Preview of User Dashboard in Gutenberg Using Better Payment #
Follow the step-by-step process below to get a preview of the user dashboard on your Gutenberg website.
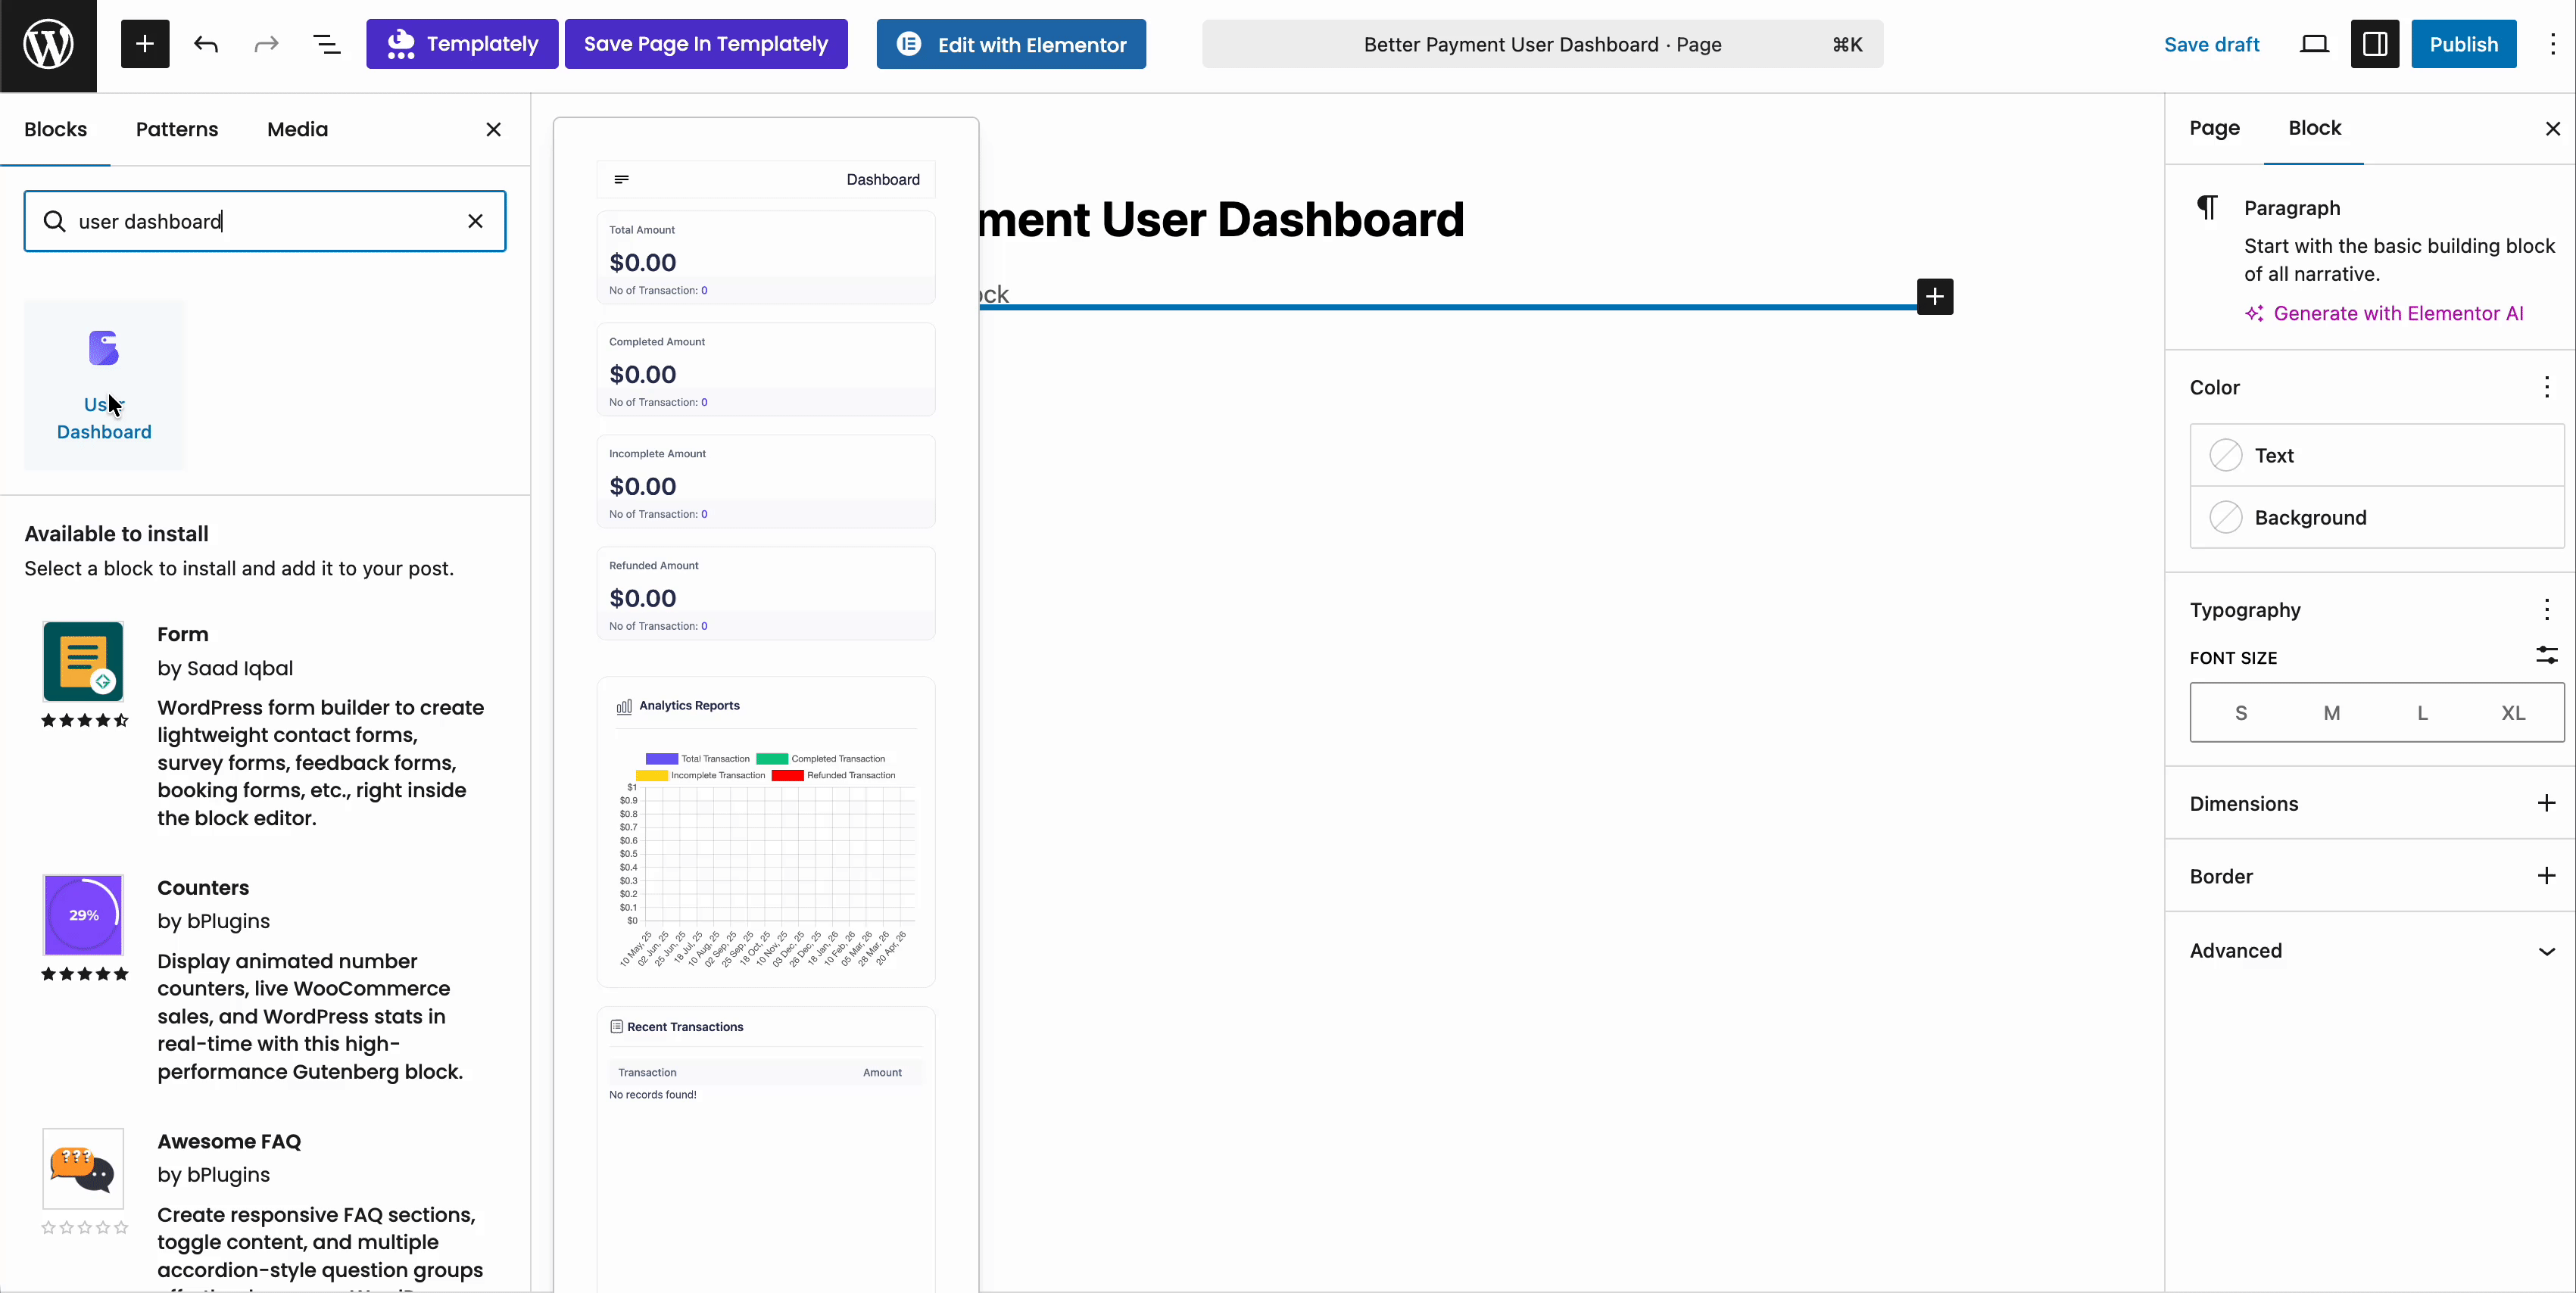
Step 1: Integrate the User Dashboard Block on Better Payment #
You can easily find the User Dashboard block in the Gutenberg block library, as the block will be auto-installed with the Better Payment plugin. Now open a page where you want to display the subscription User Dashboard.
Search for the ‘User Dashboard’ block, then drag and drop it into the page. The User Dashboard will be previewed as follows. If you’ve already subscribed via the payment form, your data log will be displayed unless the log is empty. For tutorial purposes, we have made subscriptions via the admin ID.
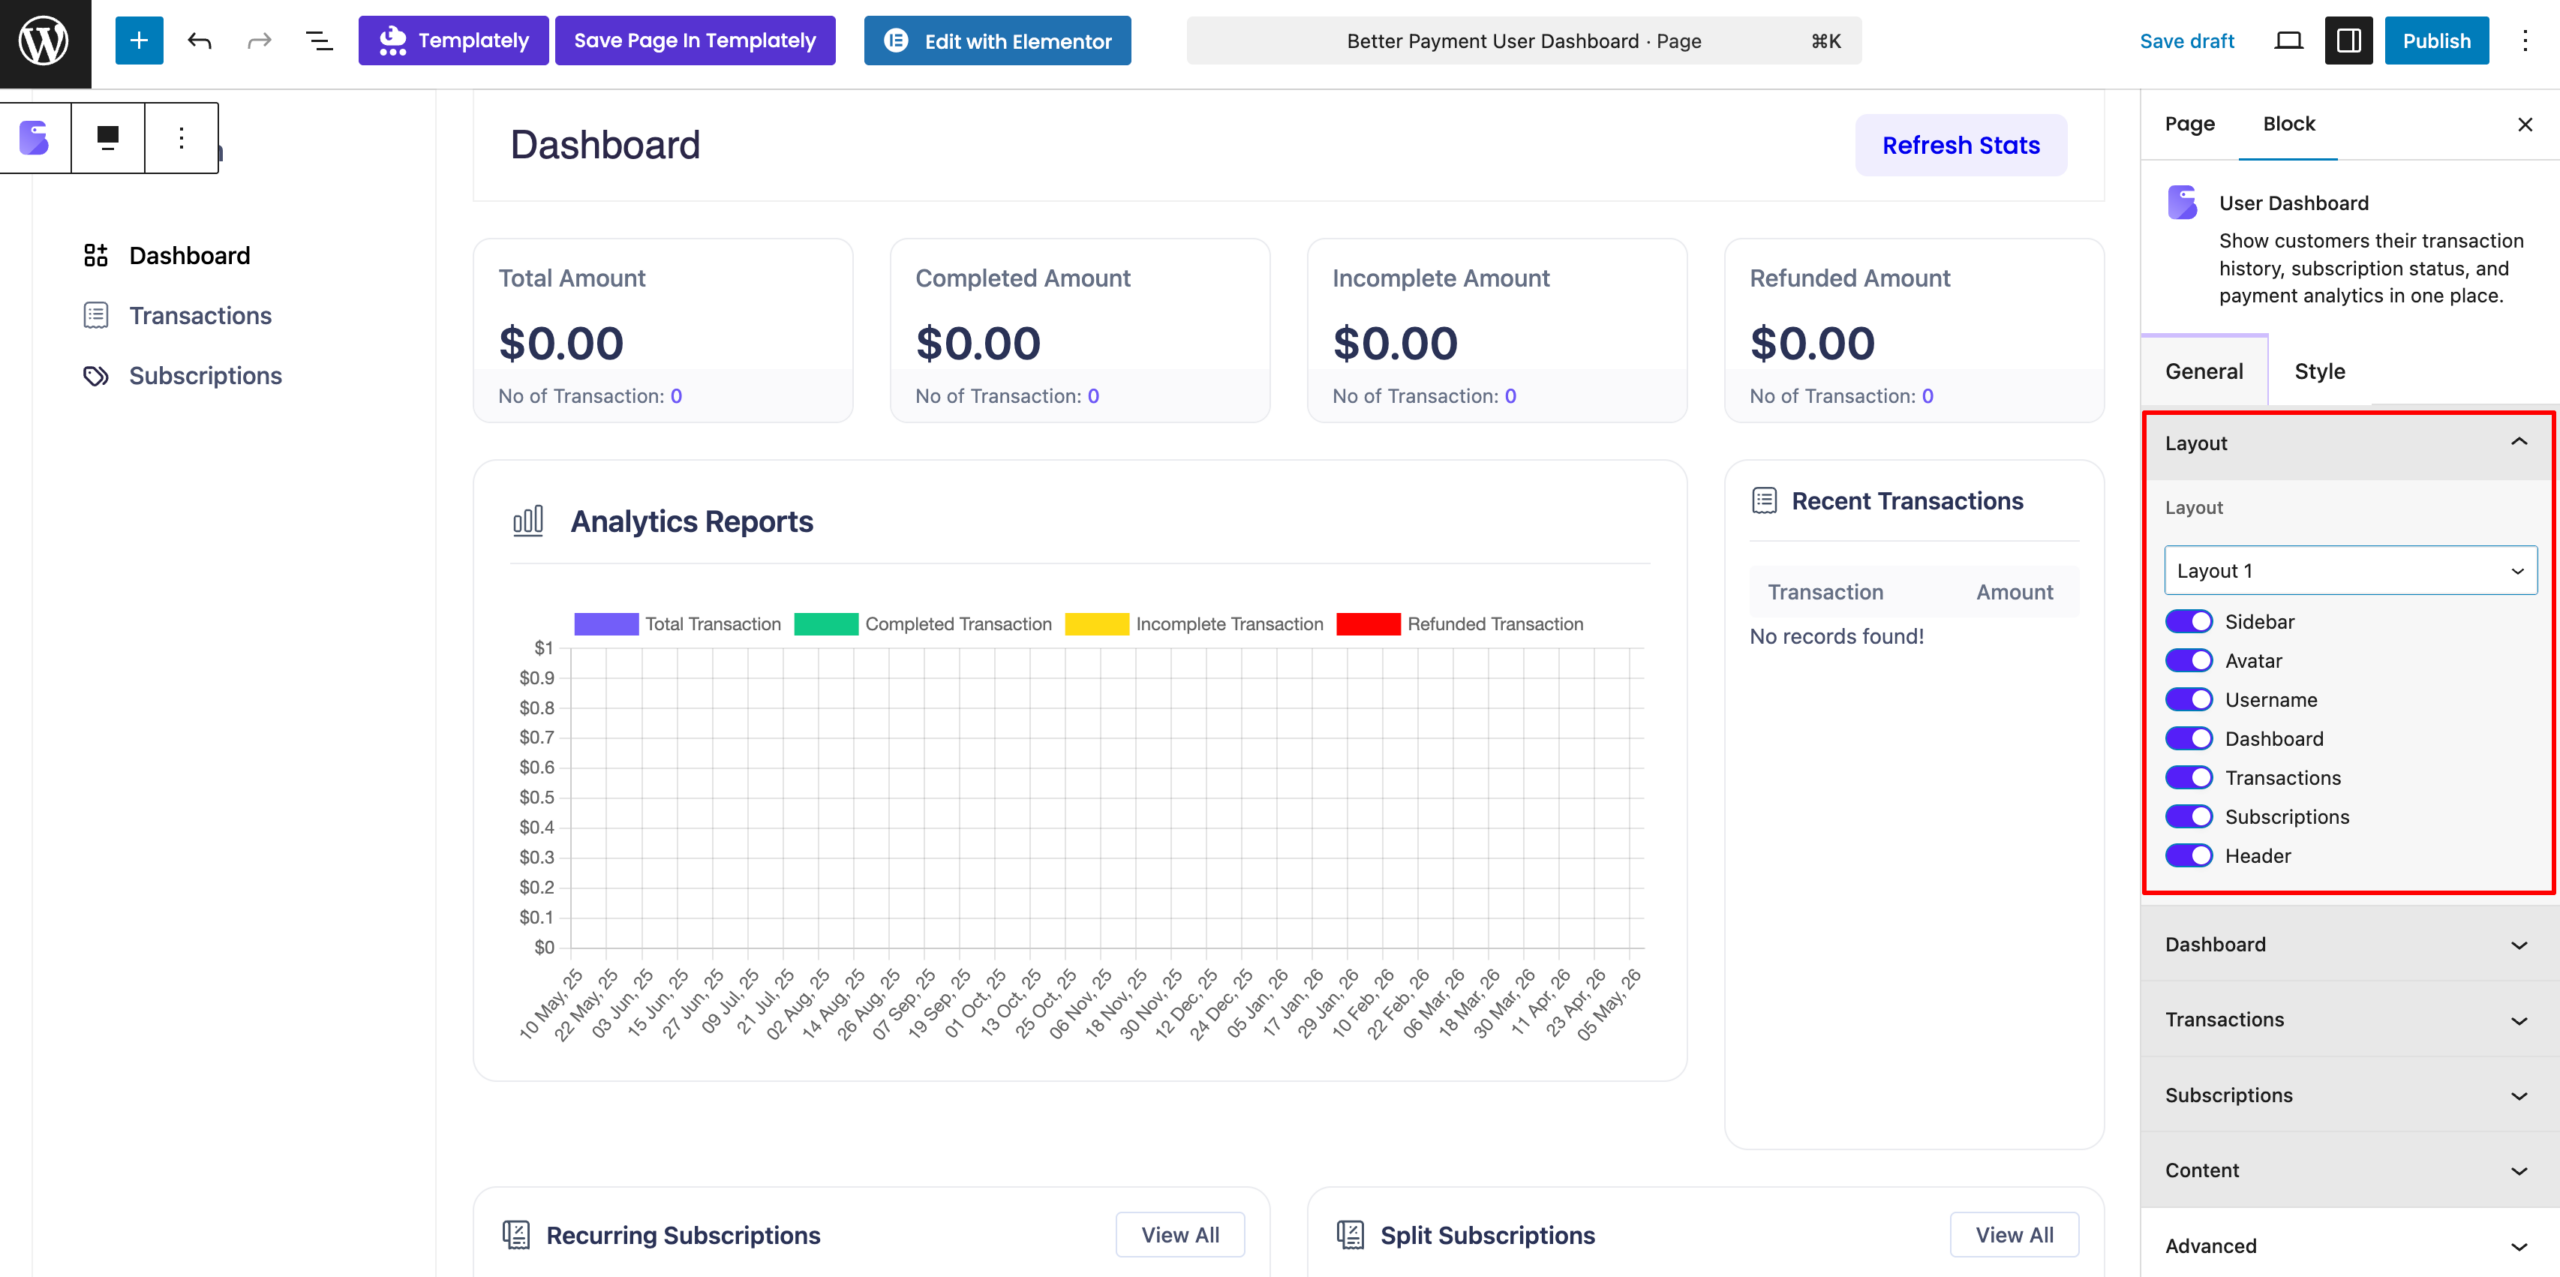
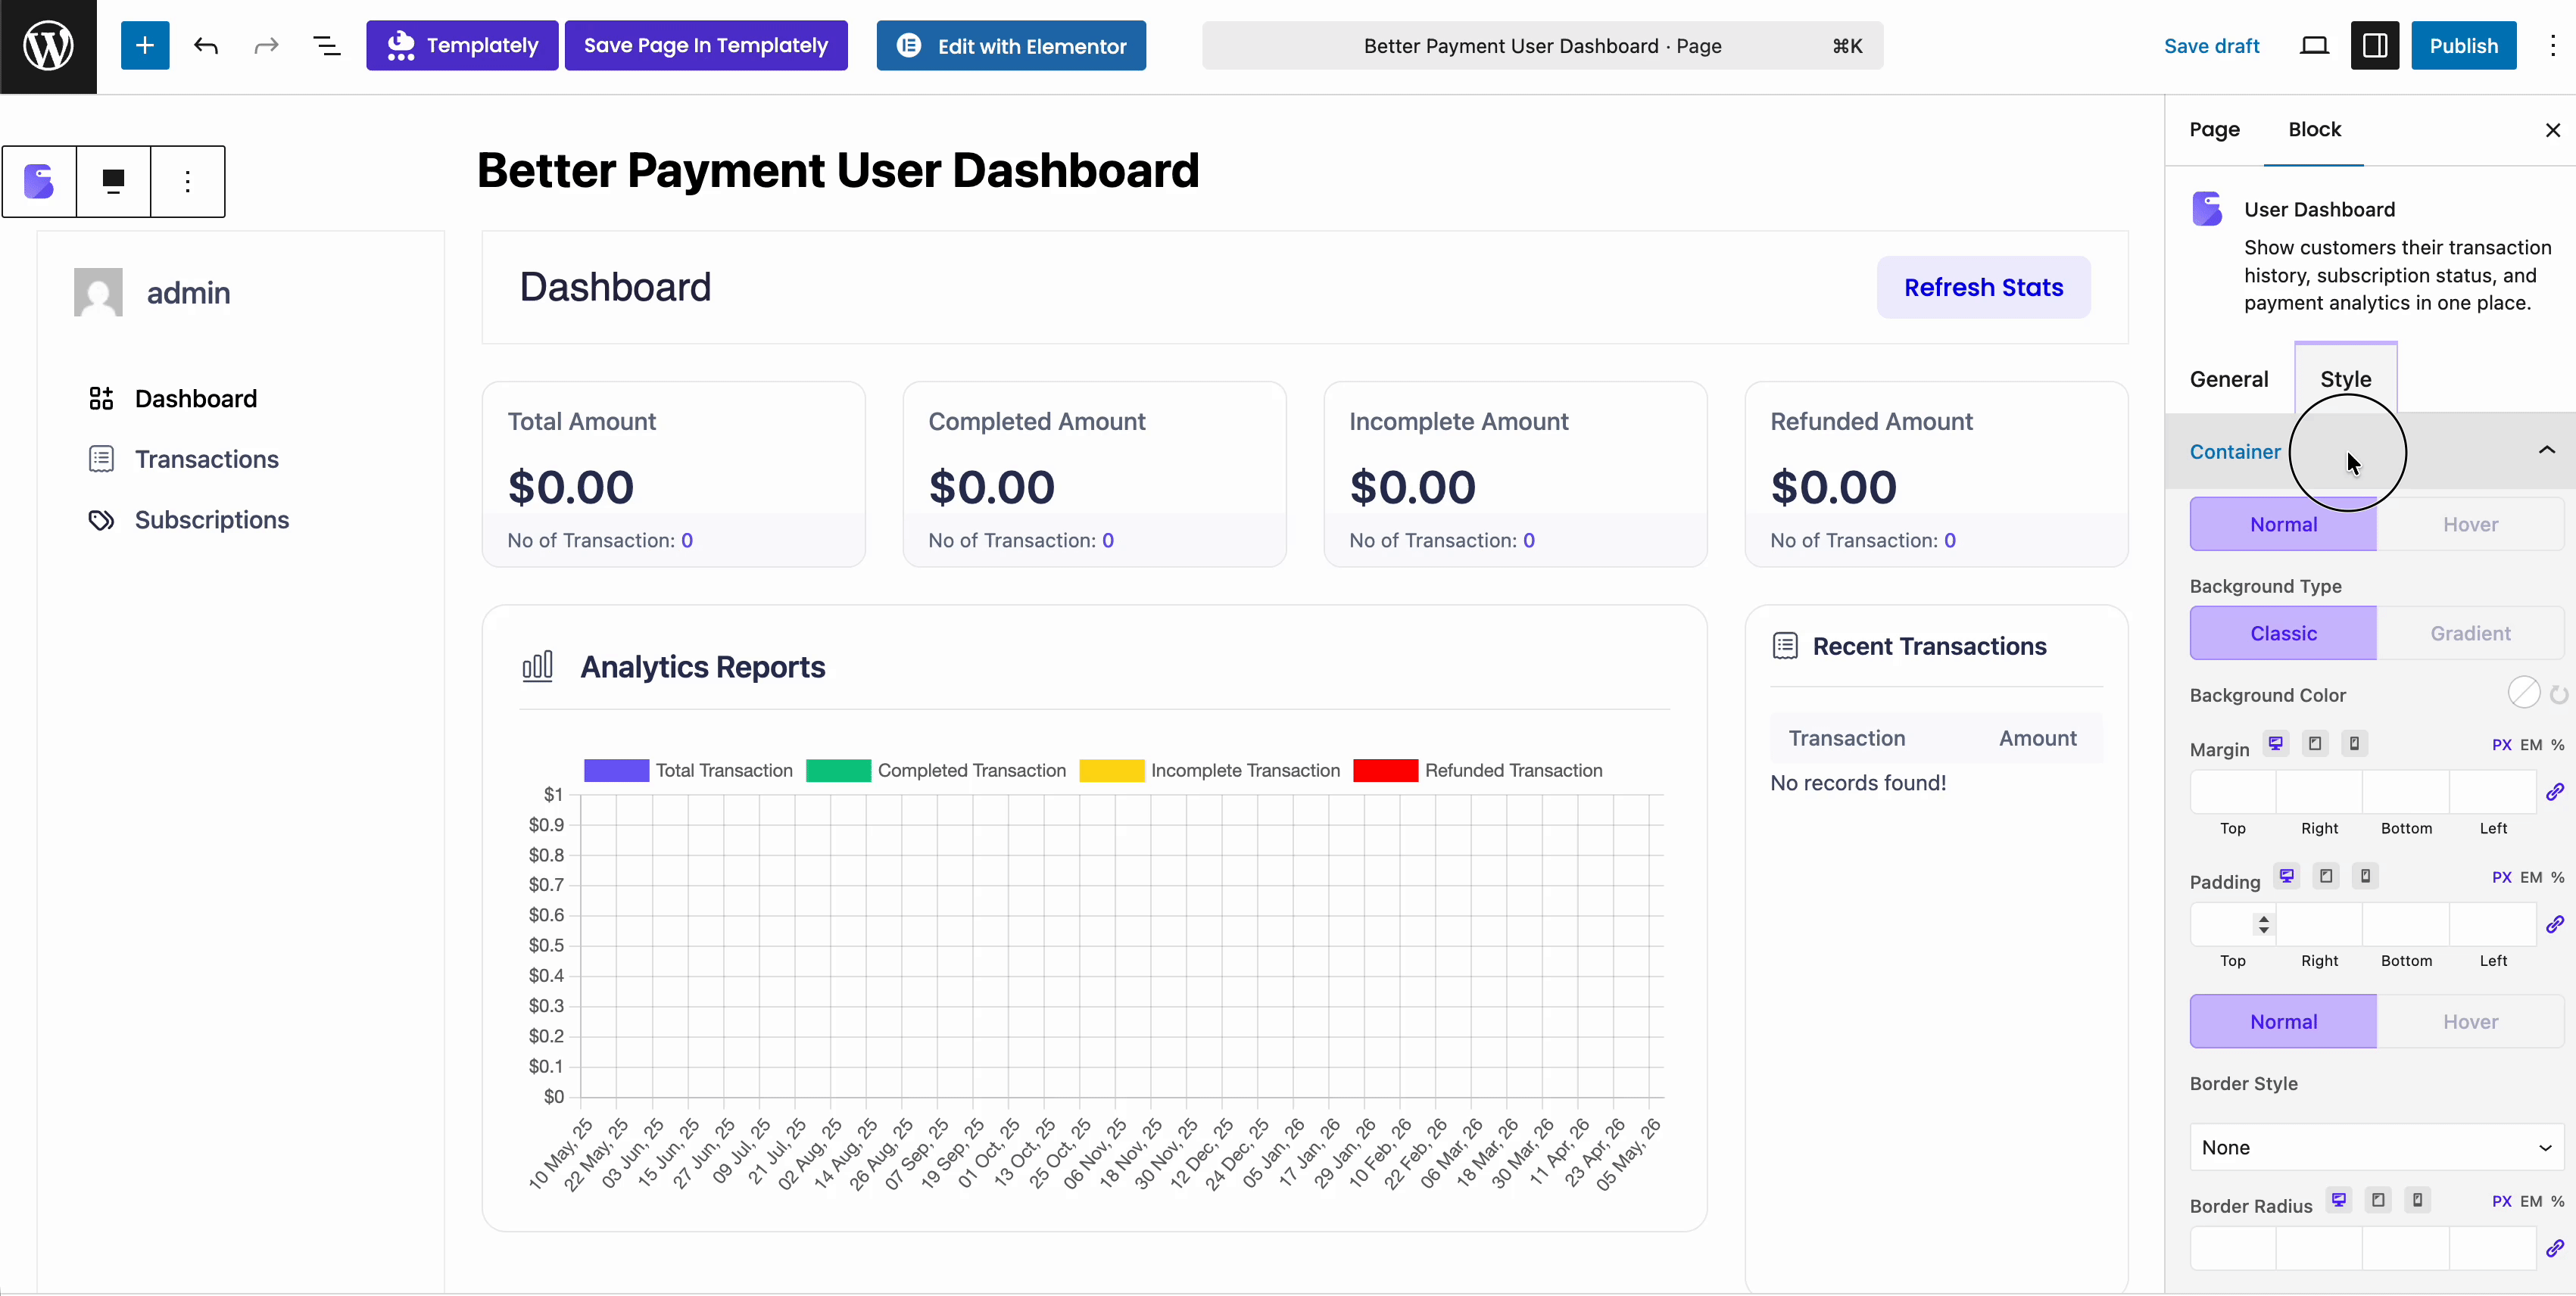
Step 2: Customize the User Dashboard Appearance #
Better Payment offers tons of customization options for the subscriber User Dashboard. Go to the ‘Layout’ tab. From there you can enable and disable these settings: Sidebar, Avatar, User Name, Subscriptions, Subscription ID, Product Name, Status, Amount, Payment Date, Renewal Date, etc.
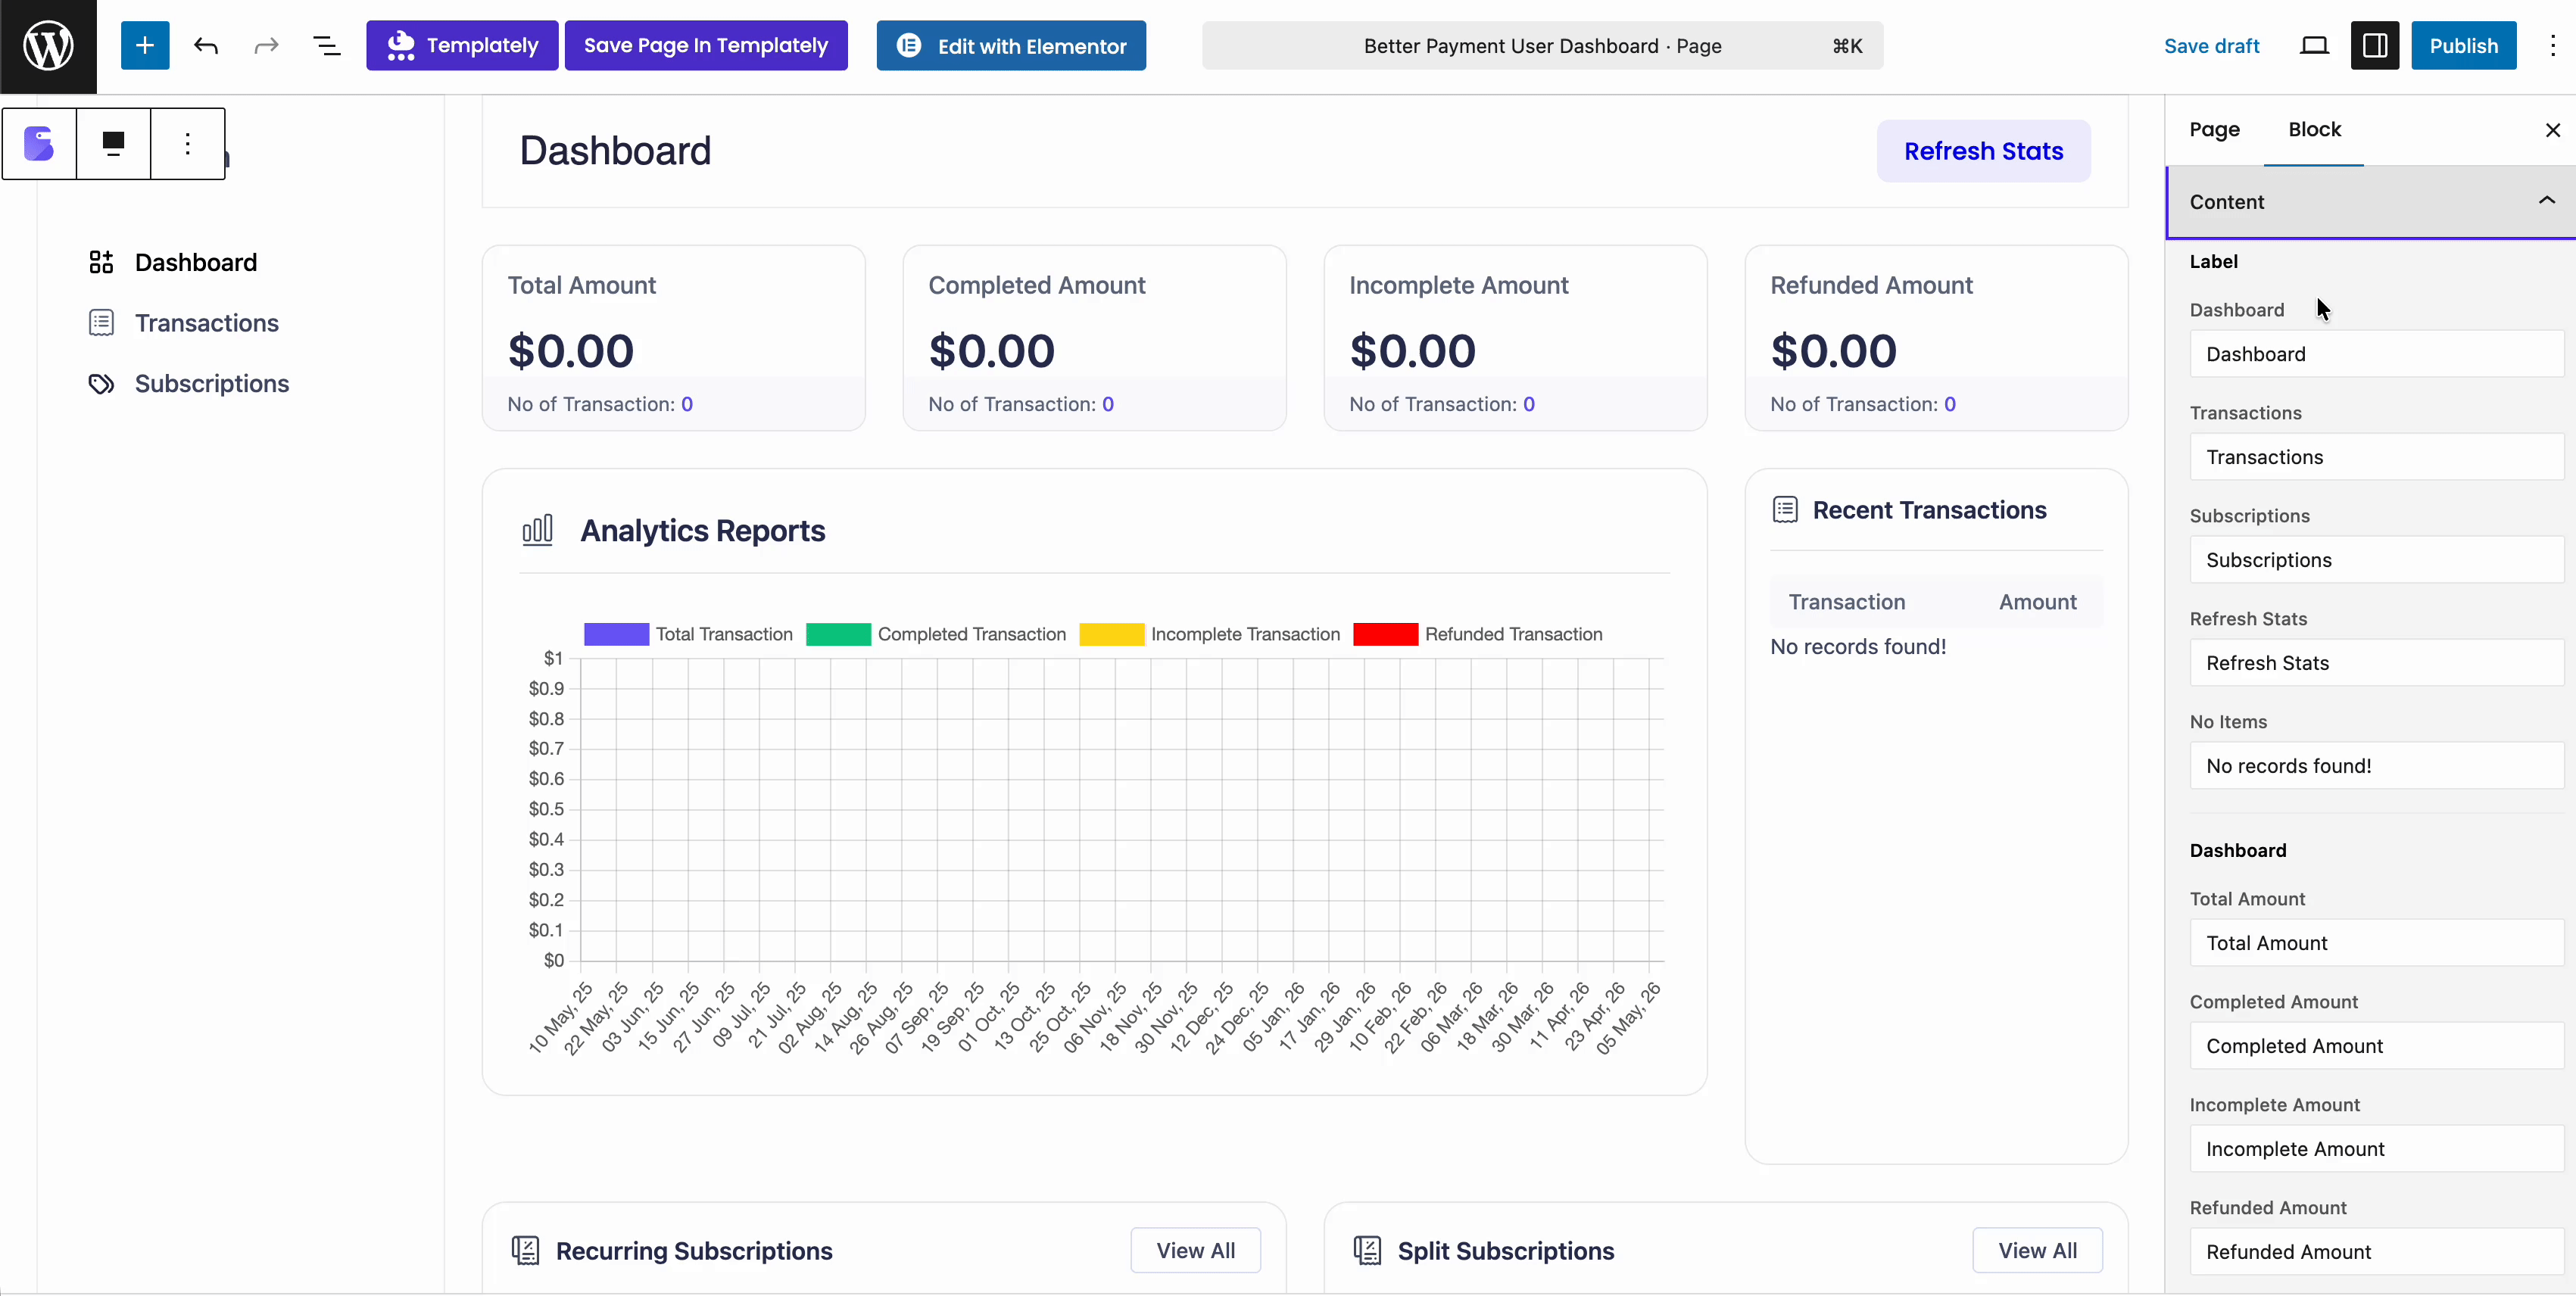
From the ‘Content’ tab, you can update the labels heading, column name, Actions names, etc. You can modify all of these from here.
From the ‘Style’ tab, you can customize the container’s Margin, Padding, Border Radius, Hover Effect, etc of Container, Sidebar, Header & Table. You can make more customizations from the ‘Advanced’ tab, like enabling Z-index, custom CSS, etc.
After making all the changes, you can publish the Subscriber User Dashboard. If any subscriptions are canceled, the status will be previewed as ‘Inactive’ in the front end.
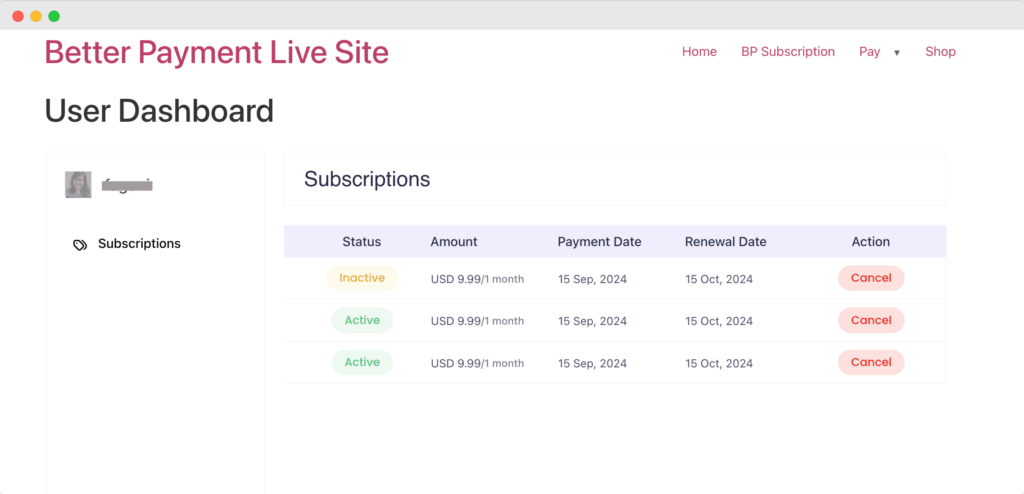
How Customers Can Take Action (Unsubscribe) Directly from User Dashboard? #
From the User Dashboard, customers can easily manage their subscriptions, i.e. cancel subscriptions from the front end. After logging into your website, they can visit the Subscriber User Dashboard to view all subscription logs. To unsubscribe, they simply click the ‘Cancel’ button in the ‘Action’ tab, which deactivates the subscription and changes its status to Inactive.
This is how easily you can configure the Subscriber User dashboard and manage customers’ subscription cancellations seamlessly.
Getting Stuck? Feel free to contact our dedicated support team for any further assistance.