Better Payment makes it easy to create a dedicated WooCommerce product payment form for your products. You can easily collect payments with Better Payment WooCommerce products from any location on your site instantly without relying on the WooCommerce checkout or cart system. Most importantly, you can configure the payment form for both single WooCommerce products and multi-WooCommerce products altogether.
Let us follow this step-by-step guide to configure a Better Payment form for WooCommerce products. Before you start, make sure that you have Elementor and Better Payment installed and activated on your site and set up a product store in WooCommerce.
How to Configure a Better Payment Form for a Single WooCommerce Product #
To create a one-click checkout experience for a specific WooCommerce product using the Better Payment form, follow these steps:
Step 1: Open And Add Better Payment in Elementor Editor #
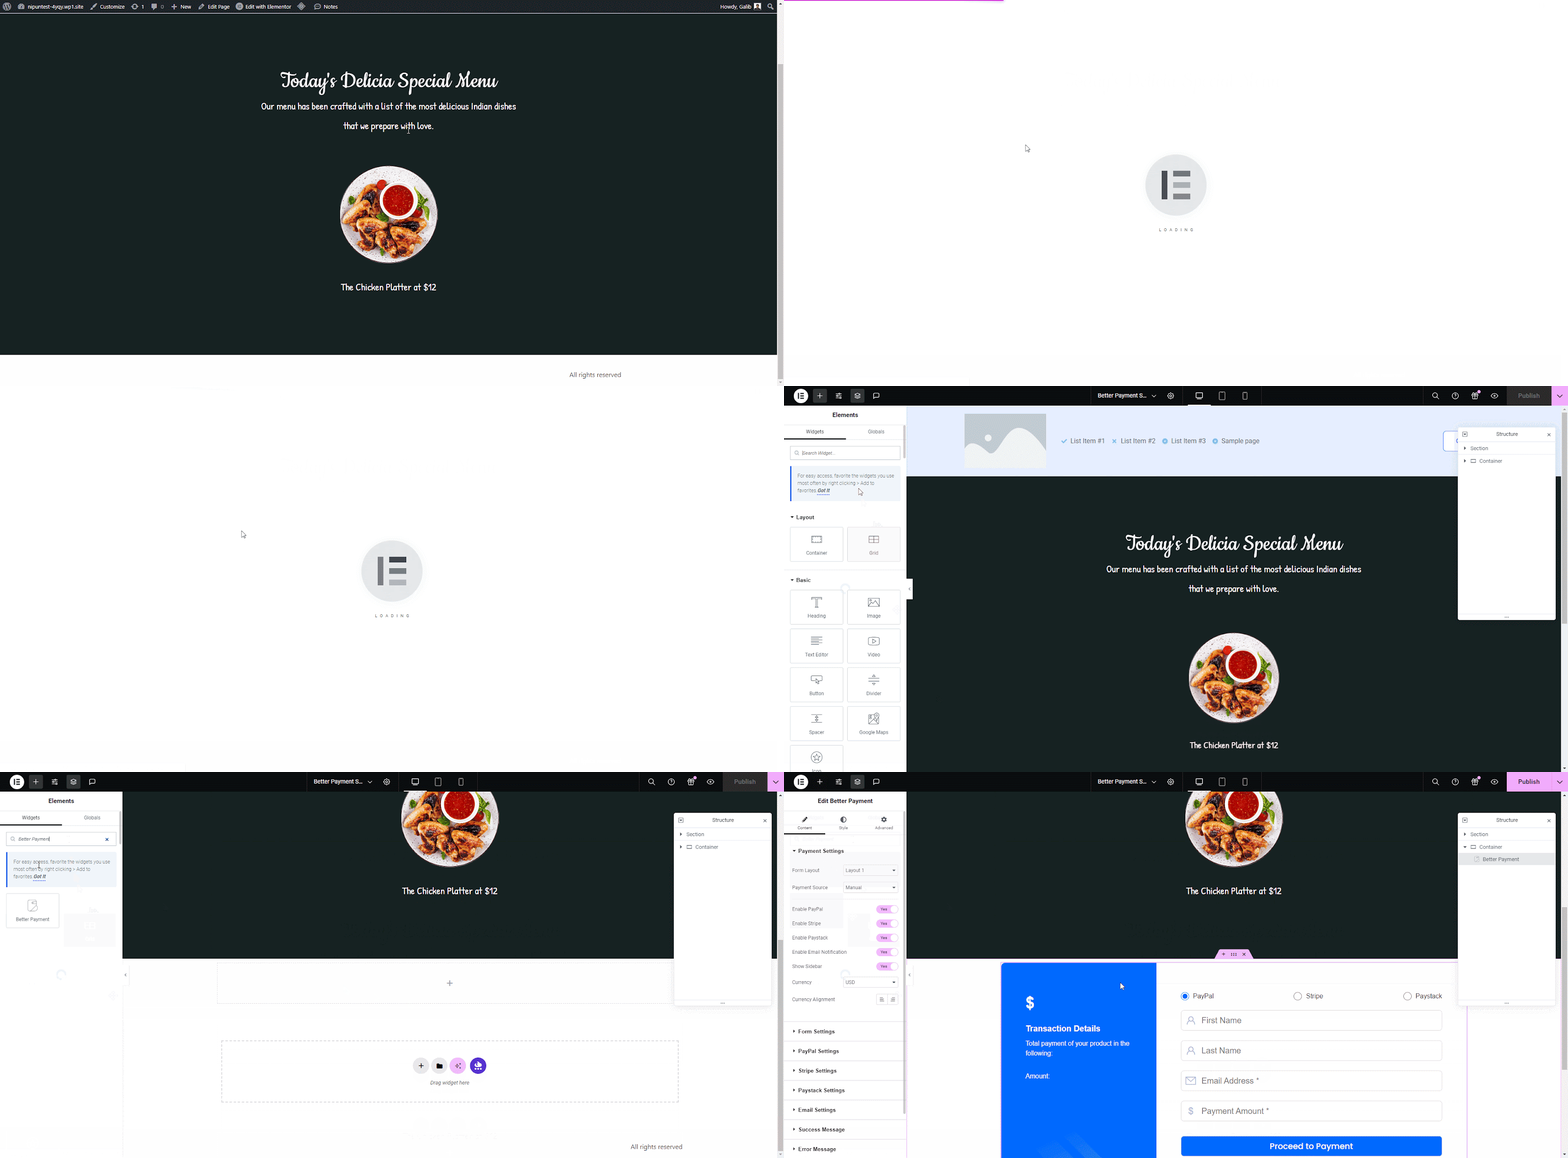
First, open a page where you want to add a payment form to WooCommerce product purchase by clicking on ‘Edit with Elementor’ from the top. Search for the ‘Better Payment’ in the widget panel, then drag and drop it into the page.
Step 2: Configure Your Payment Form Layout #
To configure the Better Payment form into a WooCommerce product payment form, select ‘Payment Source’ as WooCommerce and choose ‘Layout 2’ from the Form Layout option.
After that, choose your product from the ‘Choose a Product’ option. Now your form is turned into a WooCommerce product payment form.
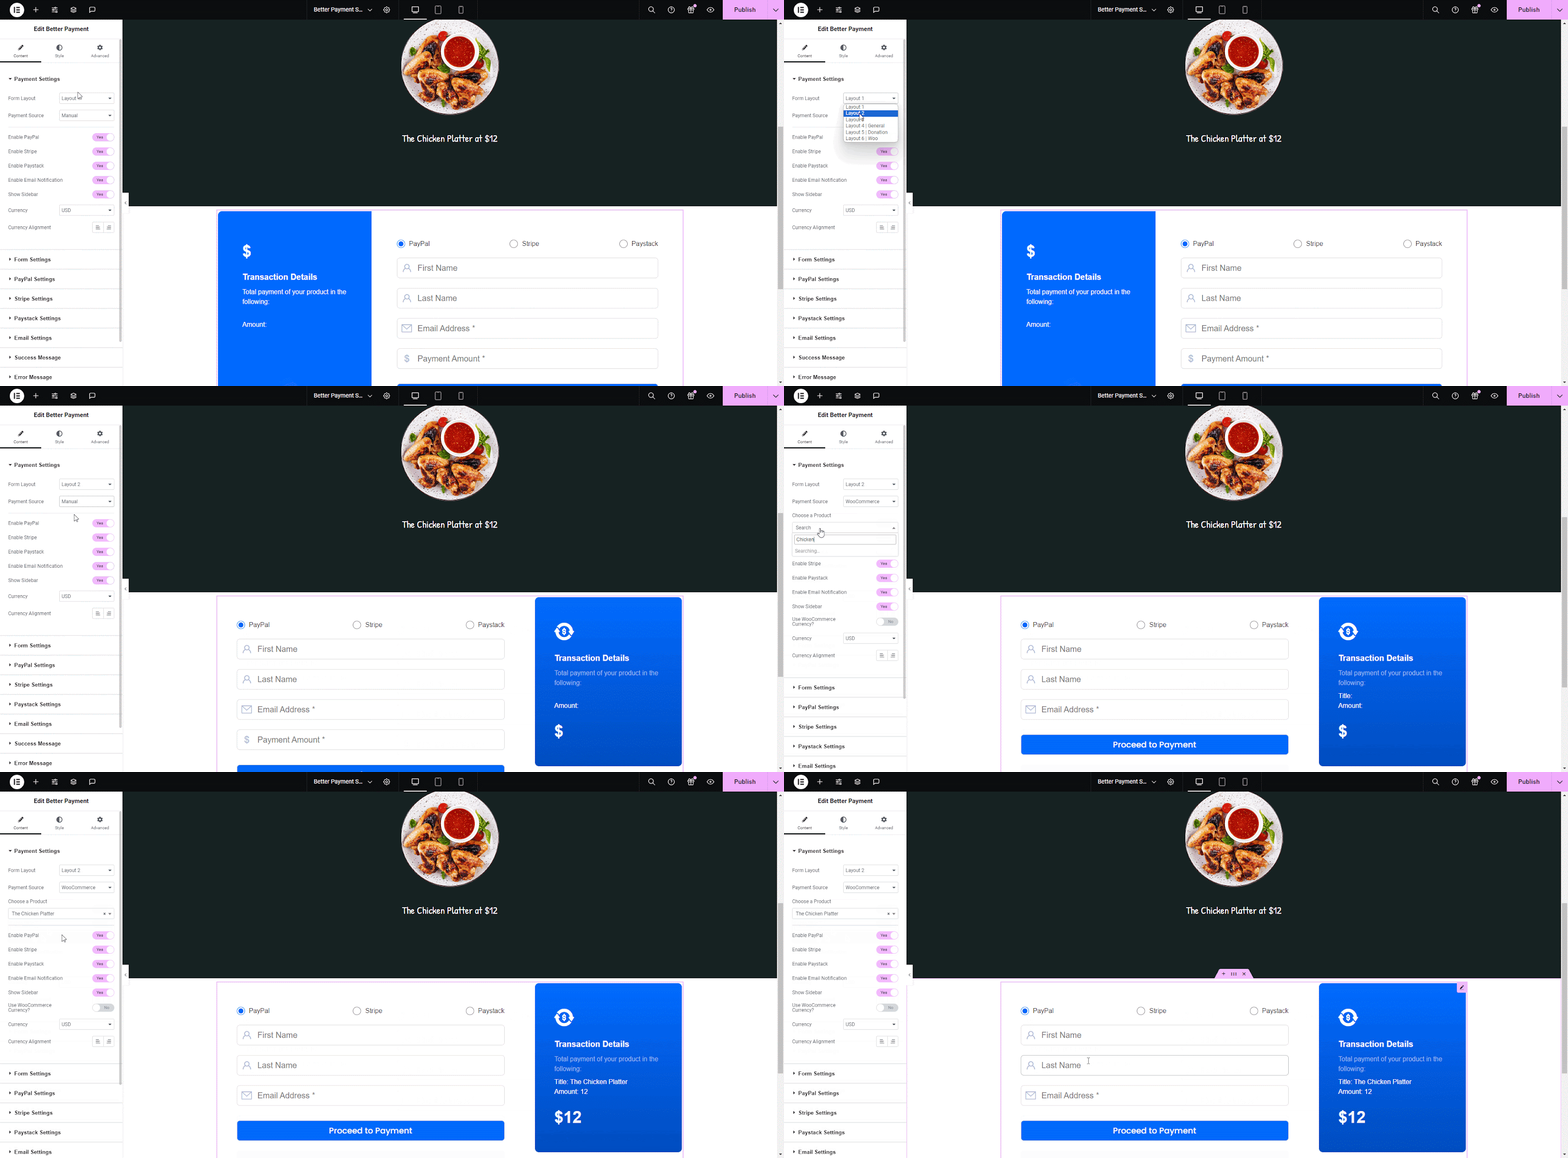
Note: If you have Better Payment PRO you can access a dedicated form layout for WooCommerce products, choose ‘Layout 6| Woo’ from the Form Layout option. After that, choose your product from options.
How to Configure a Better Payment Form for Multiple WooCommerce Product Payment #
To create a one-click checkout experience for multiple WooCommerce products using the Better Payment form, follow the below steps:
Step 1: Open and Add Better Payment in Elementor #
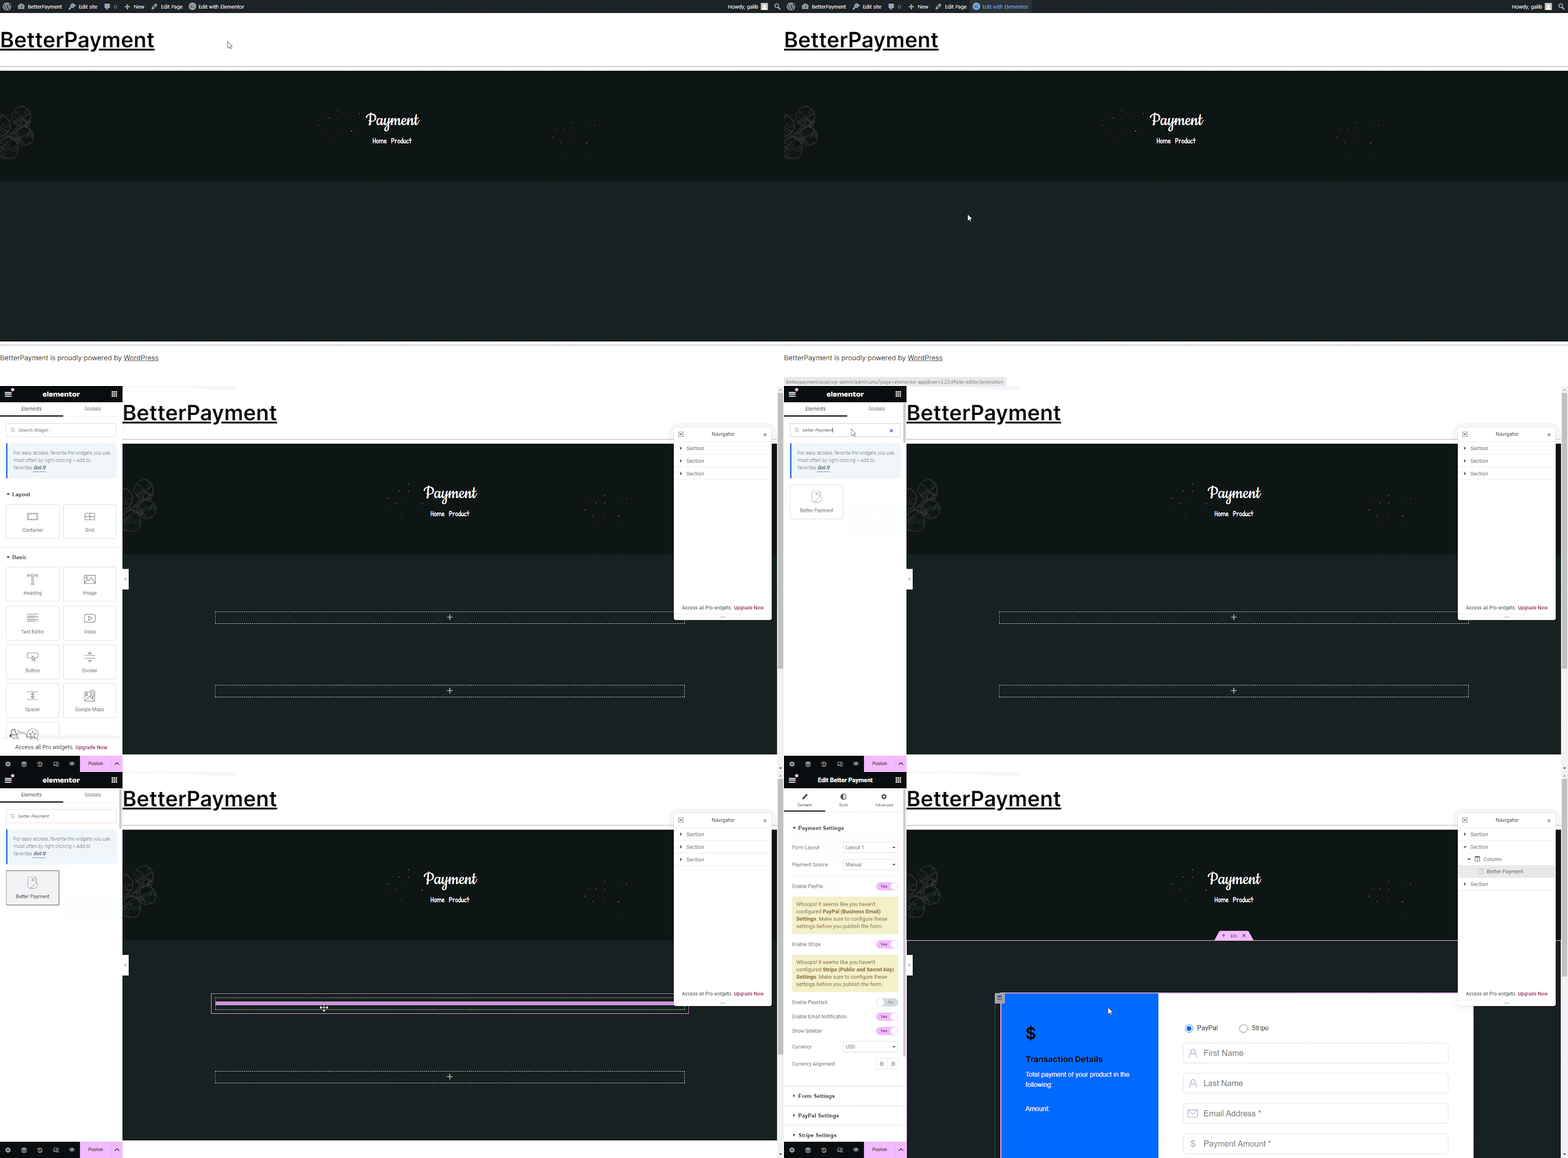
First, open a page where you want to add a payment form to WooCommerce product purchase by clicking on ‘Edit with Elementor’ from the top. Search for the ‘Better Payment’ in the widget panel, then drag and drop it into the page.
Step 2: Configure a Better Payment Form #
In the Better Payment widget settings, select ‘Layout 6’ from the Form Layout options. This layout is designed solely for processing payments for multiple products. Use the ‘Choose a Product’ option to add the WooCommerce products you want to include in the payment form.
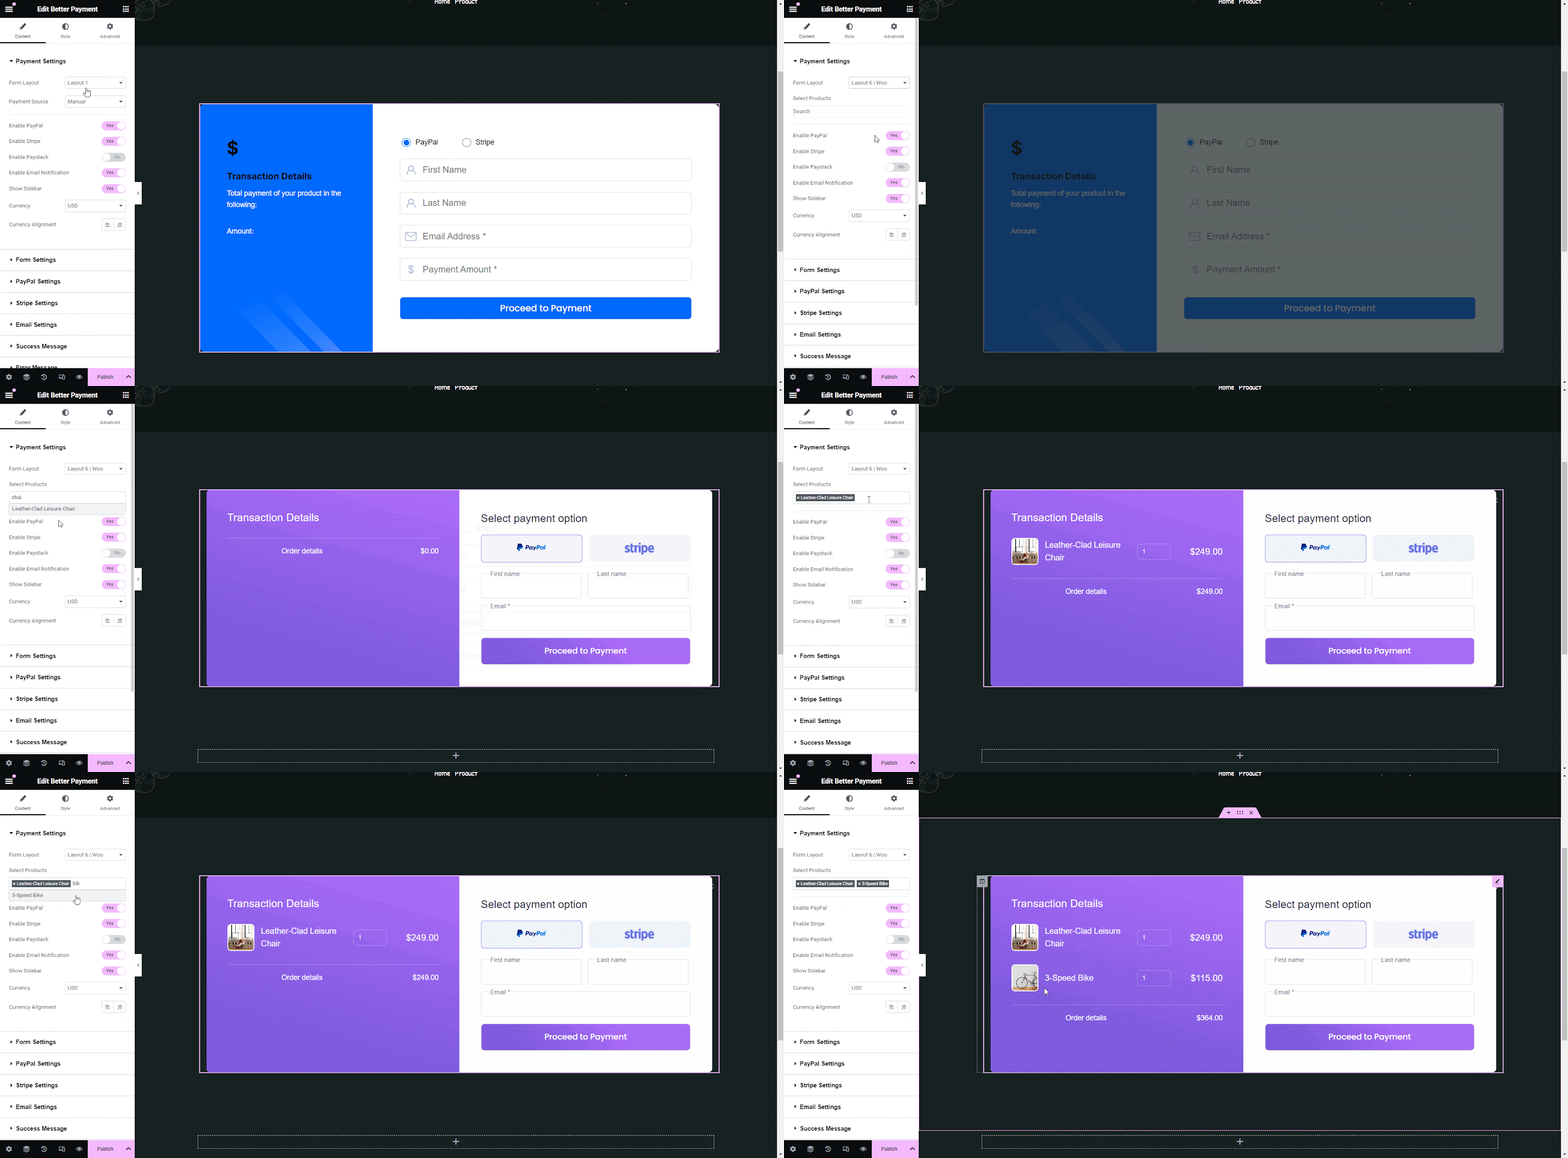
You can see that the product images, name, order count and pricing are displayed in the payment form. Now your form is turned into a multi-WooCommerce product payment form.
Style WooCommerce Product Payment Form #
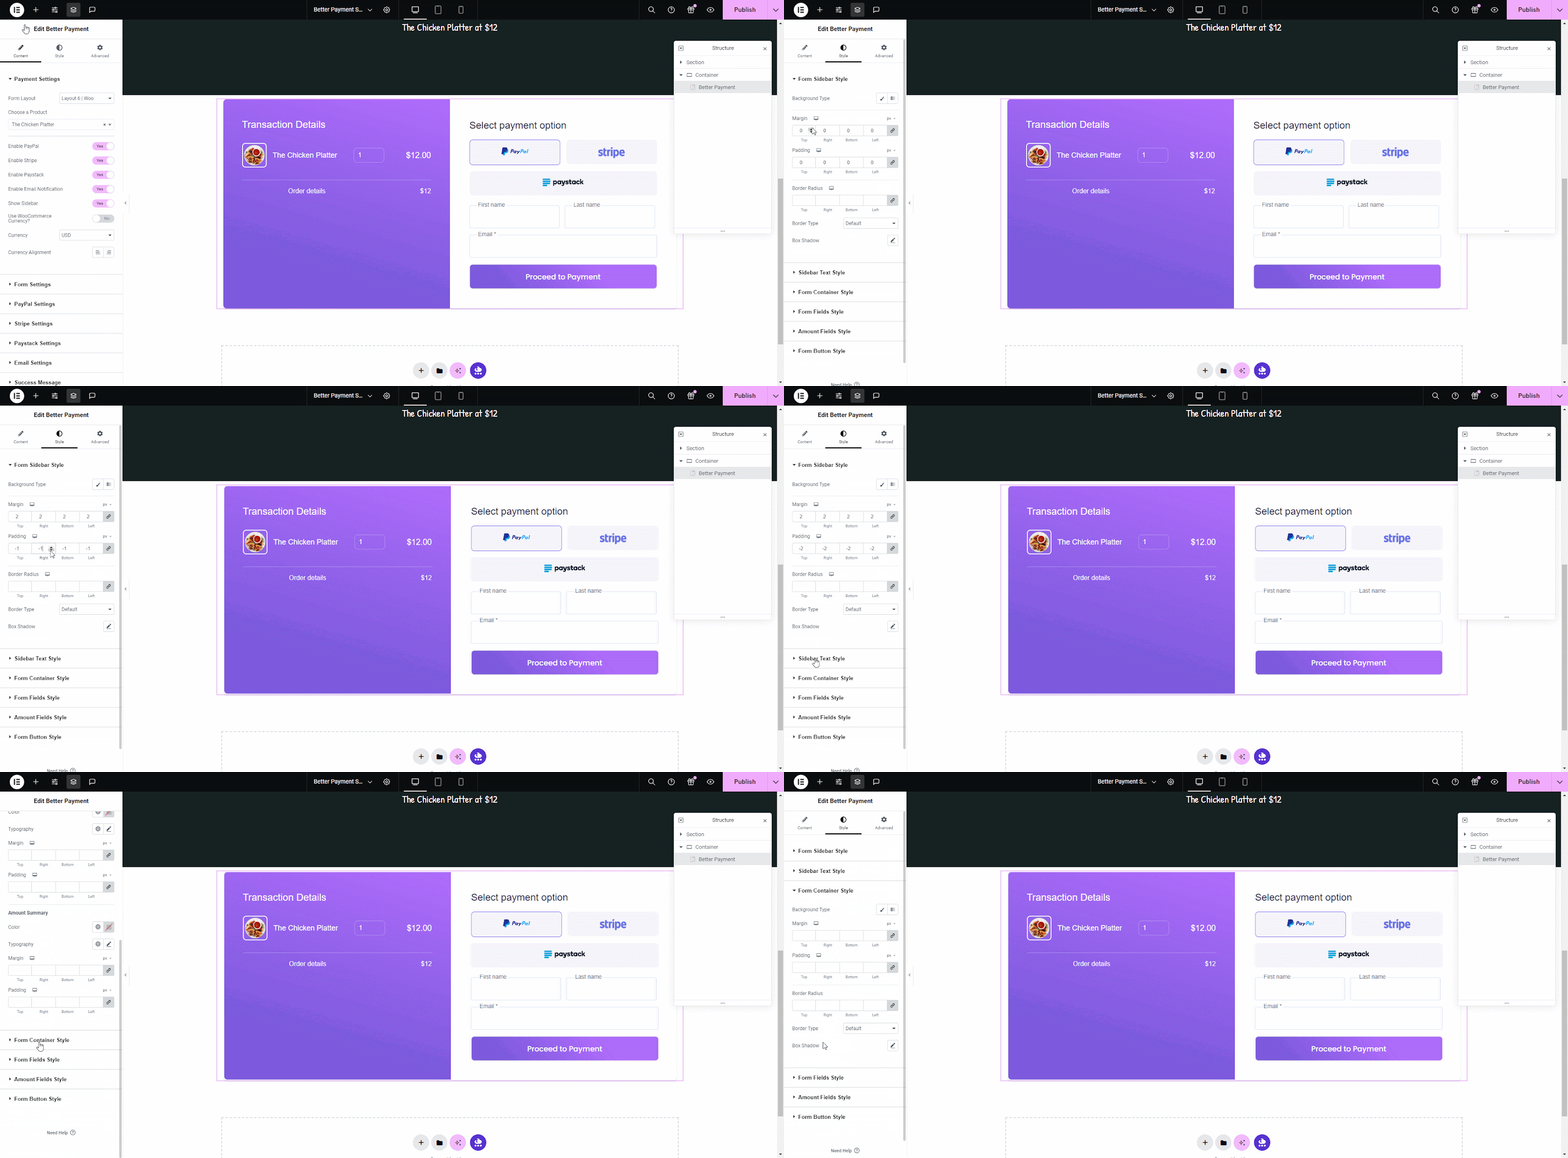
Go to the ‘Style’ tab, there you will find options to customize the form sidebar, text, container style, change payment settings, form container, header, form field and many more according to your design needed to fit the payment form.
Note: To style your Better Payment form in Elementor in-depth, you can follow this documentation.
Final Outcome #
After configuring your Better Payment form for your single or multiple WooCommerce products, you will get a similar result shown below.
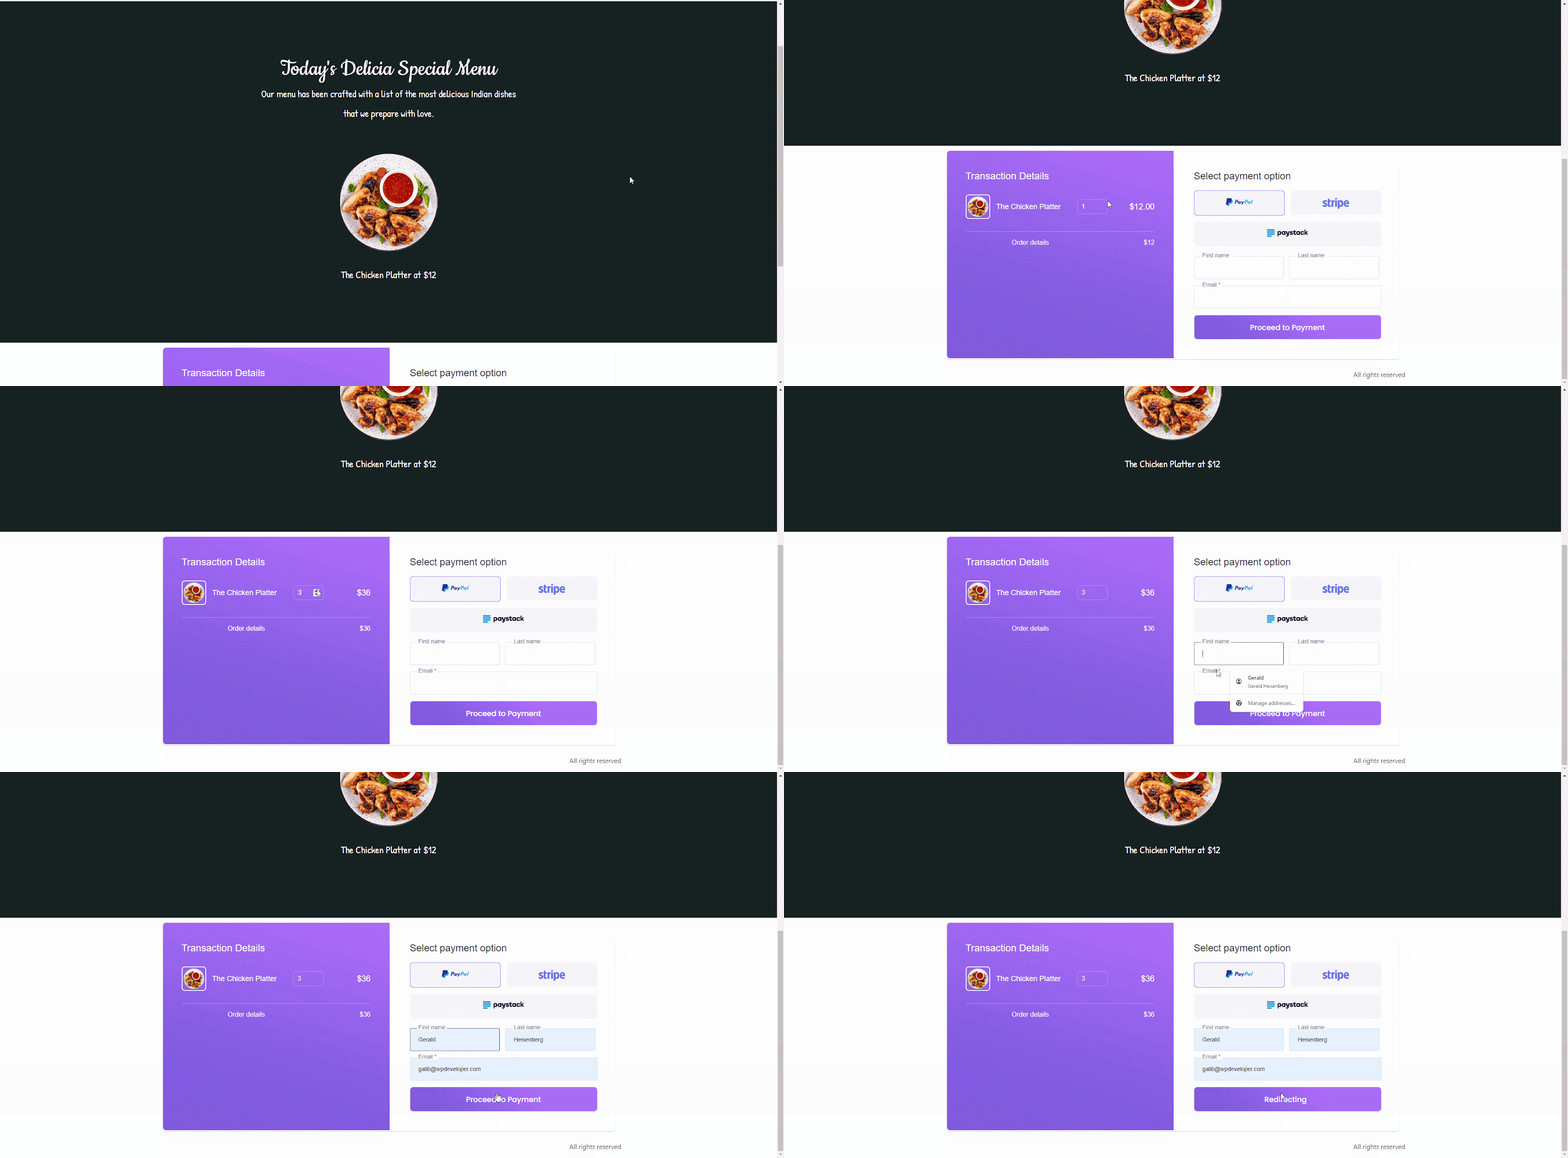
Now you can collect payments for a product right in your WooCommerce product single or multiple product multiple count orders into your Paypal, Stripe or Paystack wallet through Better Payment

By following these steps, you will create a dedicated WooCommerce product Payment form using Better Payment, providing a streamlined checkout process for your customers. If you have more queries regarding Better Payments, contact our Dedicated support team for assistance.


